
Quick Summary: Choosing the right roof rack depends on what you need to carry. For general use, a versatile crossbar system is essential. For specific gear like bikes or kayaks, dedicated mounts are best. Prioritize your vehicle’s style and your cargo for the best, safest choice.
Are you looking to haul more gear with your car, but feel overwhelmed by all the roof rack options? It’s common! Figuring out “which roof rack” is essential for your adventures can seem tricky. You might just want to toss some luggage up there for a road trip, or maybe you’re dreaming of kayaking or biking adventures. Don’t worry, we’re here to break it down simply. We’ll guide you through the choices so you can confidently pick the best roof rack for your needs, making your car even more useful.
Understanding Your Roof Rack Needs
Before diving into specific types, let’s think about what you want to achieve. Your car’s roof is a fantastic extension for carrying capacity, but only if you have the right setup. The “best” roof rack isn’t a one-size-fits-all answer. It truly depends on a few key things about you and your car.
What Will You Carry?
This is the biggest question. What kind of items will you be strapping down?
- Sporting Equipment: Bikes, kayaks, skis, surfboards all have unique shapes and require specialized racks for safety and stability.
- Luggage and Cargo Boxes: If you need extra space for road trips or moving things, a cargo box or simply tying down luggage is common.
- General Gear: Camping equipment, lumber, or anything bulky that doesn’t fit inside your car.
Your Vehicle’s Roof Type
Not all car roofs are created equal. The way a roof rack attaches is crucial for security and compatibility.
- Bare Roof: This is a roof with no pre-installed rails or tracks. Racks for bare roofs often use door frame clamps.
- Raised Side Rails: These are the rails that run from front to back along the edges of your roof, with a gap between the rail and the roof.
- Flush Side Rails: Similar to raised rails, but they sit directly on the roof with no gap.
- Fixed Points: Small, discrete mounting points, often hidden under a cover, designed for specific rack feet.
- Factory-Installed Crossbars: Some cars come with a basic set of crossbars already installed. You might be able to upgrade these or add accessories to them.
Your Budget
Roof rack systems can range from a few hundred dollars to over a thousand, depending on the brand, type, and accessories. Decide what you’re comfortable spending. Remember, sometimes paying a bit more for a reputable brand means better durability and safety.
Essential Roof Rack Components Explained
Most roof rack systems are made up of a few core parts. Understanding these will help you choose the right combination.
1. The Foundation: Crossbars
These are the bars that span across the width of your car’s roof. They are the primary support for whatever you decide to mount on top. Crossbars come in a few common materials and shapes:
- Steel: Usually heavier and more durable. They are often square or rectangular and can be more affordable.
- Aluminum: Lighter than steel and less prone to rust. They are often shaped to be more aerodynamic, reducing wind noise.
- Aerodynamic (Wingbar) Styles: These are designed to be very quiet by shaping like an airplane wing to let air flow over them smoothly.
Crossbars are often sold in pairs. The length you need will depend on your vehicle’s width and if you plan to attach accessories that overhang.
2. The Attachment System: Feet or Towers
These are the pieces that connect the crossbars to your vehicle’s roof. This is where roof type becomes very important.
- Fit Kits/Clips: For bare roofs, these often use custom clips that hook into the door frame and rubber pads to protect your car’s paint. These are specific to your car model and year.
- Clamping Feet: For raised side rails, these feet wrap around the rail and tighten securely.
- Direct mount Feet: For flush rails or fixed points, these feet bolt directly into the vehicle’s designated mounting points.
It’s critical to get the correct feet or fit kit for your specific vehicle. Using the wrong one can be unsafe. Many manufacturers, like Thule and Yakima, have online “fit guides” where you can enter your car’s details to find the compatible parts. The Rhino-Rack Vehicle Fit Guide is a good example of how these systems work and help you find the right parts for your car.
3. Accessories and Mounts
Once you have the crossbars and feet in place, you can add specialized mounts for your gear.
- Cargo Boxes: These enclosed containers offer protection from the elements and a secure place for luggage.
- Bike Racks: Options include fork-mount (which requires removing the bike’s front wheel) or frame-mount (which clamps onto the bike’s frame).
- Kayak/Canoe Carriers: These often cradle your boat and provide tie-down points.
- Ski/Snowboard Racks: These clamp onto skis or snowboards to hold them securely.
- Roof Baskets: Open-air racks that are great for bulkier, less weather-sensitive items when combined with cargo nets or straps.
Types of Roof Racks and Their Best Uses
Now let’s look at the most common types of roof rack systems and who they are best for.
1. The Universal Crossbar System (The Most Essential!)
This is the backbone of almost all roof rack setups. It consists of crossbars mounted on feet specific to your vehicle. This system is essential because it’s the most versatile. You can attach almost any accessory to these crossbars.
Why it’s essential: If you plan to carry a variety of items over time, or if you’re unsure exactly what you’ll need, this is your most flexible starting point. You buy the crossbars and feet once, and then you can swap out accessories as your needs change.
Best for:
- People who need flexibility.
- Those who carry different types of gear at different times (e.g., bikes one weekend, luggage the next).
- Users who want to add a cargo box, ski rack, or other accessories in the future.
Pros:
- High versatility.
- Can be upgraded with many different accessories.
- Reputable brands offer robust and safe systems.
Cons:
- Requires careful selection of feet and fit kits.
- Can be more expensive upfront than some non-system racks.
- Can add some wind noise, though aerodynamic options reduce this.
2. Dedicated Sport-Specific Racks
These are accessories designed to hold one particular type of gear. They almost always mount to a universal crossbar system.
Examples:
- Bike Racks: Fork mount, frame mount, or upright wheel mount.
- Kayak/Canoe Racks: J-cradles, saddle-style cradles, or roller systems.
- Ski/Snowboard Racks: Lockable clamps that hold multiple pairs.
Why they are essential (for specific users): If you only plan to carry one type of gear, a dedicated mount can be more secure and easier to load than trying to jury-rig something onto basic crossbars.
Best for:
- Athletes and outdoor enthusiasts who regularly transport specific equipment.
- Individuals who prioritize ease of loading and unloading for their particular sport.
Pros:
- Maximized security and stability for specific gear.
- Often easier to load and unload compared to general-purpose solutions.
- Protects your gear (e.g., prevents bike frame scratches).
Cons:
- Not versatile; only holds one type of item.
- Requires a base crossbar system to be installed first.
- Can be an additional expense on top of the crossbars.
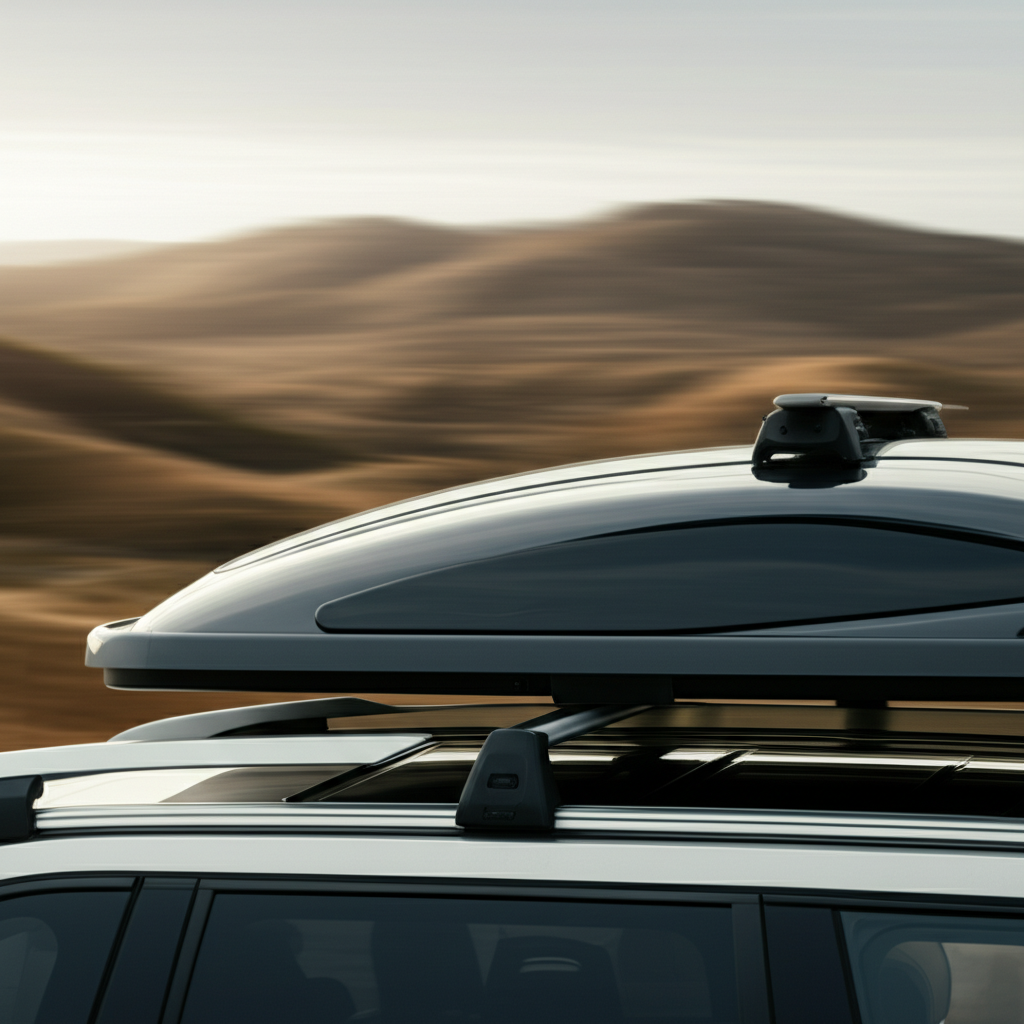
3. Cargo Boxes (Topsacks/Pods)
These are enclosed, usually plastic, storage containers that mount securely to your crossbars. They are incredibly popular for road trips and family travel.
Why they are essential (for travelers): If you frequently take road trips, have a family, or pack a lot of smaller items, a cargo box is invaluable. It keeps your gear safe, dry, and out of sight, freeing up interior space.
Best for:
- Families on vacation.
- Anyone needing extra secure, weather-protected storage.
- Car owners with limited interior cargo space.
Pros:
- Excellent weather protection.
- Locks securely, adding an anti-theft layer.
- Increases cargo capacity significantly.
- Reduces the need for interior clutter.
Cons:
- Can be expensive.
- Adds weight to your vehicle.
- Can impact fuel efficiency.
- May require a specific type or length of crossbar for optimal fit.
- Can be bulky and hard to store when not in use.
4. Roof Baskets
These are open-frame racks, often made of steel or aluminum, that create a platform on your roof. They offer a lot of flexibility for irregularly shaped or bulky items.
Why they are essential (for campers/adventurers): For campers who need to bring tents, sleeping bags, coolers, firewood, and more, a roof basket is a fantastic solution. You can strap down almost anything, and it keeps wet or dirty gear off your car seats.
Best for:
- Campers and overlanders.
- Transporting bulky, potentially messy gear.
- Users who can secure items with straps or cargo nets.
Pros:
- Great for awkward or large items.
- More affordable than many cargo boxes.
- Easy to load and unload from multiple sides.
Cons:
- Gear is exposed to the elements.
- Requires proper strapping to prevent items from shifting.
- Can generate more wind noise than other options.
- Not ideal for small, loose items unless contained within bags.
Choosing the Right System for Your Vehicle
The physical compatibility between the roof rack and your car is paramount. Safety and security depend on it. Let’s look at how to determine the best fit. Many reputable manufacturers provide excellent online tools to help you find the exact parts you need. For example, Thule’s Fit Guide allows you to select your car make, model, and year to see all compatible rack systems and accessories.
Step-by-Step Guide to Finding Your Match
To make this easy, follow these steps:
- Identify Your Vehicle’s Roof Type: Open your car doors. Look closely at the roof. Are there rails with a gap underneath (raised rails)? Rails that sit flush to the roof (flush rails)? Or a completely bare roof? Maybe you see small, covered mounting points.
- List Your Primary Cargo: What will you carry most often? Bikes? Skis? Camping gear? Luggage?
- Use Online Fit Guides: Go to the websites of major roof rack manufacturers (like Thule, Yakima, Rhino-Rack, or Inno).
- Select Your Vehicle: Use their “Fit Guide” or “Car Finder” tool. Enter your car’s year, make, and model.
- Explore Compatible Systems: The tool will show you the base rack systems (feet and crossbars) that fit your vehicle. It will also suggest compatible accessories.
- Consider Your Cargo Accessories: Based on your list from step 2, see which accessories are recommended for the base system you’ve found.
- Compare Brands and Prices: Once you have a few options, compare features, warranties, and prices. Read reviews!
Factors Affecting Rack Choice by Vehicle Type
Some vehicle types lend themselves better to certain rack types.
| Vehicle Type | Common Roof Type | Recommended Essential Rack Type | Notes |
|---|---|---|---|
| Sedan/Coupe | Bare Roof | Universal Crossbar System (with door frame clips) | Limited weight capacity; focus on lighter gear or cargo boxes. |
| SUV/Crossover | Raised or Flush Side Rails | Universal Crossbar System (with specific rail feet) | Very versatile; can handle most accessories, from biking to cargo boxes. |
| Wagon | Raised or Flush Side Rails, Fixed Points | Universal Crossbar System | Similar to SUVs, good capacity. |
| Truck | Bare Roof (for some models around cab) or Truck Bed Racks | Universal Crossbar System (if applicable) or Bed Racks | Truck bed racks are often more stable for large items like kayaks or rooftop tents. Vehicle-specific racks for cabins are less common. |
| Minivan | Raised or Flush Side Rails | Universal Crossbar System | Often have reinforced roofs; excellent for large cargo boxes and multiple carriers. |
Key Features to Look For
When you’re comparing specific roof rack models, keep these features in mind to ensure you’re getting a quality product.
Security and Locking Mechanisms
This is incredibly important! Your gear is valuable, and you want it to stay put. Look for racks that:
- Include integrated locks for the feet that attach to your car.
- Have locking mechanisms for the accessories you choose (e.g., bike or ski racks).
- Provide sturdy and secure clamping systems.
A stolen bike or a piece of gear that falls off your roof is a disaster you want to avoid. The National Highway Traffic Safety Administration (NHTSA) emphasizes the importance of secure cargo for road safety.
Weight Capacity
Every roof rack system and your vehicle’s roof have a maximum weight limit. This includes the weight of the rack itself, plus your gear. Always check both the rack manufacturer’s specifications and your car’s owner manual. Overloading can damage your car, the rack, and is a major safety hazard.
Ease of Installation and Removal
Some racks are designed for permanent installation, while others are meant to be taken off when not in use.
- Tool-Free Systems: Many modern racks are designed for quick, tool-free installation and removal, which is convenient if you only need the rack occasionally.
- Permanent Systems: These are more common for fixed points and might require more effort initially but offer a very secure, integrated look.
Consider how often you’ll be installing or removing the rack. If it’s frequently, a user-friendly design is a big plus.
Aerodynamics and Noise Reduction
Roof racks and accessories change how air flows over your car; that turbulence is the source of most wind noise and much of the fuel-economy penalty. The shape, orientation, and placement of crossbars and mounts matter more than you might think:
Aero (wing) crossbars — shaped like an airplane wing — let air glide over them and usually produce far less whistling than round or square bars.
Fairings / wind deflectors — small spoilers mounted at the front of the bars (or a full-length fairing) break up the turbulent air and are especially effective when you’re running a box or basket.
Accessories and orientation — tall or upright accessories (some bike mounts, baskets) increase frontal area and turbulence. Even a wingbar turned the wrong way or missing endcaps can create a loud howl.
Practical, easy-to-apply tips to cut noise and drag
Choose low-profile, aerodynamic bars whenever possible — they’re quieter and generally more fuel-efficient.
Install them the right way: most wingbars have a marked front — make sure it faces forward; fit endcaps and seals.
Add a wind fairing if you hear whistling with a box or basket — front-mounted fairings give the most bang for your buck.
Streamline the load: point tapered ends forward (kayaks, surfboards), lie bikes flat if your rack allows it, and avoid overhangs that present extra frontal area.
Secure and tidy straps — loose or flapping straps cause high-pitched noise; tuck or trim excess webbing.
Follow recommended crossbar spacing — manufacturer spacing is designed to minimize vibration and noise for common accessories.
Keep hardware tight and pads in good condition — looseness or worn rubber creates buzz and rattles.
Remove the rack when unused — the simplest way to eliminate noise and drag is not to carry the rack at all when you don’t need it.
What to expect on fuel economy and comfort
Any rack changes airflow, so at highway speeds you’ll feel some fuel-economy impact — how much depends on the rack shape, the accessory, and your speed. Low-profile wingbars plus a fairing minimize that penalty; bulky baskets or tall boxes create the largest drag.
Simple on-road test to tune things
Take a short drive on a quiet stretch: test at a low highway speed and then at a higher speed to hear when noise appears. Try small adjustments (rotate a bar to the correct orientation, move a fairing a few centimeters, secure a loose strap) — often a tiny change eliminates the whistle.
In short: for the quietest, most efficient setup pick aerodynamic bars, add a fairing when you use bulky gear, keep everything tight and tidy, and remove the system when it’s not needed.
Recent Posts
Jumper Cables With Bag: Heavy Duty Booster Cables for Easy Storage
There’s nothing more frustrating than turning the key in your car and hearing silence. A dead battery can ruin your day in an instant.You might feel stuck, stressed, and unsure what to do next....
Strong Ram 1500 Heavy Duty License Plate Frame for Ultimate Durability
There’s nothing more frustrating than struggling with a flimsy license plate frame that bends, rusts, or just doesn’t fit right on your Ram 1500. You want something strong and reliable that...