

Your car making a strange noise? Address it early to save big! This guide shows you how to tackle common car problems yourself, turning potential repair bills into DIY savings and boosting your confidence behind the wheel.
Ever notice an odd sound coming from your car? Maybe a PING, a GRIND, or a SQUEAL? These little noises are your car’s way of talking to you. Ignoring them is like ignoring a friend who needs help. It might seem okay for a while, but eventually, that small issue can turn into a much bigger, more expensive problem. Don’t let a minor concern turn into a major headache and a huge bill. This guide is here to help you understand and fix common car issues yourself, saving you money and giving you peace of mind. We’ll walk through it together, step by step, making it easy and affordable.
Understanding “This Common Car Issue”
While the article title, “This Common Car Issue Could Cost You Thousands,” is a bit dramatic, it highlights a very real truth in car maintenance. The “common car issue” we’re focusing on often boils down to something simple but frequently overlooked: neglecting routine maintenance and ignoring early warning signs. When drivers delay simple checks or ignore minor symptoms, they allow small problems to fester and grow. This snowball effect can lead to significantly higher repair costs down the line and even premature wear on essential components. Think of it like tooth decay; a simple filling is far cheaper than a root canal and crown.
This often manifests as:
- Strange noises (knocking, squealing, grinding)
- Vibrations or unusual feelings while driving
- Changes in performance (loss of power, rough shifting)
- Illuminated dashboard warning lights
- Fluid leaks under the car
By understanding what these signs mean and taking proactive steps, you can dramatically reduce your repair costs and extend the life of your vehicle.
Why DIY Saves You Money: The Mechanics Behind It
Visiting a mechanic is necessary for many repairs, but many common issues can be tackled by the average car owner with a little guidance. The savings are substantial. A typical mechanic’s labor rate can range from $100 to $200 per hour. If a repair takes a mechanic an hour, you could be looking at a bill of $200 or more, just for their time. Add parts and shop fees, and the cost escalates quickly.
DIYing, on the other hand, involves the cost of parts (often available at much lower prices online or at auto parts stores) and the investment of your time. Even if you need to buy a few basic tools, the initial cost is usually recouped on the very first DIY repair.
Consider a simple oil change. A dealership might charge $75-$150. Doing it yourself costs about $30-$50 for the oil and filter, and you’re out maybe 30 minutes. That’s a direct saving of $45-$100 per service. Multiply that by a few services a year, and the savings become significant.
The True Cost of Neglect: A Look at Common Problems
Ignoring seemingly small issues can spiral into expensive repairs. Here’s a look at how:
| Minor Symptom | Potential Cause | DIY Fix (Often Simple) | Mechanic Repair Cost (Estimate) | Cost of Neglect (Escalated) |
|---|---|---|---|---|
| Squealing brakes | Worn brake pads | Replace brake pads ($50-$100 for parts) | Replace pads and rotors ($300-$800+) | Damaged rotors, calipers, emergency brake system ($1,000-$3,000+) |
| Car pulls to one side | Tire pressure imbalance, alignment issue | Check tire pressure; basic alignment ($80-$150) | Wheel alignment ($100-$250) | Uneven tire wear, suspension damage, steering component issues ($500-$1,500+) |
| Overheating engine | Low coolant, faulty thermostat, bad water pump | Top up coolant ($10-$20); replace thermostat ($40-$80 for parts) | Replace thermostat, flush cooling system ($250-$500) | Blown head gasket, warped cylinder head, seized engine ($2,000-$6,000+) |
| Check Engine Light On (P0420) | Catalytic converter issue | Replace O2 sensors ($50-$150 each); Spark plugs ($3-$10 each) | Diagnose and replace catalytic converter ($500-$1,200+) | Engine damage due to poor combustion, emissions system failure ($1,500-$3,000+) |
Note: These are general estimates and can vary significantly based on vehicle make, model, year, and your geographic location.
Your Toolbox: Essential Gear for DIY Savings
You don’t need a professional mechanic’s garage to handle common car issues. A few basic tools will get you started. Investing in quality tools will make the job easier and safer.
Must-Have Tools for Beginners:
- Socket Wrench Set: A good set with various sizes (metric and SAE) and extensions is invaluable for tightening and loosening bolts and nuts.
- Screwdriver Set: Phillips and flathead screwdrivers in multiple sizes are essential for accessing panels and components.
- Pliers: Needle-nose, slip-joint, and locking pliers are useful for gripping, bending, and cutting.
- Adjustable Wrench (Crescent Wrench): A versatile tool for nuts and bolts of different sizes.
- Jack and Jack Stands: Absolutely critical for safely lifting your car to work underneath it. Never work under a car supported only by a jack. Always use jack stands. For information on safe vehicle lifting, consult resources from the National Highway Traffic Safety Administration (NHTSA): NHTSA Safe Lifting Practices.
- Gloves: Mechanic’s gloves protect your hands from grease, dirt, and potential cuts.
- Safety Glasses: Eye protection is non-negotiable to prevent debris or fluid splashes from entering your eyes.
- Owner’s Manual: Your car’s best friend! It contains crucial information about your specific vehicle, including maintenance schedules, fluid types, and basic troubleshooting.
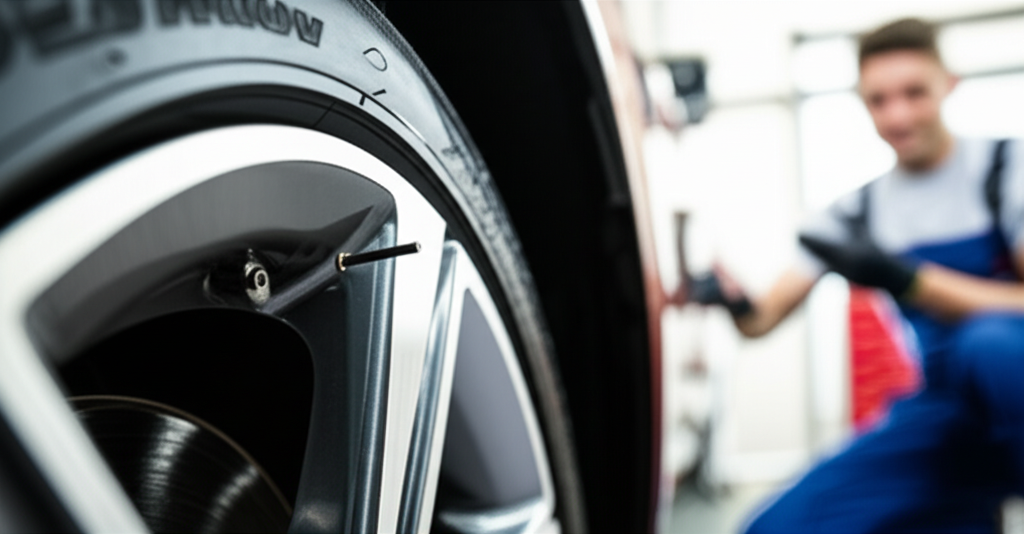
Common Car Issue #1: The Squeal Before You Stop
This is perhaps one of the most common car issues beginners will encounter: the persistent squealing sound when you apply the brakes. This isn’t just an annoying noise; it’s a critical indicator that your brake pads are wearing thin.
What It Sounds Like:
A high-pitched SQUEAL or SCREECH that happens every time you press the brake pedal, especially noticeable at lower speeds.
Why It Happens:
Most brake pads have a small metal “wear indicator” built into them. When the pad material wears down to a certain thickness, this indicator touches the brake rotor, creating that tell-tale squeal. It’s a warning designed to alert you before the pad material is completely gone, which would damage the more expensive brake rotor.
Your DIY Solution: Checking and Replacing Brake Pads
This is a fantastic DIY project for beginners. It requires patience and attention to detail, but the savings are significant.
Tools You’ll Need:
- Socket wrench set
- C-clamp or brake caliper piston tool
- Flathead screwdriver
- Wire brush
- Brake cleaner
- New brake pads (ensure they are for your specific vehicle make/model/year)
- Jack and jack stands
- Work gloves and safety glasses
Step-by-Step Guide:
- Safety First: Park your car on a flat, level surface. Engage the parking brake. Loosen the lug nuts on the wheel you’ll be working on (but don’t remove them yet).
- Lift and Secure: Use your jack to lift the car at the designated jacking point (check your owner’s manual). Place jack stands securely under the vehicle’s frame or designated support points. Slowly lower the car onto the jack stands. Remove the jack.
- Remove the Wheel: Now, fully unscrew the lug nuts and remove the wheel.
- Locate the Brake Caliper: The caliper is the component that clamps onto the brake rotor. You’ll typically see two bolts (caliper bracket bolts) holding it in place.
- Remove the Caliper: Use your socket wrench to remove these bolts. Once unbolted, you can often swing the caliper up or carefully slide it off the rotor. Don’t let it hang by the brake line; support it with a piece of wire or bungee cord.
- Inspect the Brake Pads: The old brake pads will be visible inside the caliper or rotor assembly. Check their thickness. If they are less than about 1/8 inch (3mm) thick, they need replacing.
- Compress the Caliper Piston: You’ll need to push the piston back into the caliper to make space for the new, thicker pads. Use a C-clamp or a dedicated caliper piston tool. Place an old brake pad against the piston and slowly tighten the clamp until the piston is fully retracted.
- Clean and Prepare: Use a wire brush to clean any rust or debris from the caliper bracket. Spray the caliper and bracket with brake cleaner.
- Install New Pads: Slide the new brake pads into place. Ensure they sit flush in the caliper bracket.
- Reattach the Caliper: Carefully slide or swing the caliper back over the new pads. Reinstall and tighten the caliper bracket bolts to the manufacturer’s recommended torque (check your manual or a repair manual).
- Reinstall Wheel: Put the wheel back on and hand-tighten the lug nuts.
- Lower and Tighten: Lower the car off the jack stands. Once the car is on the ground, torque the lug nuts in a star pattern to the manufacturer’s specifications.
- Repeat and Test: Repeat the process for the other side of the same axle (it’s crucial to replace brake pads in pairs). Before driving, pump the brake pedal several times to seat the caliper piston and pads. Test your brakes gently in a safe area before normal driving.
Common Car Issue #2: The Unsettling Vibration
Feeling a PULL or a VIBRATION through your steering wheel or seat can be unnerving. This often points to issues with your tires or suspension.
What It Sounds Like/Feels Like:
- A shimmy or wobble in the steering wheel, especially at highway speeds.
- A feeling that the car is pulling to one side.
- Uneven tire wear (bald spots, feathering, or cupping on the tire tread).
Why It Happens:
- Tire Imbalance: Modern tires are balanced at the factory, but small weights can fall off, or tires can wear unevenly, causing them to be out of balance.
- Wheel Alignment Issues: If your steering system or suspension components are slightly off, your wheels won’t be pointing straight, leading to pulling and uneven wear.
- Tire Damage: A bulge on the sidewall or internal damage to a tire can cause vibrations.
Your DIY Solution: Checking Tire Pressure and Basic Tire Rotation
While a full wheel alignment often requires professional equipment, you can address imbalance and ensure proper tire pressure yourself.
Tools You’ll Need:
- Tire pressure gauge
- Car jack and jack stands (as described above)
- Lug wrench or socket wrench with appropriate socket size
- Owner’s Manual (for recommended tire pressures and torque specs)
- Gloves
Step-by-Step Guide:
- Check Tire Pressure: Consult your owner’s manual or the sticker on your driver’s side doorjamb for the recommended tire pressure (PSI). Check the pressure when the tires are cold. Use your tire pressure gauge to add or release air as needed. Properly inflated tires improve fuel economy and ride quality. For more on tire safety and pressure, visit the NHTSA Tires Safety Page.
- Inspect Tires for Damage: Visually inspect your tires for any cuts, bulges, or unusual wear patterns. If you see any damage, consult a professional immediately – a compromised tire is a serious safety hazard.
- Tire Rotation (Optional DIY): Rotating your tires can help them wear more evenly, preserving their lifespan and improving handling. The pattern depends on whether your car is front-wheel drive, rear-wheel drive, or all-wheel drive, and if your tires are directional.
- Front-Wheel Drive (Without Staggered Wheels): Move front tires straight back, move rear tires to the opposite front corners. (LF -> RL, RF -> RR, LR -> LF, RR -> RF)
- Rear-Wheel Drive (Without Staggered Wheels): Move front tires to the opposite rear corners, move rear tires straight forward. (LF -> RR, RF -> LR, LR -> RF, RR -> LF)
- All-Wheel Drive / Directional Tires: Always follow the pattern specified in your owner’s manual. Often, it’s a simple front-to-back swap.
- Perform Rotation: Loosen lug nuts, lift one wheel at a time using your jack, support with jack stands, remove wheels, swap them according to the correct pattern, reinstall, hand-tighten lug nuts, lower car, and then torque lug nuts.
Common Car Issue #3: The Overheating Engine
An overheating engine is serious business. It can cause catastrophic damage if not addressed promptly.
What It Sounds Like/Feels Like:
- Steam or smoke coming from under the hood.
- The temperature gauge on your dashboard is in the “H” or red zone.
- A sweet, syrupy smell (often from leaking coolant).
Why It Happens:
The cooling system relies on coolant circulating through the engine to absorb heat and dissipate it through the radiator. Problems can arise if:
- Coolant Level is Low: Leaks in hoses, the radiator, or the water pump can cause coolant loss.
- Thermostat Malfunction: The thermostat regulates coolant flow; if it gets stuck closed, coolant can’t reach the radiator.
- Faulty Water Pump: This pump circulates the coolant; if it fails, the system stops working.
- Clogged Radiator: Internal blockages or debris on the fins can prevent proper heat dissipation.
Your DIY Solution: Checking Coolant Levels and Hoses
While replacing a water pump or thermostat is more advanced DIY, checking and topping up coolant, and inspecting hoses, are essential regular checks.
Tools You’ll Need:
- Safety glasses
- Heavy-duty gloves
- Funnel
- Approved coolant (check your owner’s manual for the correct type and mixture – typically 50/50 coolant and distilled water)
- Rag or shop towel
Step-by-Step Guide:
- Safety First: NEVER open the radiator cap or expansion tank cap when the engine is hot. The system is under pressure, and superheated coolant can spray out, causing severe burns. Wait for the engine to cool down completely (several hours).
- Locate Coolant Reservoir: Most modern cars have a translucent plastic coolant reservoir (also called an expansion tank) with MIN and MAX lines.
- Check Coolant Level: Visually check the level in the reservoir. If it’s below the MIN line, you need to add coolant.
- Add Coolant (If Needed): Carefully remove the cap from the coolant reservoir. Using your funnel, add the correct coolant mixture until the level reaches the MAX line. Do NOT overfill.
- Inspect Hoses: While the hood is open and the engine is cool, inspect all visible coolant hoses (radiator hoses, heater hoses). Squeeze them gently. They should feel firm but pliable. If they are hard, brittle, cracked, bulging, or feel mushy, they need to be replaced soon. Look for any signs of coolant leaks around hose connections or on the ground under the car.
- Check Radiator Fins: Inspect the front of the radiator (visible through the grille) for debris like leaves or bugs. Gently clean them with a soft brush or compressed air if they are blocked.
For more detailed information on cooling system maintenance and common issues, consult resources like these:
Recent Posts
Durable Jeep Wrangler American Flag License Plate Frame for Patriotic Drivers
Have you ever felt frustrated by a plain, worn-out license plate frame on your Jeep Wrangler? It’s a small detail, but it can really affect your vehicle’s look.Every time you see that dull...
Slim Design Audi Black License Plate Frame for Sleek Car Styling
Have you ever struggled with a bulky, noisy license plate frame that just doesn’t fit right? It can be so frustrating when your car’s style feels off or the frame rattles every time you...