
Roof racks and accessories are your secret weapon for hauling gear without cluttering your car’s interior. They offer versatile storage solutions for everything from bikes and kayaks to luggage and skis, expanding your vehicle’s carrying capacity safely and conveniently. This guide makes choosing and using them simple.
Ever wished you had just a little more space in your car? Maybe for that weekend camping trip, or to bring home that new piece of furniture? It’s a common feeling, and one that can make adventures or errands feel a bit cramped. The good news is, you don’t need a bigger car to solve this problem! Specialized gear called roof racks and accessories can transform your vehicle into a mobile cargo powerhouse. Don’t worry if this sounds complicated; we’re going to break it all down in a way that’s easy to understand. We’ll explore what they are, how they work, and how to pick the perfect setup for your needs, making your next journey smoother and more spacious.
What Exactly Are Roof Rack Systems?
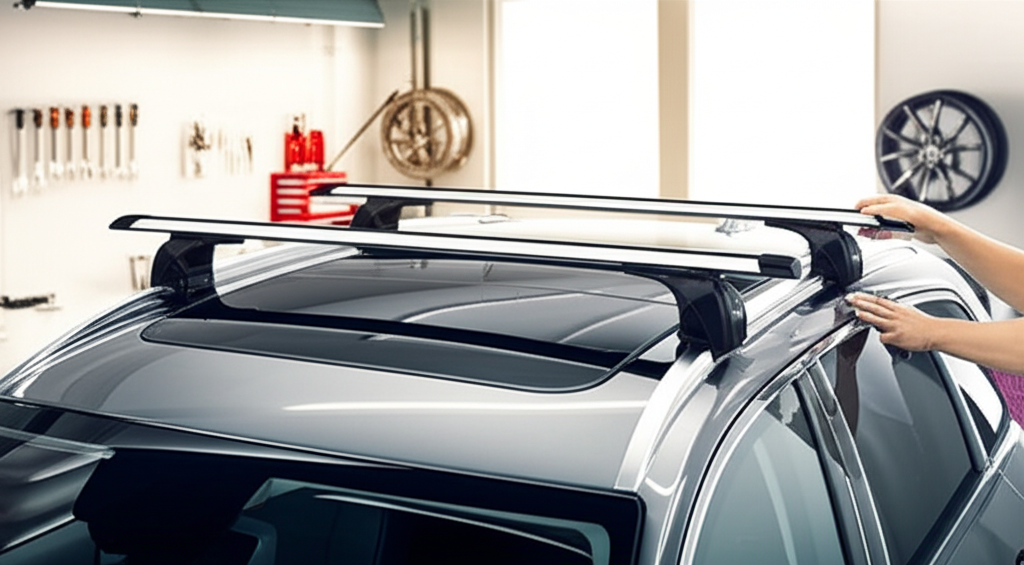
Think of a roof rack system as an extension of your car’s carrying capacity, mounted securely on the roof. It’s not just one piece, but a combination of components that work together. This system allows you to safely transport items that are too big, dirty, or bulky to fit inside your car. From sports equipment to luggage, roof racks open up a world of possibilities for travel and hobbies.
The Core Components of a Roof Rack System
A complete roof rack system typically consists of three main parts:
- Foot Pack (or Towers): These are the parts that connect the rack system to your car’s roof. They are designed to grip your roof securely without causing damage. Different cars require different types of foot packs, depending on whether your car has raised or flush side rails, a bare roof, or fixed mounting points.
- Fit Kit (or Clips/Pads): This is a custom piece that works with the foot pack to ensure a perfect, secure fit for your specific vehicle model. It’s like a tailor-made interface between the rack and your car.
- Load Bars (or Crossbars): These are the horizontal bars that run from one side of your car to the other, attached to the towers. This is where you’ll attach all your accessories. They come in different lengths and materials, such as steel or aluminum.
Types of Roof Rack Mounts
How your roof rack attaches to your car is crucial for security and stability. Here are the most common mounting types:
- Raised Roof Rails: Many SUVs and wagons have raised rails that run along the length of the roof, with a gap between the rail and the roof itself. Foot packs designed for raised rails clamp underneath this raised section.
- Flush Roof Rails: These rails look like raised rails but sit directly on the roof, with no gap. Foot packs for flush rails often wrap around the rail or use a specific clamping mechanism.
- Bare Roof: Some cars, particularly sedans and coupes, have no factory-installed rails. For these, foot packs use a gripping or clamping system that attaches to the edge of the car’s doors and roofline. A fit kit is especially important here for a precise fit.
- Fixed Mounting Points: Some vehicles come with special pre-drilled or capped mounting points on the roof. Special foot packs are designed to screw directly into these secure points.
- Gutters: Older vehicles might have classic rain gutters along the edge of the roof. Specific gutter-mount foot packs can attach to these.
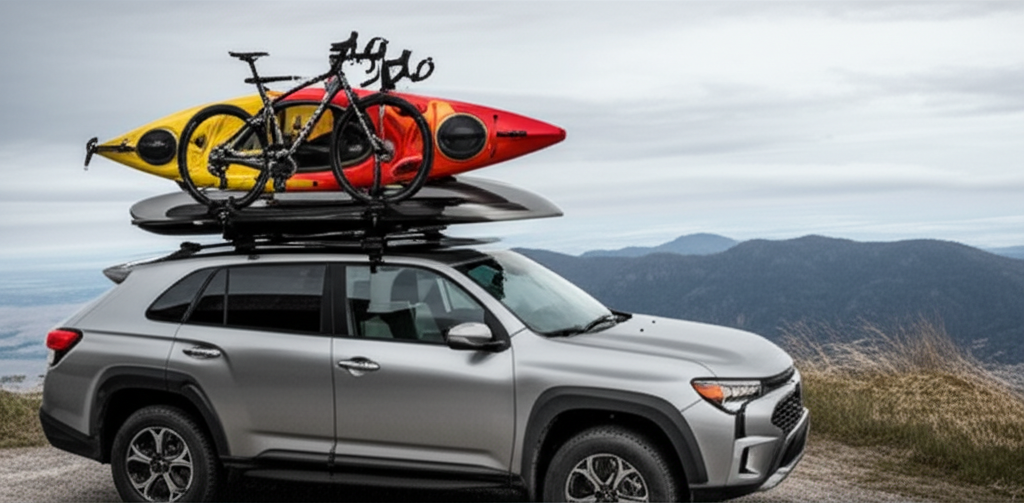
Essential Roof Rack Accessories: What You Need to Carry
Once you have your base roof rack system (the bars), you’ll need accessories to hold your specific gear. These accessories are designed to attach to your load bars and provide a secure, dedicated spot for your items.
For the Adventurous Cyclist: Bike Racks
If you love hitting the trails, a bike rack is a must-have. These keep your bikes safely out of the car and protect them from scratches.
- Frame Mount Racks: These are very common and secure your bicycle by clamping onto the frame. They’re generally easy to load.
- Fork Mount Racks: These require you to remove the front wheel of your bike and mount the fork securely to the rack. They’re often lighter and can be more aerodynamic.
- Wheel Mount Racks: These hold the bike by its wheels, often with a tray for the rear wheel and a strap or clamp for the front. They avoid contact with the bike frame, which is good for delicate frames.
For Water Sports Enthusiasts: Kayak and Canoe Carriers
Transporting a kayak or canoe is much easier with specialized carriers. These often cradle your watercraft and secure it tightly.
- J-Cradles: These are shaped like a ‘J’ and hold kayaks on their side, which is very space-efficient.
- Saddles/Rollers: These allow you to slide the kayak onto the roof, which can be easier for larger boats. Saddles hold the kayak flat, while rollers make loading easier.
- Universal Carriers: Some carriers are designed to be more versatile and can hold various types of watercraft.
For Outdoor Explorers: Ski and Snowboard Racks
Keep your skis and snowboards secure and your car clean with dedicated carriers.
- Clamp-Style Racks: These have arms that clamp down to hold skis or snowboards. They’re quick and easy to use.
- Ski and Board Boxes: These lockable boxes are great for protecting your gear from the elements and prying eyes, and they often offer a more aerodynamic profile.
For Packing Like a Pro: Cargo Boxes and Bags
When you need extra luggage space, cargo boxes and bags are excellent options. They protect your belongings from weather and theft.
- Hardshell Cargo Boxes: These are rigid, aerodynamic boxes that mount to your load bars. They offer the most security and weather protection. They come in various sizes, from compact to extra-large.
- Soft Shell Cargo Bags: These are made of durable, weather-resistant fabric and are often more flexible than hardshell boxes. They can be a more budget-friendly option and are easier to store when not in use.
For General Hauling: Cargo Baskets
Versatile for carrying a wide range of items, from camping gear to luggage. They provide an open space with raised sides to keep things contained.
- Low-Profile Baskets: These offer a sleek look and are good for lighter, bulkier items.
- High-Profile Baskets: These have taller sides, better for securing larger or more numerous items.
Choosing the Right Roof Rack System for Your Vehicle
Selecting the perfect roof rack isn’t just about which brand you like; it’s about finding a system that fits your car and your lifestyle. Here’s a breakdown of what to consider:
1. Identify Your Vehicle’s Roof Type
This is the most critical first step. As we discussed earlier, knowing if you have raised rails, flush rails, a bare roof, or fixed mounting points will determine the type of foot pack you need.
How to check:
- Inspect your car’s roof carefully. Look for rails running front-to-back.
- If there’s a space between the rail and the roof, they are “raised.”
- If the rail sits directly on the roof, they are “flush.”
- If there are no rails but perhaps small plastic covers or indentations, you might have fixed mounting points.
- If it’s just smooth metal or glass, it’s a “bare roof.”
Pro Tip: Your car’s owner manual is also a great source for identifying its roof type and any manufacturer recommendations or limitations.
2. Determine Your Carrying Needs
What will you be carrying most often? This dictates the type of accessory you’ll need and the bar length or box size.
- Sports Gear: Bikes, skis, kayaks, surfboards.
- Camping Gear: Tents, sleeping bags, coolers.
- Luggage: For road trips and vacations.
- Home Improvement Supplies: Lumber, ladders, building materials (ensure your rack is rated for the weight).
3. Consider Weight Capacity
Every roof rack system has a maximum weight capacity, and your vehicle also has its own roof load limit. It’s crucial to know both and never exceed them. Exceeding these limits can be dangerous, affecting your car’s handling and potentially damaging your vehicle or the rack system.
Where to find this information:
- Roof Rack Manufacturer: Check the product specifications for the rack system and any accessories.
- Vehicle Owner’s Manual: Look for a section on roof load limits. This is often stated in pounds or kilograms.
- On the Vehicle Door Jamb: Sometimes, tire pressure or load limit information is found here.
Important Note: The weight capacity usually includes the weight of the roof rack system itself, plus the weight of the cargo and any accessories. Always be conservative with your estimates.
4. Factor in Security and Durability
If you’re carrying expensive gear like bikes or skis, security is paramount. Look for racks and accessories with integrated locks to deter theft. For durability, consider the materials: aluminum is lighter and rust-resistant, while steel is generally stronger but heavier and more prone to rust if not protected.
5. Think About Aerodynamics and Noise
Some roof rack systems and accessories are designed to be more aerodynamic than others. This can reduce wind noise while driving and improve fuel efficiency. Hardshell cargo boxes are often more aerodynamic than open baskets. Blame for that humming sound? Often it’s air moving over the crossbars. Some accessories can help reduce this.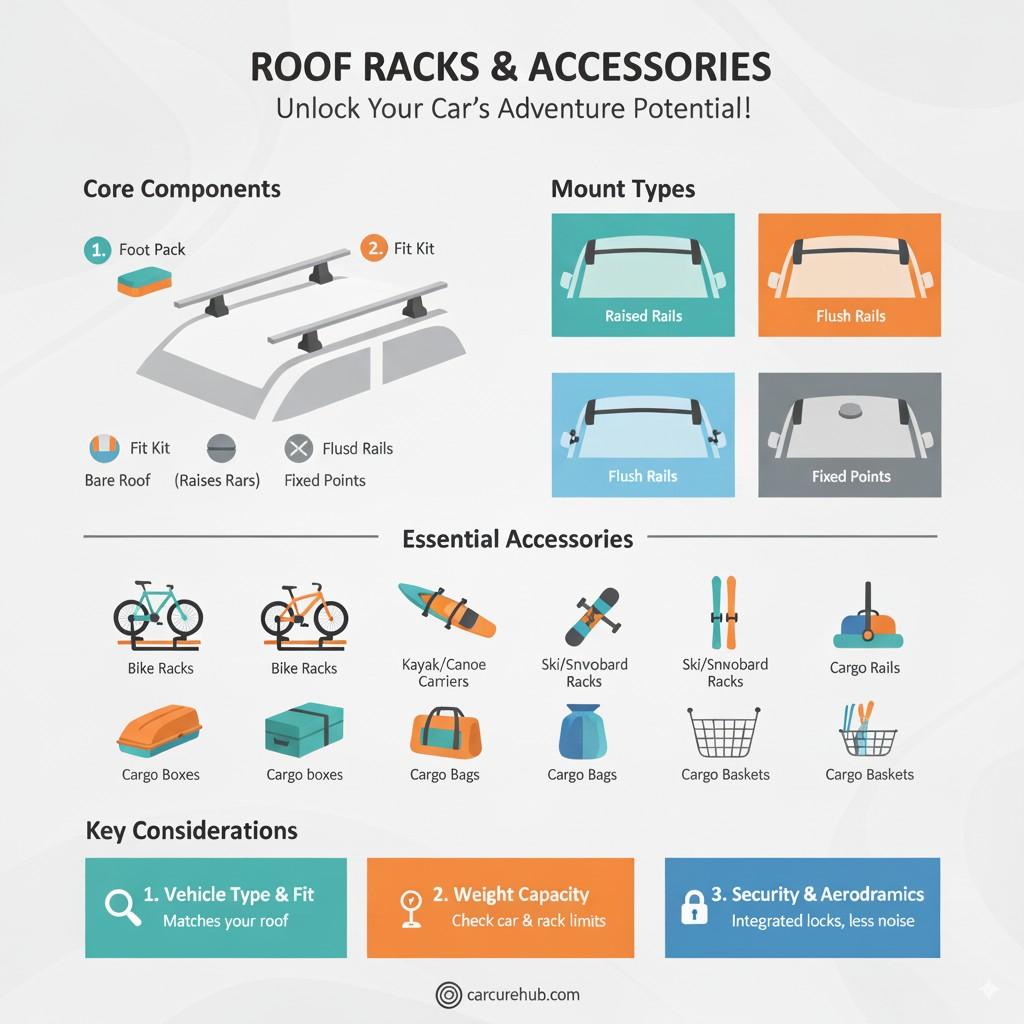
Professional Installation vs. DIY: Making the Right Choice
Installing a roof rack can seem daunting, but many systems are designed for straightforward DIY installation. However, there are times when professional help is a wise investment.
When to DIY:
- Simple Systems: If your car has factory-installed raised or flush rails, installing crossbars can be as simple as tightening a few bolts.
- Clear Instructions: Reputable brands provide detailed, step-by-step manuals with diagrams.
- Basic Tools: Most DIY installations only require common tools like a torque wrench, measuring tape, and maybe a screwdriver.
- Confidence and Time: If you’re comfortable following instructions and have a bit of time, a DIY installation is often achievable.
When to Seek Professional Installation:
- Complex Vehicle Roofs: For bare roofs or those with specific fixed mounting points that require precise alignment, a professional can ensure a secure and proper fit.
- Safety Concerns: If you’re unsure about any step or worried about damaging your car or the rack system, a professional installer has the experience to do it right.
- Noisy or Unstable Racks: If you’ve installed a rack yourself and it’s causing excessive noise or feels unstable, a professional can diagnose and fix the issue.
- High-Value Gear: For very expensive items like multiple kayaks or bikes, ensuring the rack is installed perfectly can provide extra peace of mind.
Many outdoor gear retailers and some auto accessory shops offer professional installation services. It can be well worth the small fee to ensure your rack system is secure and safe for the road.
Safety First: Tips for Using Your Roof Rack
Using a roof rack and accessories is exciting because it opens up new possibilities for adventure. However, safety is paramount. A poorly secured load can be a hazard to you, other drivers, and your gear. Here are essential safety tips:
1. Always Read the Manuals
This sounds basic, but it’s crucial. Each component of your roof rack system and each accessory will come with its own set of instructions. Read them thoroughly for your specific vehicle and equipment.
2. Secure Everything Properly
- Tighten Connections: Ensure all bolts, clamps, and straps are tightened to the manufacturer’s specifications. Use a torque wrench if recommended.
- Use Appropriate Straps: For cargo boxes, ensure the internal straps are used to keep items from shifting. For bikes or kayaks, use the tie-down straps that come with the accessory or recommended by the manufacturer.
- Distribute Weight Evenly: Place heavier items at the bottom of the load and distribute the weight as evenly as possible across the load bars.
- Check for Movement: After packing, give your gear a firm shake. It should not shift significantly.
3. Be Mindful of Height and Width
Your vehicle is now taller and potentially wider. This is critical for several reasons:
- Parking Structures: Garages, drive-thrus, and underpasses can become obstacles. Many have height restrictions posted. Always be aware of your vehicle’s new height, especially when loaded.
- Low-Hanging Branches: Be cautious on rural roads or in forested areas.
- Road Width: Ensure you have enough clearance from other vehicles, guardrails, and narrow passages.
A good rule of thumb is to add at least 6-12 inches (15-30 cm) to your vehicle’s standard height when loaded, but always err on the side of caution.
4. Regular Checks
Before and during long trips, periodically check that your roof rack and its load are still securely fastened. Bumps, vibrations, and wind can cause things to loosen over time.
5. Understand Load Limits
Know the dynamic load limit (while driving) versus the static load limit (when parked). The dynamic limit is always lower. Never exceed your vehicle’s roof load capacity or the rack system’s capacity. Visit resources like the Federal Highway Administration’s guidance on vehicle weight for general understanding, though specific roof limits are provided by your car maker.
Maintaining Your Roof Rack System
Just like any part of your car, keeping your roof rack and accessories in good condition will ensure they last longer and perform safely. Here’s how to maintain them:
Cleaning
- Regular Washing: Wash the rack system and accessories with mild soap and water after use, especially if exposed to salt, dirt, or sand. This prevents corrosion and keeps them looking good.
- Dry Thoroughly: After washing, dry all components to prevent water spots and potential rust, particularly on metal parts.
- Check for Debris: Make sure no dirt or leaves are trapped in moving parts or crevices, as this can affect functionality.
Inspection
- Inspect for Damage: Regularly check for any signs of wear and tear, cracks, bends, or corrosion on the rack components, bars, and accessories.
- Check Hardware: Ensure all bolts and screws are tight and not stripped. Reapply threadlocker if recommended by the manufacturer.
- Examine Straps: Look for fraying, tears, or wear on any straps used for securing gear. Replace worn straps immediately.
- Roof Interface: For bare roof or clip systems, check the rubber padding on the foot packs for any damage or wear that might affect grip or paint protection.
Lubrication
- Locks: If your rack or accessories have integrated locks, use a graphite lubricant or a specialized lock lubricant periodically to keep them functioning smoothly, especially in extreme weather. Avoid oil-based lubricants, as they can attract dirt.
Storage
- When Not in Use: If you don’t plan to use your roof rack system for an extended period, consider removing it. This reduces drag, improves fuel economy, and protects the system from the elements. Store it in a dry, safe place, like a garage or shed.
- Accessory Storage: Store individual accessories (like bike racks or ski carriers) properly to prevent damage.
Frequently Asked Questions About Roof Racks and Accessories
Q1: Can I put a roof rack on any car?
Generally, yes, but the type of roof rack system (foot pack, bars, etc.) must be specifically designed for your car’s roof style (raised rails, bare roof, etc.) and model. Not all cars are designed to have racks mounted.
Q2: How much weight can a roof rack hold? Is there a limit?
Yes, there’s always a weight limit. This limit is determined by the roof rack manufacturer for the specific system and by your car’s manufacturer for its roof structure. Always check both! The roof rack’s dynamic load limit (while driving) is usually lower than its static load limit (when parked).
Q3: Will a roof rack damage my car’s paint?
Reputable roof rack systems are designed with protective padding to prevent paint damage. However, rough handling during installation, dirt trapped between the rack and the roof, or improper fit can cause scratches. Always ensure the contact points are clean and the components are installed correctly.
Q4: How do I choose the right size crossbars?
The ideal crossbar length depends on your vehicle
Recent Posts
Jumper Cables With Bag: Heavy Duty Booster Cables for Easy Storage
There’s nothing more frustrating than turning the key in your car and hearing silence. A dead battery can ruin your day in an instant.You might feel stuck, stressed, and unsure what to do next....
Strong Ram 1500 Heavy Duty License Plate Frame for Ultimate Durability
There’s nothing more frustrating than struggling with a flimsy license plate frame that bends, rusts, or just doesn’t fit right on your Ram 1500. You want something strong and reliable that...