

Quick Summary:
Tired of that annoying wind whistle from your roof rack? This guide provides easy, proven tips to silence your roof rack noise. We’ll cover simple fixes like adjusting your rack, adding accessories, and even DIY solutions to make every drive peaceful and quiet.
Hey there, car enthusiasts! A S Khan here, your friendly guide to keeping your car running smoothly and quietly. Ever feel like your trusty car is singing a constant, annoying song of the wind every time you drive? That whistling or humming sound coming from your roof rack can really take the joy out of a road trip or even your daily commute. It’s a common issue, but don’t worry! You don’t need to be a master mechanic to fix it. In this guide, we’ll walk through simple, effective ways to reduce that distracting roof rack noise. Get ready to enjoy peaceful drives again!
Why Does My Roof Rack Make So Much Noise?
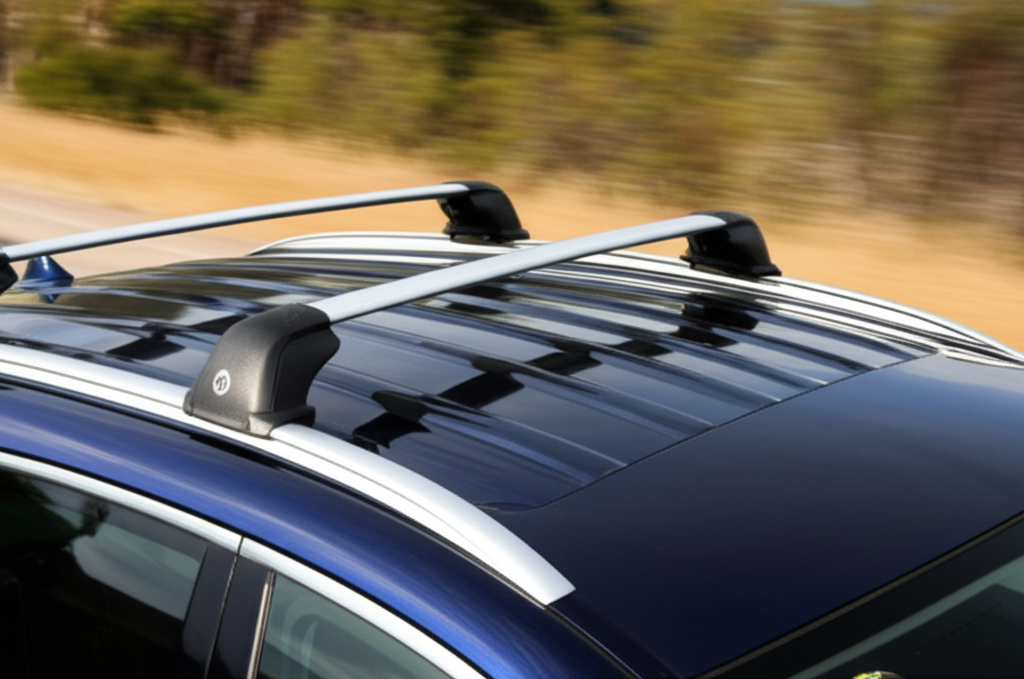
Roof racks are fantastic for carrying extra gear, bikes, or luggage, but their design can sometimes create a symphony of unwelcome sounds. The main culprit is airflow. As air rushes over and around your rack, it can create turbulence, leading to whistling, humming, or even a “thwacking” sound. The shape and placement of the rack, the speed you’re driving, and even the type of crossbars all play a role in how much noise you hear.
Think of it like sticking your hand out of a car window. If you hold it flat, you feel a steady breeze. But if you angle it, you’ll feel the turbulent air pushing your hand around – that’s the same kind of effect happening with your roof rack, just at a much higher pitch!
Understanding the Aerodynamics
The design of a roof rack can disrupt the smooth flow of air over your car’s roof. When air hits an object like a crossbar or a rack leg, it has to go around it. This redirection creates areas of low and high pressure, and the rapid change between them is what often causes that distinct whistling or humming. Certain shapes of crossbars, especially older square or round ones, tend to be more prone to this than sleeker, aerodynamic designs.
The faster you go, the more pronounced this effect becomes. At highway speeds, the air pressure and turbulence increase significantly, making the noise much more noticeable. Even small gaps or improper installation can let air sneak through in ways that generate irritating sounds.
Essential Tips for Roof Rack Noise Reduction
Ready to reclaim your quiet cabin? Here are some proven methods to tackle that roof rack noise, ranging from quick fixes to more involved solutions. We’ll start with the easiest ones you can try right now.
1. Secure and Tighten Everything
Sometimes, the simplest solution is the best. Loose parts can vibrate and create creaks or rattles that sound like wind noise. Take a moment to check every bolt, clamp, and connection point on your roof rack system.
- Inspect Mounts: Ensure the towers or feet that connect the rack to your car are firmly attached.
- Check Crossbars: Make sure the crossbars are securely locked into the towers.
- Tighten Hardware: Use the appropriate tools (often an Allen wrench or a small socket set) to snug up any bolts or screws. Don’t overtighten, as you could damage the rack or your car’s roof, but ensure there’s no wiggle room.
Safety First: Always refer to your roof rack manufacturer’s manual for specific tightening instructions. Over-tightening can sometimes strip threads or crack plastic components.
2. Adjust Crossbar Position
The distance between your front and rear crossbars can significantly impact how air flows and creates noise. Sometimes, simply moving the crossbars closer together or further apart can disrupt the harmonic vibrations that cause whistling.
- Experiment with Spacing: Try varying the distance between the crossbars by a few inches.
- Consult Your Manual: Your roof rack manual might suggest optimal spacing for different load types or to minimize noise.
Tip: Make small adjustments and test drive. What works for one vehicle or rack might be different for another.
3. Rethink Your Crossbar Shape
The shape of your crossbars is a major factor in aerodynamics. Older, round or square bars tend to be noisier than modern, airfoil-shaped bars.
- Aerodynamic Bars: If your current rack has square or round bars, consider upgrading to elliptical or wing-shaped crossbars. These are designed to mimic airplane wings, allowing air to flow over them much more smoothly, drastically reducing noise. Reputable brands like Thule and Yakima offer such designs.
- Add-ons for Existing Bars: If a full upgrade isn’t in the cards, there are often accessory fairings or wind reducers you can add to existing bars.
The investment in aerodynamic crossbars is often well worth the peace and quiet they provide, especially if you use your rack frequently.
4. Install a Wind Fairing
A wind fairing is a curved shield, usually made of plastic or sometimes even a durable fabric, that attaches to the front of your roof rack. Its primary purpose is to redirect airflow up and over the rack, preventing it from creating turbulence directly around the crossbars and any gear you might be carrying.
- How it Works: By smoothing the passage of air, a fairing can significantly reduce whistling and buffeting sounds.
- Universal vs. Specific: Some fairings are universal fit, while others are designed for specific rack systems. Check compatibility before purchasing.
- Installation: Most fairings attach with adjustable straps or clamps to the front crossbar and sometimes the towers.
You can find excellent examples of wind fairings from manufacturers like:
Yakima Fairings
Thule Windscreens
This is often one of the most effective single-item solutions for rack noise.
5. Apply Weatherstripping or Foam Tape
For those with older or more basic rack systems, or to further quiet down newer ones, adding foam or rubber weatherstripping can make a big difference. This helps to fill small gaps and dampen vibrations.
- Where to Apply:
- Along the edges of crossbars where noise seems to originate.
- Where any plastic components of the rack meet metal.
- Around any openings or gaps in the rack system.
- Material Choice: Use closed-cell foam tape or dense rubber weatherstripping designed for automotive use. This ensures durability against the elements. Check out resources on automotive sealing from sites like the Society of Automotive Engineers (SAE) technical papers for insights into how materials affect sound.
- Application: Clean the surfaces thoroughly before applying the tape. Press firmly to ensure good adhesion.
This is a low-cost, DIY-friendly method that can effectively reduce wind noise and vibration.
6. Soften Up Round or Square Bars
If you have round or square crossbars, their direct shape can cause more turbulence. You can try to “soften” their edges to improve airflow.
- Pool Noodles: A classic DIY hack! Cut sections of foam pool noodles to fit around your crossbars. Secure them with zip ties or strong tape. While not the most aesthetically pleasing, this can significantly reduce wind noise by changing the bar’s profile.
- Specialized Covers: Some aftermarket products are essentially aerodynamic covers for round or square bars, designed to smooth out the airflow.
While effective, these solutions might slightly affect the maximum weight capacity of your rack, so always double-check.
7. Tighten and Position Accessories
Sometimes, the noise doesn’t come from the rack itself, but from the accessories attached to it (like cargo boxes, bike mounts, or kayak carriers).
- Check All Attachments: Make sure all straps, clamps, and locking mechanisms on your accessories are snug and secure.
- Positioning Matters: If your accessory has multiple mounting points, try slightly adjusting its position on the crossbars. Sometimes a small shift can eliminate a resonant frequency causing noise.
- Aerodynamic Accessories: When buying new accessories, consider their aerodynamic design. Sleek, low-profile cargo boxes, for instance, will generally be quieter than bulkier older models.
Even well-designed accessories can create noise if they’re not properly secured or if air can get underneath or between them and the rack.
8. Cover Unused Rack Sections
If you have a rack system with many attachment points or open sections that you aren’t currently using, air can get trapped and create noise.
- Rubber Plugs/Caps: Some rack systems come with or allow for the addition of rubber plugs for unused T-slots or mounting holes.
- Tape It Up: For less permanent solutions, strong, weather-resistant tape (like Gorilla Tape or automotive vinyl tape) can be used to cover openings. Ensure the tape adheres well to a clean surface.
This helps create a smoother surface for airflow, reducing potential noise generators.
9. The “Zip Tie Trick”
This is a very simple, often surprisingly effective trick that involves using zip ties. The idea is to break up the smooth airflow that causes whistling.
- How to Do It: Cut several zip ties into short lengths (about 1-2 inches).
- Placement: Strategically thread these short zip ties through any open slots or around the edges of your crossbars where you suspect the whistling originates. You don’t need many – just a few placed where the air seems to funnel.
- Why it Works: These small protrusions disrupt the smooth laminar airflow, turning it into more chaotic (but less noisy) turbulent flow at a lower frequency.
This method is cheap, easy to implement, and reversible. It’s a great first step for diagnosing specific noise points.
10. Consider a Cargo Net or Cover for Gear
If you’re carrying loose items or large bulky gear, a properly tensioned cargo net or a dedicated cargo bag/cover can significantly reduce noise.
- Tension is Key: A loose net or cover will flap and create its own noise or allow wind to get under your gear, creating buffeting. Ensure everything is pulled tight.
- Aerodynamic Covers: Many modern cargo bags are designed with aerodynamic shapes to minimize wind resistance and noise.
This method is about managing the airflow around your cargo, not just the rack itself.
11. Address the Roof Itself
In some cases, the noise might be amplified or even generated by the interaction of the rack mounting points with your car’s roof. This is especially true for vehicles with panoramic sunroofs or unique roof designs.
- Padding Underneath: Some high-quality roof rack systems provide specific rubber or foam pads designed for the mounting feet. Ensure these are present and in good condition. If yours are old or missing, contact the manufacturer.
- Check for Gaps: Look for any small gaps between the rack’s mounting points and the roof. Tiny amounts of rubber sealant or even small, strategically placed pieces of dense foam might help, but proceed with extreme caution. The Environmental Protection Agency (EPA) notes that sound is energy, and anything that can absorb or deflect that energy can reduce noise.
Caution: Always ensure any modifications to the mounting points do not compromise the structural integrity or water seal of your roof or rack system. Consult your vehicle and rack manuals.
When to Upgrade Your Roof Rack
If you’ve tried several of the tips above and are still plagued by noise, it might be time to consider upgrading your roof rack system. Older designs or lower-quality racks are often inherently noisier due to their less aerodynamic profiles.
Signs it’s time to upgrade:
- Your current rack is several years old and uses older, non-aerodynamic bar shapes (square or round).
- The noise is so severe it impacts your driving comfort and safety (distraction).
- Damage or wear to the rack components.
- You frequently carry large or bulky items that are hard to secure quietly on your current rack.
Modern, aerodynamic roof racks are specifically engineered to minimize wind noise. While they can be an investment, the improved driving experience and durability often make them worthwhile.
Choosing the Right Roof Rack for Less Noise
When selecting a new roof rack, prioritize “aerodynamic” or “low-profile” designs. Look at the crossbar shape – wings or ellipses are best. Brands like Thule (Aeroblade, Edge), Yakima (JetStream, Whispbar), and Rhino-Rack have excellent options designed for minimal noise.
Here’s a quick comparison:
| Roof Rack Type | Aerodynamics & Noise Level | typical Installation Complexity | Pros | Cons |
|---|---|---|---|---|
| Round Bars | Poor – High Noise | Easy | Inexpensive, widely compatible accessories | Noisy, less secure for some accessories, can damage kayak/SUP |
| Square Bars | Fair – Moderate to High Noise | Moderate | Affordable, durable | Can be noisy, less aerodynamic than wing bars |
| Aerodynamic Wing/Elliptical Bars | Excellent – Very Low Noise | Moderate to High (requires vehicle-specific fitting kits) | Quiet, efficient, looks modern, strong | More expensive, accessories might require specific adapters |
| Low-Profile/Integrated Racks | Very Good – Low Noise | Moderate to High (often vehicle-specific fit) | Sleek, minimal wind resistance when empty | Can have less carrying capacity, potentially less versatile |
For the absolute quietest experience, aerodynamic wing bars or well-designed low-profile racks are your best bet. Always check reviews and manufacturer specifications for noise reduction features.
Frequently Asked Questions (FAQs)
Q1: Will removing my roof rack make my car quieter?
A: Yes, absolutely! If your roof rack isn’t in use, removing it will eliminate any associated wind noise. Most racks can be removed in 10-30 minutes once you’re familiar with the process. It also improves your car’s fuel efficiency slightly.
Q2: Can I use car wash soap to clean my roof rack before applying weatherstripping?
A: Standard car wash soap is generally fine for cleaning the rack. However, for best adhesion of tapes and weatherstripping, it’s crucial to follow up with an isopropyl alcohol wipe to remove any residue and ensure the surface is perfectly clean and dry.
Q3: How long does weatherstripping last on a roof rack?
A: With quality automotive-grade weatherstripping, you can expect it to last anywhere from 2 to 5 years, depending on the climate, exposure to sun (UV rays), and the specific product used. It’s good practice to inspect it annually.
Q4: Is a fairing really effective at reducing noise?
A: Yes, a well-designed and properly installed wind fairing is one of the most effective accessories for reducing roof rack wind noise, particularly whistling sounds. It redirects airflow smoothly over the rack, minimizing turbulence.
Q5: What do you mean by “aerodynamic crossbars”?
A: Aerodynamic crossbars have a shape designed to mimic an airplane wing or a teardrop. This shape allows air to flow over them more smoothly and quietly compared to older, round or square bars. Brands often call these “aero bars,” “wing bars,” or “whisper bars.”
Q6: Can I combine multiple noise reduction techniques?
A: Absolutely! Often, the best results come from using a combination of methods. For example, you might install aerodynamic bars, add a
Recent Posts
Car Fridge Dual Zone: Ultimate Portable Cooler for Travel and Camping
Have you ever opened a car cooler only to find your drinks warm and your snacks spoiled? It’s frustrating when a simple road trip or camping day turns uncomfortable because your food isn’t...
Car Fridge And Warmer: Ultimate Portable Cooler for Travel and Camping
Have you ever been stuck on a long drive with warm drinks and soggy snacks? It’s frustrating when your food and beverages don’t stay fresh.This small annoyance can spoil your whole trip or...