
Roof racks and crossbars are vital for expanding your vehicle’s cargo capacity, allowing you to securely transport gear like bikes, kayaks, skis, or luggage boxes. Choosing the right system involves understanding your vehicle type, the gear you’ll carry, and how to install it correctly for a safe and enjoyable journey.
Going on an adventure or need to haul a lot of stuff? Your car’s roof might be the answer! But not all cars come ready for a weekend camping trip or a furniture run. That’s where roof racks and crossbars come in. They’re like adding extra storage space right on top of your car. Don’t worry if this sounds complicated; it’s simpler than you think! We’ll walk you through what they are, why you might need them, and how to pick the right ones for your car and your gear. Get ready to unlock your car’s full potential!
Why You Need a Roof Rack and Crossbar System
Imagine needing to carry your mountain bike for that epic trail you’ve been wanting to conquer, or packing up all your camping gear for a family getaway. Sometimes, your trunk and back seats just aren’t enough. This is exactly where a roof rack and crossbar system shines. They transform your car into a versatile hauler, letting you bring along all sorts of bulky items without sacrificing passenger comfort inside.
This system isn’t just about adding space; it’s about smart, safe transportation. Properly installed racks distribute weight evenly and keep your gear secured. This means no more squeezing bulky items inside, no more compromising on who sits where, and more importantly, no more worrying about unsecured items becoming hazards. From sporting equipment to extra suitcases, these accessories are essential for anyone looking to maximize their vehicle’s utility.
Understanding the Components
To get the most out of your roof-mounted storage, it’s important to understand the different parts that make up the system. It’s not just one big piece; it’s a combination of components designed to work together.
Foot Pack (or Towers): These are the parts that attach directly to your car’s roof. They act as the bridge between your vehicle and the crossbars. Different cars have different roof styles (like raised rails, flush rails, or bare roofs), and foot packs are designed to securely grip each specific type. The quality of the foot pack is crucial for stability and safety.
Crossbars: These are the horizontal bars that run from one side of your car to the other. They are what your accessories (like bike racks or cargo boxes) will actually attach to. Crossbars come in various lengths and materials, typically aluminum or steel. The length needs to be appropriate for your vehicle’s width, and the material choice often balances strength with weight.
Fit Kit (or Clips/Pads): This is a set of custom-designed parts, usually specific to your car’s make, model, and year. The fit kit includes things like rubber pads that sit on your car’s roof and metal clips that hook into your door frames or factory mounting points. These ensure a snug, secure, and non-damaging fit for the foot pack. Without the correct fit kit, even the best roof rack won’t be safe.
Accessories: These are the items that mount onto your crossbars to hold specific gear. This can include bike carriers, ski racks, kayak mounts, cargo boxes (also called roof boxes or cargo pods), or even just tie-down straps for flatter items.
Types of Roof Rack Systems
The best roof rack system for you depends heavily on your vehicle. Not all vehicles have the same roof design, and this dictates the type of rack you can use.
Raised or Factory Side Rails: Many SUVs and some wagons come with rails that run the length of the roof, raised slightly above the vehicle’s surface. These are the easiest to work with, as most crossbar systems are designed to clamp onto these rails.
Flush Side Rails: These are similar to raised rails but sit directly on the roof, with no gap underneath. They often have a channel where a specific crossbar mount can slot in. Special foot packs are designed for these.
Fixed Points: Some vehicles have small, capped mounting points concealed on the roof. These are designed for specific roof rack systems to attach securely, often requiring a custom fit kit.
Bare Roof: This is a roof with no existing rails or mounting points. For these vehicles, you’ll need a system with foot packs that grip the car’s door jambs using a specialized fit kit. This type requires meticulous attention to the fit kit and proper installation due to the contact points.
Rain Gutters: Older vehicles or specific truck models might have external rain gutters along the edge of the roof. Specialized racks are available that clamp directly onto these.
Choosing the Right Roof Rack and Crossbars
Picking the perfect roof rack system might seem daunting, but it boils down to a few key considerations. We want to make sure whatever you get is safe, sturdy, and matches what you need to carry.
1. Identify Your Vehicle Type and Roof Style
This is the absolute first step. What kind of car do you have? Look at your roof. Does it have those rails running down the sides? Are they raised, or are they flush with the roof? Or is it a smooth roof with no rails at all? Knowing this will tell you which type of roof rack system will work.
For example, an SUV with raised side rails will likely need a system designed for that. A sedan with a smooth roof will need a different kind of system that attaches at the door frames. Many websites selling roof racks have a “fit guide” where you can enter your car’s make, model, and year to see compatible options. It’s a great way to narrow down your choices quickly.
2. Determine What You’ll Carry
What’s the main reason you want a roof rack? Are you a cyclist looking to carry a few bikes to the trails? A kayaker who needs to transport a paddleboard? Or maybe you just need extra luggage space for family road trips.
Bikes: You’ll need a bike rack that attaches to your crossbars. Options include fork-mount racks (where the front fork attaches) or frame-mount racks (which grip the bike’s frame).
Skis/Snowboards: A ski carrier is designed to hold multiple pairs of skis or snowboards securely.
Kayaks/Canoes/Paddleboards: These require special carriers that often cradle or strap the watercraft securely. Some systems use rollers to help load heavier items.
Cargo Boxes (Roof Boxes): These are enclosed, aerodynamic containers that provide weatherproof storage. They’re great for luggage, camping gear, or anything you want to keep protected from the elements.
General Cargo/Large Items: You can often use cargo nets or tie-down straps directly onto the crossbars for larger, oddly shaped items, though a cargo basket can offer more containment.
The weight and size of your gear will also influence your choice. Heavier items might require sturdier crossbars and a rack system with a higher weight capacity.
3. Consider Crossbar Material and Style
Crossbars are the backbone of your roof rack system. They come in two main shapes and materials:
Square Bars: These are typically made of steel and are very strong and affordable. However, they can be noisier and aren’t as aerodynamic, which might affect fuel economy. accessories can sometimes be a tighter fit on square bars.
Wingbars/Aero Bars: These are usually made of aluminum and have an aerodynamic, wing-like shape. They are much quieter and more fuel-efficient than square bars. Most modern accessories are designed to slide into a T-slot channel on the top of these bars, making them easy to adjust.
The length of your crossbars is also important. They need to be long enough to span your vehicle’s mounting points but not so long that they overhang excessively, which can be a safety hazard and increase wind noise.
4. Weight Capacity is Key
Every roof rack system and your car’s roof itself have a weight limit. This limit includes the weight of the racks, the crossbars, and the gear you are carrying. It’s crucial to find this information out. Your vehicle’s owner’s manual is the best place to start for the roof’s capacity. The roof rack manufacturer will specify the capacity of their system.
Never exceed these limits. Overloading your roof rack can damage your vehicle, compromise your car’s handling, and, most importantly, be extremely dangerous.
5. Ease of Installation and Removal
Are you planning to keep the rack on all the time, or do you only need it for specific trips? Some systems are designed for permanent installation, while others are easier to put on and take off. If you’ll be removing it often, look for a system with quick-release levers or simple locking mechanisms. Tools might be required for some installations, so check what’s included.
6. Security Features
If you’re carrying expensive gear like bikes or a cargo box, you’ll want locks. Many modern roof rack systems come with integrated locks for the towers (the parts that attach to the car) and often for the accessories themselves. This prevents theft of both your rack and your gear.
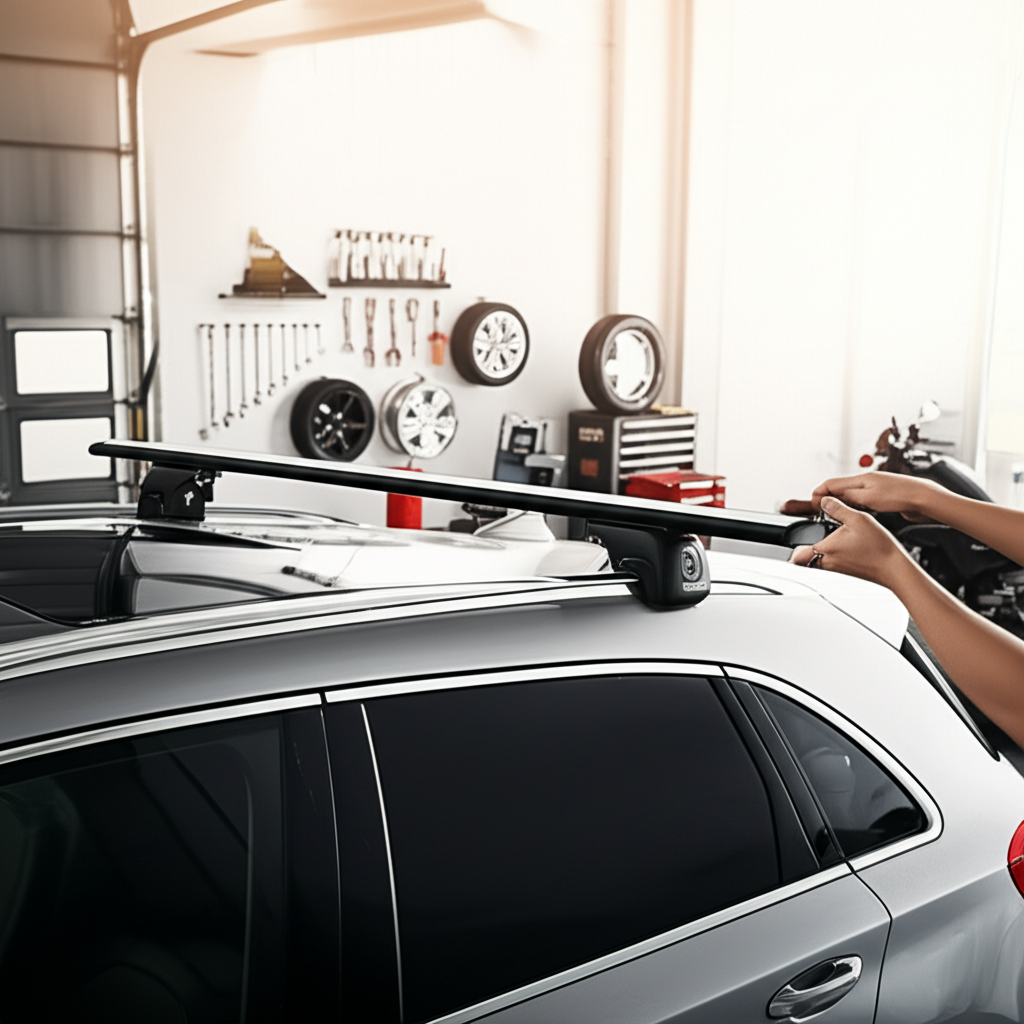
Installation Guide: Attaching Your Roof Rack and Crossbars
Installing a roof rack might seem intimidating, but by following a few simple steps, you can do it safely and securely. Always refer to the specific instructions that come with your rack system, as designs vary.
Tools You Might Need:
Measuring Tape: For ensuring even placement.
Soft Cloth or Towel: To protect your car’s paint.
The Included Tools: Most systems come with specific wrenches or Allen keys.
Possibly a Second Person: For longer vehicles or heavier racks, an extra pair of hands is very helpful.
Step-by-Step Installation (General Guide):1.
Unpack and Identify Parts: Lay out all the components and compare them to the parts list in your manual. Make sure you have everything and understand what each piece is for.
2. Attach Foot Packs to Towers (if separate): Some systems have towers and foot packs that need to be assembled or adjusted to fit your specific vehicle.
3. Mount Foot Packs to Vehicle:
For Raised/Flush Rails: Place the foot packs onto the rails at roughly the desired position. Loosely tighten them.
For Bare Roofs: Attach the specific fit kit (pads and clips) to the foot pack according to the vehicle-specific instructions. Carefully position the foot pack onto the roof, ensuring the pads sit flat and the clips engage correctly in the door jamb.
4. Position and Attach Crossbars:
Place the crossbars onto the foot packs. There will be specific points or slots for them.
Ensure they are oriented correctly (e.g., some bars have a specific front/back).
If using “T-slot” bars, slide any accessory mounts you’ll need now into the channel.
5. Tighten Securely: This is the most critical step for safety.
Work in a systematic way, tightening each foot pack gradually and evenly. For bare roof systems, you’ll often use a torque wrench or a click-indicator system on the tightening knob to ensure you reach the manufacturer’s recommended tightness. This prevents overtightening, which can damage your car, and undertightening, which can lead to the rack coming loose.
Measure the distance between the front and rear crossbars and also their overhang from the towers to ensure symmetrical placement.
6. Attach Locks (if applicable): If your system has locking cores, insert them now and turn them to secure the rack.
7. Test and Double-Check: Gently shake the rack to ensure there’s no excessive movement. Close your car doors carefully to make sure nothing is binding.Important Note: Always consult your specific roof rack and vehicle owner’s manuals. Installation methods can vary significantly between brands and vehicle types. For instance, The National Highway Traffic Safety Administration (NHTSA) provides general guidance on vehicle safety, and while they don’t specifically cover roof racks, their emphasis on proper installation and weight limits is crucial for any automotive add-on.Types of Gear You Can Carry
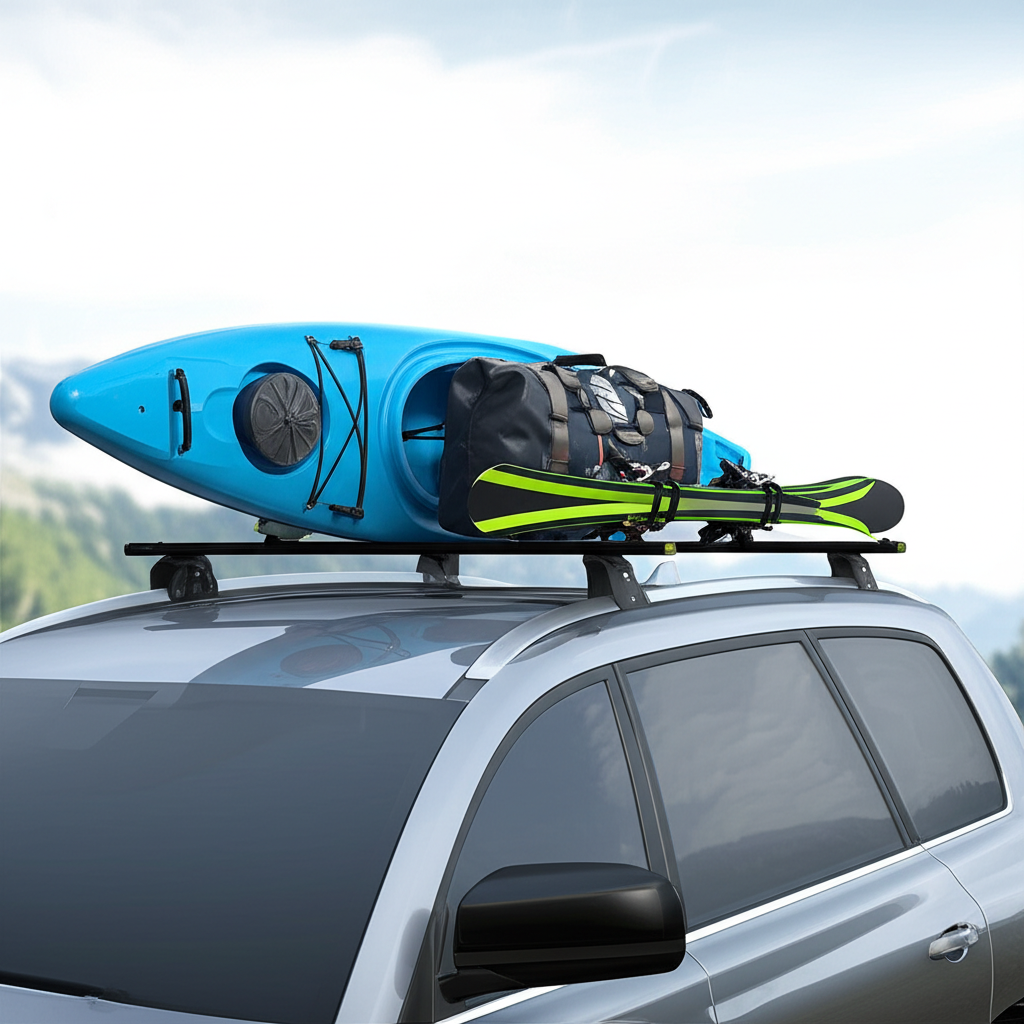
The beauty of a roof rack system is its incredible versatility. Once your crossbars are installed, they become a platform for all sorts of adventures and hauling needs.
1. Adventure Sports Gear
Bicycle Carriers: From the simple frame clamp to sophisticated fork mounts, dedicated bike racks keep your two-wheeled companions safe and sound. Each type has pros and cons regarding aerodynamics and ease of loading.
Ski and Snowboard Racks: These are essential for winter sports enthusiasts. They typically clamp onto your crossbars and have padded arms to hold skis or snowboards securely, keeping snow and slush out of your car.
Kayak, Canoe, and SUP Carriers: Whether it’s a simple J-cradle that holds your watercraft on its side or a padded saddle system, there are options for every type of paddle sport gear. Some systems even include rollers to help load heavier kayaks.2. Cargo Solutions
Cargo Boxes (Roof Boxes): These aerodynamic, hard-shell containers are fantastic for luggage, camping gear, or anything you want protected from the weather. They come in various sizes and are typically lockable for security. They are a popular choice for families going on long road trips to increase baggage capacity.
Cargo Baskets: If you have bulky, less delicate items, a cargo basket offers open-air hauling. They are great for camping gear, extra suitcases, or even for transporting muddy boots to keep your car interior clean. You’ll usually want to secure items with cargo nets or straps.
Luggage Straps and Nets: For securely fastening items directly to crossbars or within a cargo basket, strong bungee cords, ratchet straps, or cargo nets are indispensable.3. Everyday Hauling
Lumber and Building Materials: For DIY projects, a roof rack can transport long pieces of lumber or other construction materials that won’t fit inside your car. Be sure to use appropriate tie-downs and consider the weight.
Sporting Equipment: Beyond bikes and skis, think golf bags, surfboards, paddleboards, or even large tents and sleeping bags.
Furniture and Appliances: Need to pick up a bookshelf or a small table? A roof rack can be a lifesaver for transporting items that are just a bit too large for your trunk. Always secure these items properly.Tip: When choosing accessories, ensure they are compatible with your specific crossbar type (e.g., square bar vs. aero bar T-slot).Maintaining Your Roof Rack System
Keeping your roof rack in good shape ensures it lasts for years and, more importantly, stays safe. Regular maintenance is simple and doesn’t take much time.
Cleaning
After Use: Whenever you remove your rack, or at least seasonally, give it a good clean. Wash it with mild soap and water to remove dirt, grime, road salt, and any residue.
Rinse Thoroughly: Make sure to rinse off all soap to prevent corrosion or damage to your car’s paint.
Dry Properly: Use a clean towel to dry the components. For bare roof systems, ensure the pads and clips are completely dry before reinstallation to prevent moisture from getting trapped and potentially damaging your paint.Inspection
Before Each Use: Visually inspect all components for any signs of damage, such as cracks, bends, or excessive wear. Check that all bolts and screws are still tight.
Periodically: Look closely at the foot packs and how they attach to your car. Are the pads worn? Are the clips showing signs of stress? For bare roof systems, check the rubber pads for any hardening or cracking.
Check Attachments: Ensure bike racks, ski carriers, and cargo boxes are securely fastened to the crossbars.Lubrication (If Applicable)
Locks: If your rack has integrated locks, a quick spray of a dry lubricant (like graphite lubricant or a silicon-based spray) can keep them working smoothly, especially in harsh weather conditions. Avoid oil-based lubricants, as they can attract dirt.Storage
When Not in Use: If you remove your rack, store it in a clean, dry place. This could be a garage, shed, or even a large storage bin. Keeping it protected from the elements when not in use will prolong its lifespan significantly.
Bare Roof Systems: Pay special attention to storing the fit kits. These can be particularly prone to damage or getting lost due to their small size and specific shapes.A well-maintained roof rack is a reliable tool for all your adventures. Regular checks and cleaning ensure your gear stays secure and your vehicle remains protected.
Troubleshooting Common Roof Rack Issues
Even with careful installation, you might run into a few hiccups. Here are some common issues and how to solve them.
Noisy Roof Rack (Wind Whistle/Hum)
This is probably the most common complaint. Wind can create noise as it flows over the bars and towers.
Check Bar Alignment: Ensure bars are installed correctly and symmetrically.
Use Fairings: Many manufacturers offer “fairings” – curved plastic strips that attach to the front crossbar. These disrupt the airflow and significantly reduce wind noise.
Tighten Everything: Sometimes, loose parts can vibrate and cause noise. Double-check all connections.
Reduce Speed: Noise often increases with speed.
Consider Aero Bars: If noise is a constant problem, switching to more aerodynamic crossbars can make a big difference.Rack Seems Loose or Wobbly
This is a safety concern and needs immediate attention.
Re-tighten: Loosen the rack slightly, reposition it, and then re-tighten all mounting points very securely, following the manufacturer’s torque specifications if provided.
Check Fit Kit:** Ensure the correct fit kit is being used for your vehicle and that all pads and clips
Recent Posts
link to Jumper Cables With Bag: Heavy Duty Booster Cables for Easy StorageJumper Cables With Bag: Heavy Duty Booster Cables for Easy Storage
There’s nothing more frustrating than turning the key in your car and hearing silence. A dead battery can ruin your day in an instant.You might feel stuck, stressed, and unsure what to do next....
link to Strong Ram 1500 Heavy Duty License Plate Frame for Ultimate DurabilityStrong Ram 1500 Heavy Duty License Plate Frame for Ultimate Durability
There’s nothing more frustrating than struggling with a flimsy license plate frame that bends, rusts, or just doesn’t fit right on your Ram 1500. You want something strong and reliable that...
Jumper Cables With Bag: Heavy Duty Booster Cables for Easy Storage
There’s nothing more frustrating than turning the key in your car and hearing silence. A dead battery can ruin your day in an instant.You might feel stuck, stressed, and unsure what to do next....
Strong Ram 1500 Heavy Duty License Plate Frame for Ultimate Durability
There’s nothing more frustrating than struggling with a flimsy license plate frame that bends, rusts, or just doesn’t fit right on your Ram 1500. You want something strong and reliable that...