
Quick Summary: Learn to safely and securely use your roof rack with these essential tips for a stress-free journey. This guide covers choosing the right rack, proper loading techniques, securing methods, and essential maintenance to ensure cargo stays put and your adventures begin smoothly.
Hey there, car adventurers! Ever looked at a vehicle with gear piled high on its roof and thought, “How do they do that without losing everything on the highway?” If you’ve got a roof rack or are thinking about getting one, you’re in the right place. Many of us love to pack up and hit the road for camping, sports, or just a big road trip. But sometimes, our car’s trunk just isn’t enough. That’s where a roof rack comes in as a total game-changer. It’s like adding extra cargo space without buying a bigger car! But using a roof rack properly is super important for safety. Don’t worry, it’s not complicated. We’ll break down exactly how to use your roof rack safely and effectively, step-by-step. Get ready to explore with confidence!
Why You Might Need a Roof Rack
Think of a roof rack as your car’s best friend for carrying more. It’s not just for vacationers planning a cross-country drive. People use them for all sorts of reasons:
- Camping Gear: Tents, sleeping bags, and camping chairs can take up a lot of space inside your car. A roof rack lets you strap them down securely on top.
- Sports Equipment: Kayaks, bikes, skis, surfboards – if it’s long or bulky, a roof rack is probably the easiest way to transport it.
- Home Improvement Projects: Need to pick up lumber, a ladder, or perhaps a new mattress? A roof rack can handle those larger items.
- Reducing Clutter Inside: Even on shorter trips, carrying messy or bulky items on the roof keeps your car’s interior clean and comfortable for passengers.
- More Space for People: By moving cargo outside, you free up valuable interior space, making longer journeys more comfortable for everyone on board.
Types of Roof Racks: What’s Out There?
Before we get to how to use one, it’s good to know there are a few main types. Most commonly, you’ll see these:
- Crossbars: These are the basic horizontal bars that attach to your car’s roof, often connecting to raised side rails, a fixed point, or directly to your car’s door frames. This is the foundation for most other roof rack systems.
- Basket Racks: These look like a basket with raised sides and are great for carrying odd-shaped items and keeping smaller gear contained.
- Specialty Racks: These are designed for specific gear, like bike racks that hold them upright, kayak carriers that cradle your boat, or ski racks that safely secure your skis. On top of these, you might add a cargo box, which is a lockable, aerodynamic container.
Most modern roof racks are designed to fit specific vehicles or types of existing roof rails. Always ensure your rack is compatible with your car model. Websites like REI offer great guides on picking the right system for your needs.
Essential Steps on How to Use a Roof Rack Safely
Alright, let’s get down to business. Using a roof rack isn’t just about throwing your gear up there. It takes a little care and attention to make sure everything stays put and you’re driving safely.
Step 1: Determine Your Roof Rack Type and Fit
First things first, you need to know what kind of roof rack you have or will be getting. Do you have factory-installed side rails along the length of your car’s roof? Or maybe a panoramic sunroof where clips attach to the door frames? Different rack systems attach in different ways.
- Factory-Installed Side Rails: These are the most common. You’ll usually attach crossbars directly to these.
- Raised Rails: Similar to side rails, but they have a gap underneath.
- Fix-Point Systems: These use small, pre-determined mounting points on your car’s roof.
- Door-Frame (Clip) Systems: These clamp around the top edge of your car doors. These need to be very securely fitted to avoid damaging your car or falling off.
Crucially, always check your car’s manual and the roof rack manufacturer’s instructions. They will tell you exactly how the rack is meant to be installed on your specific make and model. A properly fitted rack is the foundation of safety. If you’re unsure, professional installation is a great option.
Step 2: Install Your Roof Rack Correctly
This is the most critical step. A loosely fitted rack is dangerous. Here’s a general idea:
- Read the Manual: Seriously, don’t skip this. Each rack is different.
- Assemble Components: Many racks come in a few pieces. Put them together as instructed.
- Attach to Vehicle:
- For Side Rails/Raised Rails: You’ll typically attach feet or towers to the rails and then connect the crossbars between them. Ensure they are spaced correctly for your car and for the gear you’ll be carrying.
- For Fix-Point Systems: Mounts screw into the designated points.
- For Door-Frame Systems: Measure and adjust the clips carefully into the door seam. The manual will have specific instructions for placement and tension.
- Tighten Everything: This is where “secure” really matters. Use the provided tools and tighten bolts and clamps firmly. Many systems have torque specifications – check your manual!
- Test for Stability: Once installed, try to wiggle the rack. It shouldn’t move. If it does, tighten it more.
Always use the exact hardware the rack manufacturer provides. Using unofficial bolts or clamps can compromise safety.
Step 3: Prepare Your Cargo
Before you start loading, think about what you’re carrying and how it will stack.
- Pack Smart: Distribute weight evenly. Don’t put all the heavy stuff on one side or one end.
- Use Duffel Bags or Soft Cases: These are easier to strap down and mold around other items than rigid boxes.
- Secure Loose Items: Anything that can fly out or shift needs to be tied down.
- Protect Your Car: If you’re carrying items that could scratch your cars roof (like lumber), place a blanket or cardboard underneath where the load will rest.
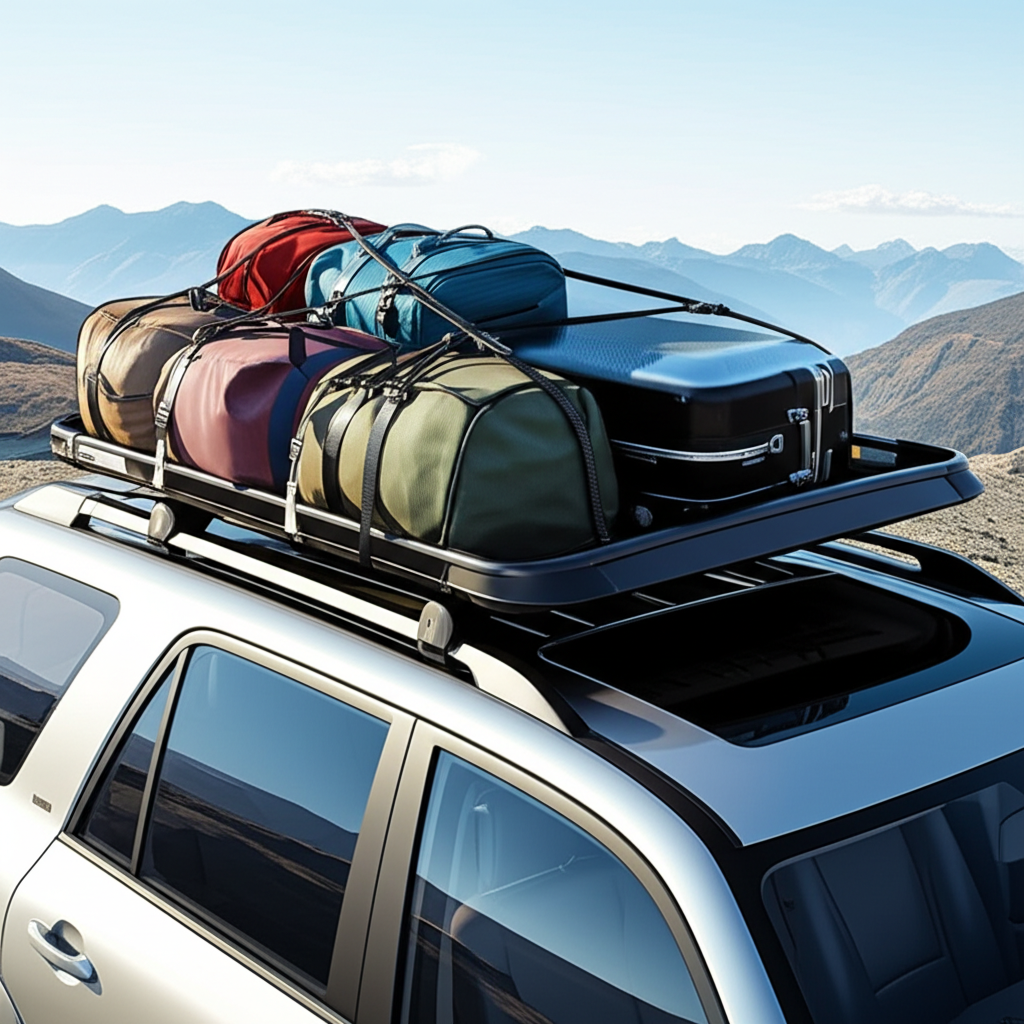
Step 4: Load Your Gear onto the Roof Rack
Loading is an art. Here’s how to do it right:
- Load Heaviest Items First: Place the heaviest, bulkiest items at the bottom and as close to the car’s center as possible. This keeps your car’s center of gravity lower and more stable.
- Distribute Weight Evenly: Spread items out across the width and length of the rack. Avoid concentrating all the weight at the front or back.
- Don’t Overload: Check the weight limit for both your roof rack system and your car’s roof. Overloading can damage your car and affect handling. A common limit for many car roofs is around 150 lbs (68 kg), but this can vary significantly. Always consult your vehicle’s owner’s manual for the specific roof load limit.
- Stack Securely: If stacking items, make sure the lower items are stable and won’t compress unevenly under the weight of the items above.
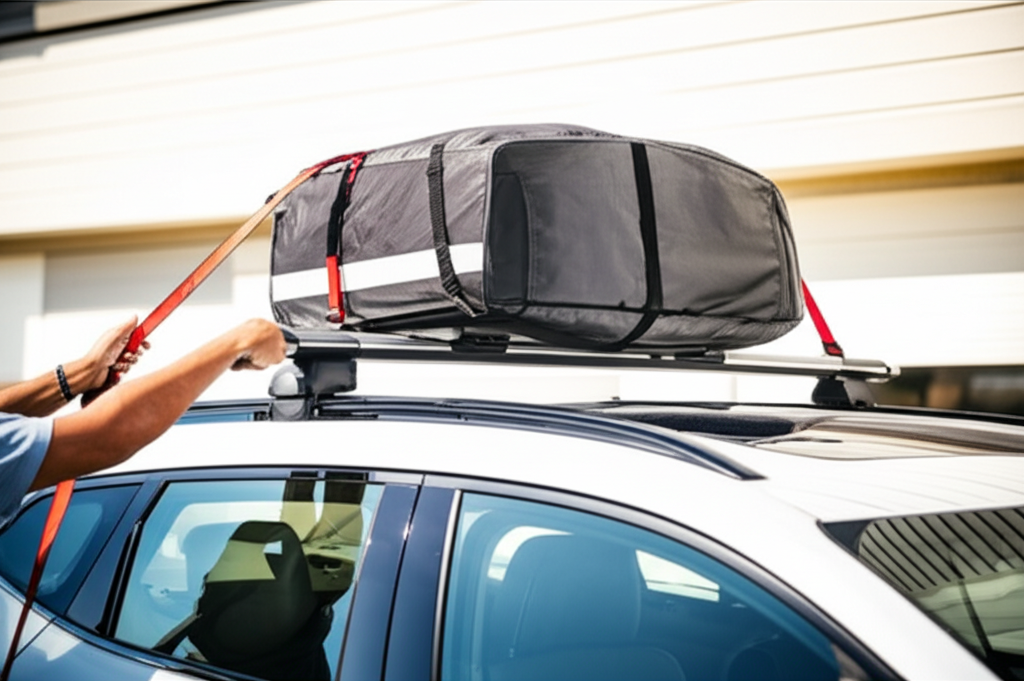
Step 5: Secure Your Cargo Tightly
This is where most people can improve. A loose load is a hazard. You’ll want good tie-down straps.
- Use Proper Straps: Ratchet straps or strong, cam-buckle straps are ideal. Avoid bungee cords; they can stretch and fail.
- Tie Down Everything: Every item, or group of items, needs to be secured.
- Anchor Points Matter: Use the crossbars and any integrated tie-down points on your rack. If you have a basket rack, use the basket walls.
- Crossing Straps:** Ideally, straps should cross over the load and anchor on opposite sides of the rack. This provides the best stability. For long items like kayaks or lumber, you may need additional straps to secure them to the front and rear of your vehicle (tie-downs to the bumper or frame are strongest).
- Check Strap Tension: Straps should be snug. But don’t overtighten to the point you’re deforming your cargo or damaging the rack.
- Tie Down Ends: For long items like skis or lumber, ensure the front and back ends are also secured, often with separate ropes or straps tied to the vehicle’s frame or tow hooks, to prevent shifting.
Always ensure your straps aren’t rubbing against sharp edges that could fray them. Consider strap protectors if needed.
Step 6: Test Your Load Before Driving
Before you pull out of the driveway, give everything a good shake.
- Push and Pull: Try to move the cargo by hand. It should feel solid and unmoving.
- Check Straps Again: Ensure all buckles and ratchets are locked, and tension hasn’t loosened.
- Visual Check: Look from all angles to make sure no part of your load is sticking out precariously or looks unstable.
Step 7: Drive Cautiously and Re-Check
Your first few miles are a test drive for your load.
- Start Slow: Drive at low speeds around your neighborhood. Listen for any unusual noises, flapping, or shifting.
- Gentle Turns and Brakes: Pay attention to how the extra weight affects your car’s handling, especially when turning or braking.
- The 50/50 Rule: A good practice is to stop and re-check your cargo and straps about 50 miles or 50 minutes into your trip. Things can settle, and straps can loosen slightly.
- Regular Checks: For longer trips, make it a habit to stop and check your load every couple of hours or after driving over rough terrain.
Important Considerations for Roof Rack Usage
Using a roof rack changes how your car behaves. Keep these points in mind:
Weight Limits
This is crucial. Every roof rack and every vehicle has a maximum weight capacity for the roof. Exceeding this can:
- Damage your car’s roof structure.
- Cause the rack to detach, leading to a dangerous situation.
- Reduce your car’s stability and handling.
Always consult your vehicle’s owner’s manual for the specific roof load limit. A general guideline for many cars is around 150 lbs (68 kg), but it can vary dramatically. The rack manufacturer will also state its own weight limit, which you must not exceed if it’s lower than your car’s limit.
Aerodynamics and Fuel Efficiency
A roof rack, especially when loaded, creates drag. This means:
- Increased Fuel Consumption: You’ll likely use more gas.
- Wind Noise: Even an empty rack can make a noticeable humming noise at higher speeds.
For best fuel economy, remove the rack when you’re not using it. For loaded racks, especially with bulky items like kayaks or bikes, expect a significant hit to your miles per gallon. Consider using aerodynamic cargo boxes if fuel efficiency is a major concern.
Height Clearance
This is a big one people forget! Your car is now taller than you’re used to.
- Parking Garages: Many parking garages have height restrictions. Always check signs or know your vehicle’s new height.
- Drive-Thrus: Be mindful of low-hanging signs and awnings at drive-thrus.
- Tunnels and Bridges: Some older tunnels or bridges might have lower clearances.
Generally, a roof rack can add anywhere from 2-6 inches (5-15 cm) or more to your vehicle’s height, depending on the rack type and how you load it. If you have a very tall load, your vehicle could easily exceed 8 feet (2.4 meters).
Weather Conditions
Rain, snow, and strong winds can all affect your load.
- Rain/Snow: Waterproof your gear inside bags. Loose items might get wet.
- Wind: High winds are a major concern. A properly secured load is essential. If winds are extreme, consider delaying your trip or finding a safer way to transport items. Be extra cautious on exposed bridges or during storms.
Maintenance for Your Roof Rack
A little care will make your roof rack last longer and keep it safe.
- Clean Regularly: Wash it off with gentle soap and water, especially after trips involving salt, mud, or dirt.
- Inspect for Damage: Look for cracks, dents, or signs of wear on the bars, feet, and mounting hardware.
- Check Hardware: Periodically make sure all bolts and clamps are still tight, especially after the first few uses and before heavy trips.
- Lubricate Moving Parts: If your rack has adjustable parts or locks, a light application of a lubricant can keep them working smoothly.
- Proper Storage: When not in use, store your rack in a clean, dry place to prevent corrosion and damage.
Proper care ensures your rack remains a reliable and safe accessory for all your adventures. Many manufacturers provide detailed care instructions; it’s worth checking them out. For example, Thule, a popular brand, offers a lot of helpful resources on their website regarding product care and maintenance.
Table: Common Roof Rack Loading Mistakes & How to Avoid Them
Here’s a quick look at what not to do:
| Common Mistake | Why It’s Bad | How to Avoid It |
|---|---|---|
| Loose Straps | Cargo can shift, fall off, or cause accidents. | Use quality straps, tighten them firmly, and re-check tension regularly. |
| Overloading | Damages car roof, affects handling, dangerous. | Know your car’s and rack’s weight limits. Distribute weight evenly. |
| Uneven Weight Distribution | Makes car unstable, harder to control. | Place heaviest items at the bottom and center. Spread weight across the rack. |
| Using Bungee Cords | They stretch and can break, letting cargo loose. | Use ratchet straps or cam-buckle straps designed for load security. |
| Forgetting Height Clearance | Damage to car, rack, and overhead structures/signs. | Be aware of your increased vehicle height. Check all clearance signs. |
| Not Securing Front/Back of Long Items | Long items can slide forward or backward, especially during braking. | Use additional tie-downs (like ropes) connecting to the vehicle’s frame for kayaks, lumber, etc. |
Frequently Asked Questions (FAQ) about Roof Racks
Q1: How do I know if my car can even have a roof rack?
A1: Most cars can accept a roof rack. Look for existing side rails, fix-points, or check if your car model is compatible with door-frame (clip-on) rack systems. If you’re unsure, check your car’s manual or consult a reputable rooftop cargo specialist.
Q2: What’s the best way to secure a surfboard or kayak?
A2: Use specialized carriers designed for these items, like J-cradles for kayaks or padded racks for surfboards. Always use multiple strong straps (ratchet or cam-buckle) threaded through the rack’s crossbars and around the watercraft. For kayaks, consider using bow and stern tie-downs that connect to the vehicle’s front and rear for maximum security.
Q3: Can I leave a roof rack on my car all the time?
A3: You can, but it’s often not recommended. An empty roof rack creates wind noise and reduces your fuel efficiency. It’s best to remove it when not in use so your car performs better. Also, leaving it on might expose it to unnecessary wear and tear from the elements.
Conclusion
Using a roof rack safely isn’t complicated — it’s all about preparation, balance, and maintenance. By choosing the right rack for your vehicle, loading and securing your gear properly, and keeping up with regular checks, you can travel confidently knowing your cargo is secure. Whether you’re heading out for a weekend adventure or tackling a big move, a well-used roof rack transforms your car into a capable, adventure-ready machine. Drive smart, stay aware of your limits, and enjoy the freedom that comes with extra space and peace of mind on every journey.
Recent Posts
Console for Car: Ultimate Organizers and Accessories for Clutter-Free Rides
Have you ever reached for your sunglasses or phone while driving, only to have them slip into the tiny gap between seats? It’s a small moment, but it can cause big frustration.These little...
Don't let a cold car ruin your morning drive. We've found the best heated seat pads for instant, toasty warmth and ultimate comfort.