
Quick Summary
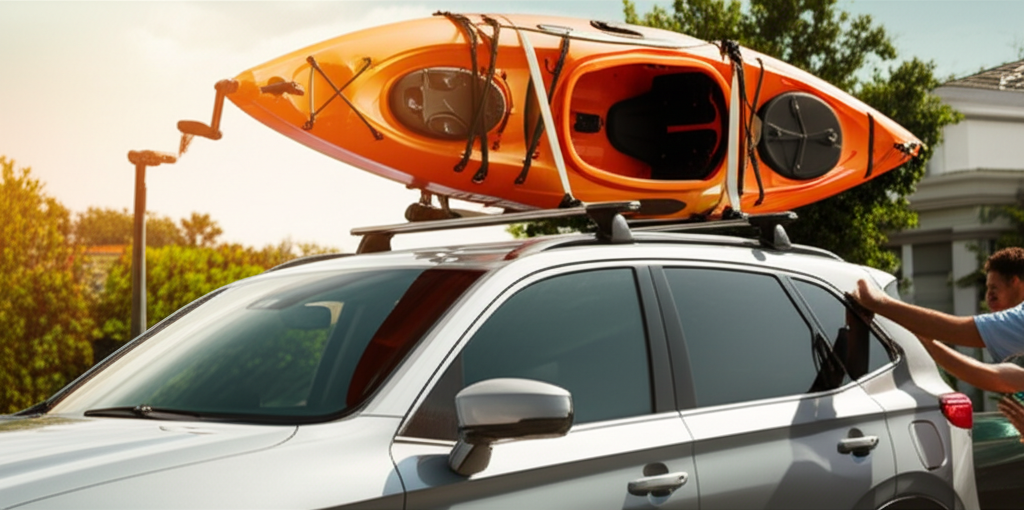
Securing your kayak on a car roof rack is a straightforward process with the right steps. This guide shows you exactly how to safely load, strap, and tie down your kayak, ensuring a worry-free trip to the water. Follow along for easy-to-understand instructions that build your confidence.
Getting your kayak from home to your favorite paddling spot should be an exciting part of the adventure, not a source of stress. Many car owners find loading a kayak onto a roof rack a bit daunting at first. Questions like “Is it secure?” or “Will it damage my car?” are common. But don’t worry! With a little guidance, you can master this skill quickly and safely. This guide is designed to break down the process into simple, manageable steps, making it easy for anyone to transport their kayak confidently. We’ll cover everything from choosing the right rack to making sure your kayak is perfectly secured for the journey.
Why a Kayak Roof Rack is Your Paddling Partner
A kayak roof rack is more than just an accessory; it’s an essential tool for any kayaker who doesn’t own a truck or SUV with a large cargo area. These racks allow you to safely and securely transport your kayak on the roof of almost any vehicle, from compact sedans to larger SUVs. This opens up a world of possibilities, letting you explore new waterways without being limited by your car’s interior space. Investing in a good kayak roof rack system means protecting your kayak from potential damage that might occur if you tried to squeeze it into an unsuitable space, and it also ensures your kayak is stable during transit.
Types of Kayak Roof Racks
Before we dive into how to use a kayak roof rack, it’s helpful to know the common types available. Each has its own way of holding your kayak, and understanding them can help you appreciate the loading process better.
- J-Cradles: These racks are shaped like a “J” and hold the kayak on its side. They are great for saving space, often allowing you to carry multiple kayaks on a single vehicle.
- Saddle Racks: These have padded saddles that conform to the hull of your kayak, carrying it upside down or right-side up. They offer excellent support and are good for wider kayaks.
- Platform Racks: These are larger, flat racks that kayaks can be placed directly onto, often with integrated tie-down points. They are very versatile.
- Kayak Carriers with Rollers: Some systems include rollers that make it much easier to slide a heavy kayak up onto the rack, especially if you’re loading by yourself.
Essential Gear You’ll Need
To successfully and safely use your kayak roof rack, having the right equipment is key. Here’s a quick checklist of what you’ll want handy:
- The Kayak Roof Rack System: This includes the crossbars and the specific kayak carriers (J-cradles, saddles, etc.).
- Strap System: Typically, cam straps are used for securing the kayak to the rack. These are strong nylon straps with a quick-release buckle.
- Bow and Stern Tie-Downs: Separate ropes or straps that secure the front and back of your kayak to your vehicle’s frame or specific tie-down points. This is crucial for stability.
- A Step Stool or Ladder (Optional but Recommended): Especially for taller vehicles, this makes loading and unloading much easier and safer.
- Gloves (Optional): To protect your hands while lifting and strapping.
Step-by-Step Guide: How to Use Your Kayak Roof Rack
Let’s walk through the process of getting your kayak from the ground to your car’s roof, securely and safely. We’ll break it down into simple, actionable steps.
Step 1: Prepare Your Vehicle and Rack

Before you even think about lifting the kayak, make sure your car is ready. You’ll want to position your car in a way that makes loading as easy as possible. If you have a second person, it makes this much simpler. Ensure your car’s roof rack crossbars are correctly installed and tightened according to the manufacturer’s instructions. It’s also a good idea to check that your kayak carriers (J-cradles, saddles, etc.) are securely attached to the crossbars. A loose rack is a recipe for disaster, so a good foundational check is vital. Check out the Department of Transportation’s recommendations on vehicle accessories for general safety awareness.
Step 2: Position the Kayak
This is often the trickiest part, especially if you’re working alone. If you have a helper, position yourselves on either side of the kayak and the car. Lift the kayak in unison. Aim to place the kayak onto the roof rack, aligning its hull or deck with the carriers. If using saddle racks, ensure the kayak rests evenly on the padded saddles. For J-cradles, you’ll typically be lifting the kayak so it rests on its side within the cradle. Some kayak carriers have rollers to assist if you’re loading from the rear. If you’re solo, you might need to use a technique where you lift one end onto a cushion or block, then pivot the kayak or slide it onto the rack.
Step 3: Secure the Kayak with Straps Directly to the Rack
Once the kayak is resting on the carriers, it’s time to strap it down. Use your cam straps. Thread one strap over the kayak and under the crossbar on one side, then back over the kayak and under the crossbar on the other side. Pull the strap taut. Engage the cam buckle to tighten it securely. You don’t want the strap to be so tight that it deforms the kayak’s hull, but it should be snug enough that the kayak feels firmly attached. Repeat this with a second strap, ideally spaced apart to distribute the pressure evenly. Most kayak rack systems will have specific points or loops for attaching these straps. If your rack system doesn’t have integrated tie-down points, you might need to loop the straps around the crossbars themselves. For example, many Thule and Yakima systems utilize the crossbar for strap attachment.
Step 4: Attach Bow and Stern Tie-Downs
This step is critical for preventing the kayak from shifting forward or backward, especially during sudden stops or turns. Here’s where you’ll use separate ropes or specialized tie-down straps.
Bow Tie-Down: Find a secure attachment point on the front of your vehicle, like a tow hook or a designated under-hood strap (often found in modern SUVs and trucks). Attach one end of your rope/strap here. Then, find a strong point on the bow of your kayak (usually a handle or loop). Connect the other end of the rope/strap.
Stern Tie-Down: Do the same for the rear of your vehicle and the stern of your kayak. Look for similar secure attachment points on your car’s frame.
Tightening: Pull the bow and stern tie-downs snug. They should be taut but not overly strained. The goal is to eliminate any front-to-back movement of the kayak. These straps are often overlooked but are vital for overall safety.
Step 5: Double-Check Everything
Before you hit the road, give everything a thorough inspection.
Wiggle Test: Try to push and pull the kayak in all directions. It should feel solid and not move independently of the car.
Strap Check: Ensure all cam straps are tight and the buckles are locked. Check that the bow and stern tie-downs are snug.
Visual Inspection: Look for any areas that seem loose or might rub inappropriately.
Listen: During your first short drive (e.g., around the block), listen for any flapping noises or unusual sounds. If you hear something, pull over and re-check your straps.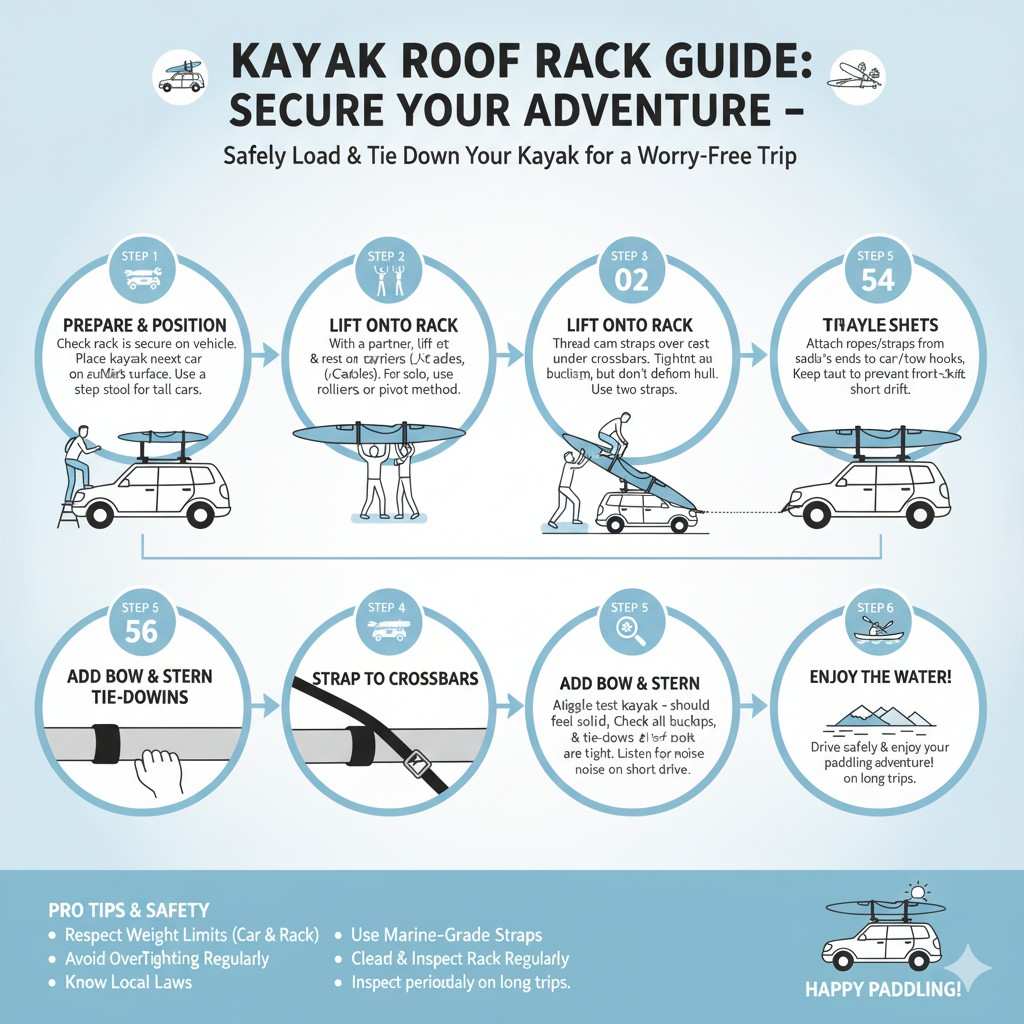
Tips for Solo Kayak Loading
Loading a kayak alone can be challenging, but it’s entirely doable with the right techniques and a bit of practice.
Kayak Weight: If possible, choose lighter kayaks or consider models designed for easier portability.
Loading Ramps/Rollers: Many roof rack systems offer accessories like loading ramps or rollers that attach to the rear of your car. You can rest the stern of the kayak on the rollers and then lift and slide it onto the rack.
Two-Person Assistance: If your car is particularly tall or your kayak is heavy, a friend makes a huge difference. Even a brief assist can make the process much easier.
Parking Strategy: Park your car adjacent to a slight incline or a grassy area. This can sometimes reduce the effective height you need to lift the kayak.
Get a Kayak Cart: Use a kayak cart to transport your kayak from the water to your car. This way, you’re only lifting it onto the rack, not carrying it the whole distance.
Safety Considerations and Best Practices
Safety should always be your top priority when transporting a kayak. Here are some crucial points to remember:
- Respect Weight Limits: Always adhere to the weight limits specified by your vehicle manufacturer for the roof load, and also the limits of your roof rack system and kayak carriers. Overloading can damage your car’s roof or the rack itself.
- Use the Right Straps: Ensure your cam straps and tie-downs are rated for the load and are in good condition. Inspect them for wear and tear before each trip.
- Proper Tightness: Over-tightening can damage your kayak’s hull, especially composite kayaks. Aim for snug and secure, not crushing.
- Know Your Local Laws: Some regions have specific regulations about securing loads on vehicles. Make sure you’re compliant.
- Avoid Distractions: Focus entirely on loading and securing your kayak. Rushing can lead to mistakes and potential injury.
- Consider Kayak Covers: While not directly related to strapping, a kayak cover can protect your boat from the elements and road grime during transport.
Common Mistakes to Avoid
Even experienced paddlers can sometimes make mistakes. Being aware of these common pitfalls can help you prevent them:
- Not using bow and stern tie-downs: Relying only on straps to the crossbars leaves your kayak vulnerable to shifting. They are essential for stability.
- Loose straps: Straps that aren’t tight enough will allow the kayak to move, which can be dangerous and could cause damage.
- Over-tightening straps: As mentioned, this can warp or break your kayak.
- Forgetting to check: A quick “wiggle test” before driving can save a lot of trouble.
- Using the wrong tie-down points: Securing to plastic bumpers or trim on your car won’t be strong enough. Always use solid metal frame points.
- Ignoring crossbar height: For very tall SUVs or vans, consider if you can comfortably and safely reach to secure the kayak.
Maintenance for Your Kayak Roof Rack
Your kayak roof rack system is an investment, and a little maintenance will ensure it lasts a long time and remains reliable.
Clean Regularly: After trips, especially if you’ve been in saltwater or muddy conditions, rinse down your rack and carriers with fresh water. This prevents corrosion and buildup.
Inspect for Damage: Periodically check all components (crossbars, carriers, straps) for any signs of wear, cracks, or damage. Replace any faulty parts immediately.
Lubricate Moving Parts: If your rack has any adjustable or moving components, a bit of lubricant (like silicone spray) can keep them working smoothly.
Check Tightness: Even when not in use, it’s good practice to periodically ensure that the rack is still firmly attached to your vehicle’s mounting points and that the carriers are secure on the crossbars.
Troubleshooting Common Loading Issues
Here’s how to tackle some common problems you might encounter:
| Problem | Solution |
|---|---|
| Kayak doesn’t fit evenly on saddles. | Adjust the position of the saddles on the crossbars. Ensure the kayak is centered and resting on all contact points. Some saddles can be angled. |
| Straps slip easily. | Ensure you are threading the strap correctly through the cam buckle. Make sure the strap is not twisted and that the camouflage pattern is facing the correct way (if applicable) for grip. Clean straps if they are dirty or wet. |
| Struggling to reach bow/stern tie-down points. | Use a longer rope or strap, or consider a flexible tether that attaches to a more accessible point. A small step stool can also help. |
| Kayak feels unstable after loading. | Re-check all straps and tie-downs. Ensure they are significantly tightened. Confirm that the kayak is sitting snugly within its carriers. Make sure the crossbars themselves are securely mounted to the vehicle. See a guide on basic kayak rack setup for more details on securing methods. |
| Concerned about vehicle paint damage. | Use protective materials like foam padding or micro-cloth between the rack’s clamps and your car’s paint. Be extra careful when loading and unloading to avoid accidental contact. |
FAQ: Your Kayak Rack Questions Answered
Q1: How tight should my kayak roof rack straps be?
Your kayak straps should be snug and firm, but not so tight that they visibly deform your kayak’s hull. The goal is to prevent any movement, but over-tightening can cause damage to both the kayak and the rack system. You should feel resistance when you try to move the kayak by hand.
Q2: Do I really need bow and stern tie-downs if my kayak is strapped to the rack?
Yes, absolutely! Bow and stern tie-downs are crucial for safety and stability. They prevent the kayak from shifting forward or backward during acceleration, braking, or strong winds, which can be very dangerous. They are just as important as the straps securing the kayak to the crossbars.
Q3: Can I just use any rope for tie-downs?
It’s best to use a strong, nylon or polyester rope specifically designed for load securing. Avoid thin cords or natural fibers like cotton, which can stretch, fray, or break. Specialty tie-down straps with cam buckles or ratchets are even better, as they offer more secure fastening and easier adjustment. Always check that your tie-down material has a sufficient weight rating.
Q4: How do I know if my car can handle a kayak roof rack?
Most vehicles can accommodate a kayak roof rack. You’ll need to ensure your car has appropriate mounting points for crossbars (door frames, existing rails, or factory-installed points). Always check your vehicle’s owner’s manual and the roof rack manufacturer’s specifications for the maximum weight capacity of the roof load. Exceeding this can be dangerous and damage your car.
Q5: What if my kayak seems too heavy to lift onto the roof alone?
If your kayak is heavy, consider using a kayak cart to get it to your car, or invest in a roof rack system with loading assistance features like rollers or a tilting mechanism. For very heavy kayaks, it’s highly recommended to get a second person to help with loading and unloading. Safety first!
Q6: How often should I inspect my kayak roof rack?
You should perform a quick visual inspection before every trip. A more thorough inspection for wear, damage, and tightness of all components should be done at least once a month, or before any long journeys. Cleaning your rack after use, especially in harsh conditions, will also help prolong its life.
Conclusion
Mastering the use of a kayak roof rack is a fundamental skill for any paddler looking to explore beyond their local waters. By following these step-by-step instructions, understanding the importance of sturdy tie-downs, and committing to regular checks, you can ensure your kayak travels safely and securely to every destination. Remember, the key is preparation, attention to detail, and using the right gear correctly. Don’t let the thought of loading your kayak deter you from your next adventure. With a little practice, you’ll find it becomes a routine part of your paddling ritual. So, secure your kayak, hit the road, and enjoy the freedom of the open water!
Recent Posts
Jumper Cables With Bag: Heavy Duty Booster Cables for Easy Storage
There’s nothing more frustrating than turning the key in your car and hearing silence. A dead battery can ruin your day in an instant.You might feel stuck, stressed, and unsure what to do next....
Strong Ram 1500 Heavy Duty License Plate Frame for Ultimate Durability
There’s nothing more frustrating than struggling with a flimsy license plate frame that bends, rusts, or just doesn’t fit right on your Ram 1500. You want something strong and reliable that...