
Quick Summary: Transporting a kayak safely and easily is achievable with the right approach! Whether you own a roof rack or not, this guide provides simple, step-by-step methods, essential gear, and clever tips to get your kayak from point A to point B without any stress. Learn how to secure your kayak for a smooth journey.
Hey there, fellow adventurers! Ever get that feeling of excitement about hitting the water, only to be met with the huge question mark of “How on earth do I get my kayak there?” It’s a common hurdle, especially when you’re just starting out. Lugging a kayak can seem daunting, but don’t let that stop you from enjoying your paddling adventures. We’re here to break down all the best ways to transport your kayak, making it super simple and safe. Think of me as your automotive buddy, here to guide you through this with clear, easy steps.
We’ll cover everything from using basic car features to smart gear choices, even if you don’t have a fancy roof rack. By the end of this guide, you’ll feel confident and ready to load up your kayak and head out to your favorite lake or river. Let’s make getting your kayak to its watery destination as enjoyable as the trip itself!
Your Kayak Transport Toolkit: Essential Gear for a Smooth Ride
Before we dive into the different methods, let’s talk about the gear that makes kayak transport a whole lot easier and safer. Having the right tools on hand can turn a potentially frustrating job into a breeze. Think of these as your trusty companions for every journey.
Securing Your Kayak: The Backbone of Safe Transport
The most critical part of transporting your kayak is securing it properly. This protects your kayak, your vehicle, and other drivers on the road. Here are the must-have items:
- Straps (Cam Straps or Ratchet Straps): These are essential. Cam straps are generally preferred for kayaks as they offer a gentler hold and are less likely to over-tighten and damage the hull. Ratchet straps can work but require a lighter touch. Look for straps specifically designed for watercraft or outdoor gear, usually 10-15 feet long.
- Bow and Stern Tie-Downs: These are crucial for preventing the kayak from lifting or shifting during transit. They connect the front and back of your kayak to secure points on your car.
- Padding: To protect both your kayak and your vehicle, consider using pool noodles, foam blocks, or specialized kayak saddle pads. These go between the kayak and the car’s surface.
- Kayak Carrier/Rack System (Optional but Recommended): If you plan on transporting your kayak regularly, a rack system is a great investment. Options include roof racks, hitch-mounted racks, or truck bed racks.
- Gloves: Kayaks, especially plastic ones, can have sharp edges. Gloves will save your hands during loading and unloading.
- Tarp or Blanket (Optional): For extra protection against scratches, especially when sliding the kayak onto a rack or bed.
Making Loading & Unloading Easier
These accessories can significantly reduce the physical strain involved:
- Kayak Cart or Dolly: For moving your kayak from the parking area to the water’s edge, a cart is a lifesaver. They come with wheels and a frame to support your kayak.
- Loading Assist Systems: Some roof racks have rollers or slides that help you get the kayak onto the roof more easily.
- Shoulder Straps for Kayak: These distribute the weight of the kayak across your shoulders and chest, making it easier to carry short distances.
How to Transport Kayak Without a Roof Rack: Clever Solutions
Don’t have a roof rack? No problem! Many drivers find clever ways to transport their kayaks using their vehicle’s existing features or simple, affordable accessories. These methods are perfect for occasional trips or if you’re on a budget.
Method 1: In-Bed Truck Transport
If you’re lucky enough to have a pickup truck, the bed offers a spacious and stable platform for your kayak. This is often the easiest method if your kayak fits.
Steps:
- Clean the Truck Bed: Ensure the bed is free of debris that could scratch your kayak.
- Position the Kayak: Gently place the kayak in the truck bed. You can lay it flat with the hull down, or on its side, depending on what best suits your kayak and truck bed. For longer kayaks that extend beyond the tailgate, make sure the rear is properly supported.
- Secure the Kayak: This is the most important step.
- Use at least two sturdy straps to secure the kayak to the tie-down points in the truck bed. Position the straps around the widest part of the kayak (beam) if possible.
- If the kayak extends significantly beyond the tailgate, use a red flag to increase visibility or consider a tailgate extender.
- Add Bow and Stern Tie-Downs: To prevent the kayak from shifting forward or backward, attach tie-downs from the bow of the kayak to a sturdy point on the front of your truck (like a tow hook or frame) and from the stern to a secure point at the rear.
Pros:
- Very stable.
- Minimal height, making it easy to load.
- No need for specialized racks on the vehicle itself.
Cons:
- Requires a pickup truck.
- Kayak takes up the entire bed, limiting other cargo.
- Long kayaks may require additional support or permit for overhang.
Method 2: Using Pool Noodles or Foam Blocks (Car Sedans, SUVs, Hatchbacks)
This is a popular and effective way to transport a kayak on the roof of a car without a dedicated roof rack system. It relies on the strength of your vehicle’s doors and pillars.
Steps:
- Prepare Your Vehicle: Open all four doors of your vehicle.
- Place Padding: Cut pool noodles lengthwise and slip them over your car’s roof rails if you have them, or directly onto the roof. If you don’t have rails, place foam blocks on the roof where the kayak will rest. These act as cushions.
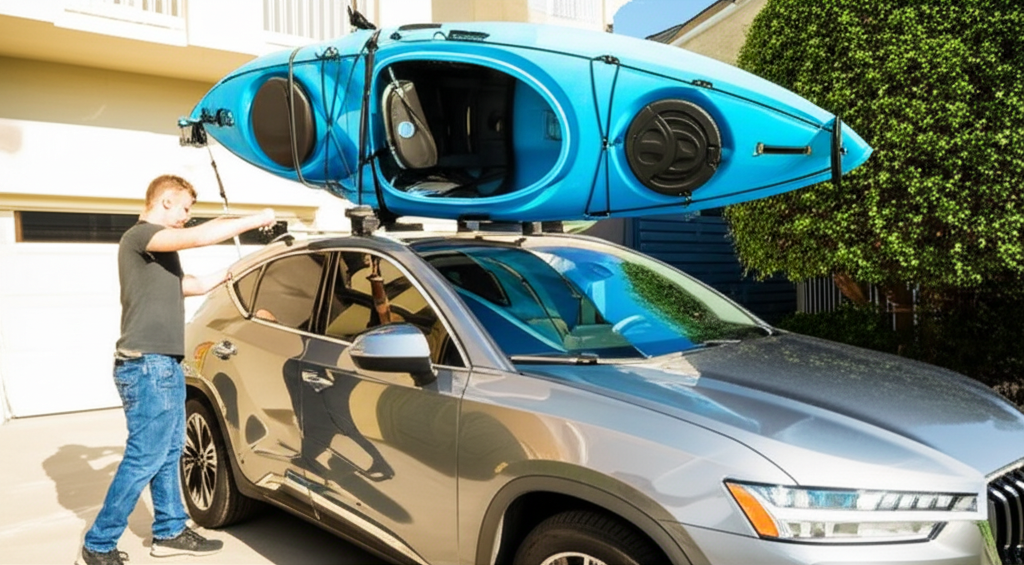
- Position the Kayak: With help, carefully lift the kayak and place it upside down (hull up) or on its side onto the pool noodles or foam blocks. Position it so that it’s centered and balanced. The bow should extend slightly over the windshield and the stern over the rear window.
- Secure with Straps: This is where the magic happens.
- Thread one strap through the inside of the car, over the kayak, and buckle it on the other side. Do this for the front and rear positions. Ensure the straps are snug but not so tight that they deform the kayak.
- For the bow and stern tie-downs, you’ll need to find secure anchor points on your vehicle’s frame. This might involve looping straps around the tow hooks (often found behind removable panels on the bumper) or using specialized hood/trunk anchors. A great resource for finding these anchor points is often found on kayak community forums or manufacturer websites.
- Check for Stability: Gently push and pull the kayak. It should feel very secure and not move significantly.
Pros:
- Very affordable solution.
- Works for many sedan and SUV models.
- Relatively simple to set up once you understand the tie-down method.
Cons:
- Requires significant physical effort and at least two people.
- DIY method requires careful attention to detail for safety.
- May not be suitable for very heavy or long kayaks.
- Check local laws regarding windshield and rear window obstruction.
Method 3: Hitch-Mounted Kayak Carriers
If your vehicle has a trailer hitch, a hitch-mounted carrier is a fantastic option. These systems allow you to carry kayaks low to the ground, making loading much easier.
Steps:
- Install the Hitch Carrier: Slide the hitch-mounted carrier into your vehicle’s receiver hitch and secure it with the hitch pin.
- Assemble/Adjust Carrier: Follow the manufacturer’s instructions to assemble or adjust the carrier for your kayak’s size. Some carriers are simple bars, while others have cradles or saddles.
- Load the Kayak: With help, lift the kayak onto the carrier. If it’s a higher hitch, you might still need a step stool.
- Secure the Kayak: Use straps to firmly attach the kayak to the carrier. Ensure it’s stable and won’t move.
- Add Bow and Stern Tie-Downs: As with other methods, secure the bow and stern to robust anchor points on your vehicle.
Pros:
- Much easier loading, especially for taller vehicles.
- Carries kayaks lower, reducing wind resistance and sway.
- Can often carry multiple kayaks.
Cons:
- Requires a trailer hitch on your vehicle.
- Can be an expensive accessory.
- May increase your vehicle’s length, affecting maneuverability.
When You DO Have a Roof Rack: Maximizing Its Potential
If you have a factory-installed or aftermarket roof rack, you’re already steps ahead. But there are still choices to make about how you’ll attach your kayak.
Method 4: Saddle or Roller Racks
These are specialized accessories designed to hold kayaks on a roof rack. Saddles contour to the kayak’s hull, while rollers help with loading. For this method, you’ll need a base roof rack system first.
Steps:
- Install Base Roof Rack: If you don’t have one, install a quality base roof rack system suitable for your vehicle. Check resources like NHTSA guidance on roof racks to understand weight limits and proper installation.
- Attach Kayak Saddles/Rollers: Mount the saddles or roller system onto your base crossbars according to the manufacturer’s instructions.
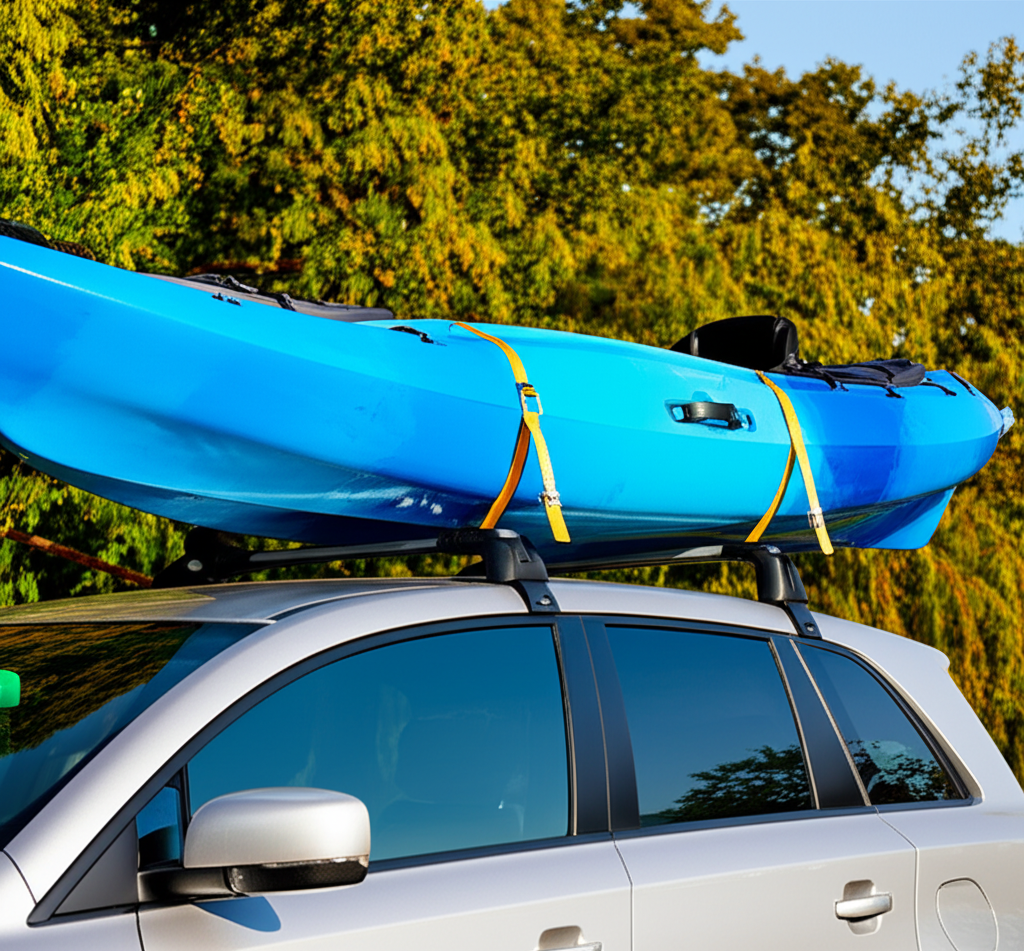
- Load the Kayak: With saddles, you’ll lift the kayak hull-down onto the saddles. With rollers, you might tilt the kayak and let the rollers assist in sliding it onto the rack.
- Secure and Strap: Place the kayak firmly in the saddles and secure it using the integrated straps or your own cam straps.
- Bow and Stern Tie-Downs: Always connect bow and stern tie-downs to secure the kayak from front-to-back movement.
Pros:
- Designed specifically for kayaks, offering excellent support and protection.
- Reduces risk of hull damage.
- Rollers significantly ease the loading process.
Cons:
- Can be expensive.
- Requires investing in a base roof rack system and the specialized carriers.
- Loading height can still be a challenge for shorter individuals.
Method 5: J-Cradles or Angled Carriers
These carriers hold the kayak on its side, often freeing up space on your roof rack if you need to carry more than one kayak or other gear.
Steps:
- Install Base Roof Rack: Same as Method 4, ensure you have a compatible base rack.
- Attach J-Cradles: Mount the J-cradles to your base crossbars.
- Load the Kayak: Lift the kayak and position it on its side in the J-cradle.
- Secure the Kayak: Use the straps provided with the J-cradle or your own sturdy straps to firmly attach the kayak.
- Bow and Stern Tie-Downs: Don’t forget these essential additions for stability.
Pros:
- Saves space on the roof rack for other items.
- Can be easier to load than flat saddles for some.
Cons:
- Kayaks stored on their side can be more susceptible to side impact damage.
- May not be suitable for all kayak hull shapes.
Crucial Safety Tips for Transporting Your Kayak
Transporting a kayak isn’t just about getting it from point A to point B; it’s about doing it safely. A loose kayak can cause serious accidents. Here are some non-negotiable safety checks:
- Always Use Two People: Especially for lifting. Safety first!
- Inspect Straps and Tie-Downs: Before every trip, check that all straps are in good condition, not frayed, and properly buckled.
- Double-Check Tightness: After driving a short distance (about 5-10 miles), pull over and re-tighten all straps. Kayaks can compress slightly, and straps can loosen.
- Secure Bow and Stern: These are vital for preventing lifting and swaying. A kayak becoming airborne is a dangerous situation.
- Mind Your Speed: Drive slower than you normally would, especially around curves and on windy days. Expect longer braking distances.
- Be Aware of Height: Know the total height of your vehicle with the kayak loaded. Watch out for low bridges, parking garages, and overpasses.
- Check Your Load’s Balance: Ensure the kayak is centered on your vehicle to maintain handling stability.
- Never Exceed Vehicle Load Limits: Your car has a maximum roof load capacity and a Gross Vehicle Weight Rating (GVWR). Ensure your kayak and any racks don’t exceed these. You can find GVWR on a sticker inside your driver’s side door jamb.
- Visibility: If the kayak overhangs your rear, ensure you use a red flag as required by law in many places. Consider bright colors or reflective tape.
Kayak Transport Comparison Table
To help you decide on the best method for your needs, here’s a quick comparison:
| Method | Best For | Ease of Loading | Cost | Vehicle Type | Requires Roof Rack? |
|---|---|---|---|---|---|
| In-Bed Truck Transport | Pickup Truck Owners | Very Easy | Low (straps) to Medium (tailgate extender) | Pickup Trucks | No |
| Pool Noodles/Foam Blocks | Budget-Conscious, Sedans/SUVs | Moderate (2+ people required) | Very Low | Most Cars, SUVs | No |
| Hitch-Mounted Carrier | Vehicles with Hitches, Ease of Loading Needed | Easy to Moderate | Medium to High | Any vehicle with a hitch | No (Requires hitch) |
| Saddle/Roller Racks | Regular Kayak Transport, Protection | Moderate to Difficult (depends on height/rollers) | High | Any vehicle | Yes (Base Rack Needed) |
| J-Cradles | Space Saving, Multiple Watercraft | Moderate | Medium to High | Any vehicle | Yes (Base Rack Needed) |
Frequently Asked Questions (FAQ) about Kayak Transport
Here are some common questions beginner kayakers have about getting their boats from here to there.
Q1: Is it safe to transport my kayak on the roof of my car without a roof rack?
Yes, it can be very safe if done correctly using methods like pool noodles or foam blocks combined with strong straps, including bow and stern tie-downs. The key is to ensure the kayak is incredibly stable and doesn’t shift. Always check the security of your straps, especially after a short drive.
Q2: How do I tie down the bow and stern of my kayak if I don’t have a roof rack?
For the bow, you can loop a strap around a secure point on the front of your car, like a tow hook (often behind a removable panel on the bumper) or a strategically placed bolt on the frame. The same applies to the stern, connecting to rear tow hooks or frame points. Many online guides and videos demonstrate finding these anchor points for specific car models. For sedans, sometimes the hood latch area offers a connection point, but this requires careful inspection. Always use sturdy straps and ensure they are under tension.
Q3: How tight should kayak transport straps be?
Straps should be snug enough to prevent the kayak from moving at all, but not so tight that they deform the hull or damage your vehicle’s roof or doors. You want the kayak to feel like a solid part of the car. A good test is to
Recent Posts
Car Fridge Dual Zone: Ultimate Portable Cooler for Travel and Camping
Have you ever opened a car cooler only to find your drinks warm and your snacks spoiled? It’s frustrating when a simple road trip or camping day turns uncomfortable because your food isn’t...
Car Fridge And Warmer: Ultimate Portable Cooler for Travel and Camping
Have you ever been stuck on a long drive with warm drinks and soggy snacks? It’s frustrating when your food and beverages don’t stay fresh.This small annoyance can spoil your whole trip or...