
Surprising stat: Nearly one in five spray complaints are electrical — not a failed motor — and that changes what we test first.
We’ll walk through why a common setup on the Escape uses a single reversible pump that feeds both front and rear nozzles. That design means the front may spray while the rear does not — and the cause is often wiring or relay logic, not a dead unit.
Our approach is simple and safe. We start with quick checks, then run basic electrical tests, and only replace parts when needed. You’ll learn easy ways to tell if the pump is bad — listening for noise, checking current draw, or applying 12V briefly to confirm bidirectional flow without hauling out the entire reservoir.
The access point is practical: the unit sits behind the passenger fender liner, and the swap mostly involves unplugging the connector, pulling the pump, and moving the rubber grommet and screen.
Key Takeaways
- One reversible unit serves both front and rear — polarity matters.
- Start with power, ground, and simple flow checks before buying parts.
- Listen and measure: sound and current draw reveal many faults.
- Access via the passenger fender liner makes the job straightforward.
- Replace grommets and clamps while you’re in there to prevent repeat leaks.
Understanding Ford Escape washer pump operation and common failure points
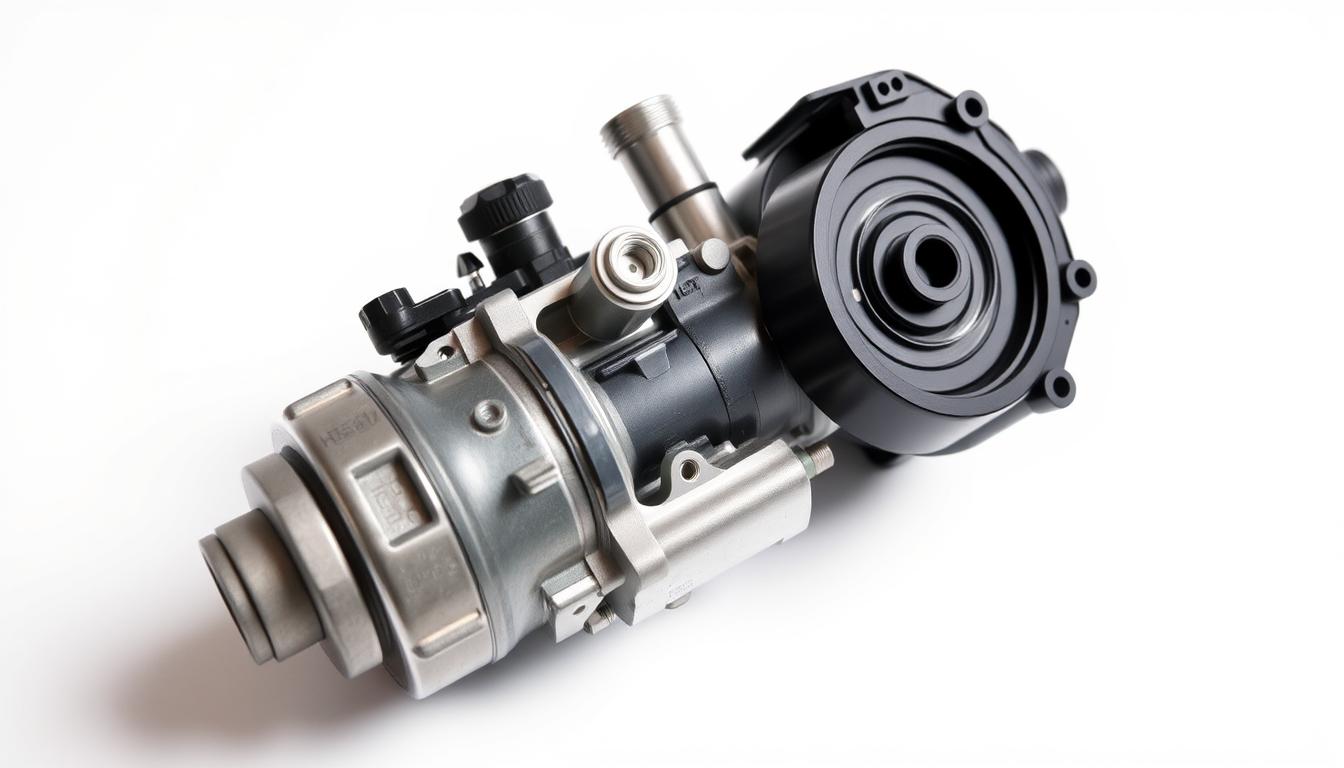
We start with the design: many Ford Escape models use a single reversible unit mounted at the reservoir. That device feeds two outlets and sends fluid forward or rearward by swapping polarity.
That setup is clever but creates a single point of failure. One bad connection or a relay logic fault can stop spray at one end while the other still works. If the rear does not spray and the unit is silent, the command voltage may never reach the unit because the wiper relay logic did not flip polarity.
Common failure points are easy to list and check. Expect a failed motor, corroded connector, torn hose at the grommet, a clogged nozzle, or wiring faults along the liftgate or passenger fender. A weak motor often buzzes but pushes little fluid. A dead unit is quiet under command.
- Short front path tolerates minor kinks; the longer rear run adds risks.
- Check fluid level, grommet screen, and hose clips first.
- Measure for swapped 12V and ground at the connector if spray fails.
| Symptom | Likely cause | Easy check | Next step |
|---|---|---|---|
| Front sprays; rear dry | Relay logic or wiring | Listen for motor; test voltage | Inspect wiper relay and connector |
| Motor buzzes; low flow | Clogged grommet or weak motor | Clear screen; apply brief 12V | Clean grommet or replace unit |
| No sound, no spray | Open circuit or dead motor | Check fuse and power at connector | Trace wiring; bench test motor |
Why your Ford Escape windshield washer isn’t working: symptoms and quick checks

Start by noting the symptom: no spray, a faint hum, or steady flow — each points us down a different path. These quick checks are driveway-friendly and need only simple tools or none at all.
How do you know if your pump is bad?
Listen when you press the stalk. If you hear a steady hum but no fluid, think clog or disconnected hose. No sound at all usually means power, ground, or a failed unit.
Front works, rear doesn’t: reversible polarity explained
Many models use a reversible unit that sprays one port with forward polarity and the other when reversed. Owners often find that applying 12V to a removed unit sprays front, then rear when polarity flips — proving the motor itself is fine.
No spray vs. no sound: distinguishing pump, clog, and wiring issues
- Flow test: pull the outlet hose and command the system — strong pulses = healthy motor.
- Sight test: check for puddles at the passenger fender — leaks stop priming.
- Air test: blow gentle air through suspect hoses; bubbling in the tank confirms a clear route.
Tip: Check windshield wiper and rear-wash commands separately. That narrows the issue between wiring and clogged lines quickly.
How to fix windshield washer pump 2016 Ford Escape: step-by-step troubleshooting

We start with simple electrical checks. Back-probe the connector and command front then rear wash. You should see 12V with opposite polarity each time. If voltage never reverses, suspect the wiper relay logic or control path.
Next, verify fuses and ground integrity. Inspect under-hood and interior fuse panels. Perform a voltage-drop test across the pump while it runs. A poor ground can mimic a failing pump.
Quick checklist
- Fuses: confirm continuity in washer/wiper fuses.
- Connector: back-probe for polarity change during front/rear commands.
- Relay logic: trace the wiper motor relay that flips polarity.
- Hoses & nozzles: remove outlets, check flow and clear filters.
| Step | What to check | Expected result |
|---|---|---|
| Power | Back-probe connector front/rear | 12V present and reverses polarity |
| Ground | Voltage drop test during run | |
| Wiring path | Inspect passenger fender and liftgate boot | No rub-through, corrosion, or broken conductors |
| Filters & hose | Clean grommet screen; blow air through lines | Clear flow at both outlets |
Ford Escape washer pump replacement and washer bottle replacement
Begin with a safe setup: left wheel turned, right front raised if needed, and the passenger fender liner peeled back for service space. This gives clear access to the reservoir and the small service area behind it.
Removing the fender liner and removing the unit
Remove push pins and screws, then fold the liner back carefully. Unplug the electrical connector before any further steps.
Label the two outlet hoses — front and rear — so reassembly matches factory routing. Pry the pump straight out of the rubber grommet and catch any fluid with a drain pan.
Reservoir removal, seals, and reassembly
For bottle service, unbolt the reservoir, disconnect the level sensor, and move the grommet and any sensors to the new tank.
Inspect the tiny filter screen in the grommet. Clean or replace it if torn — sediment here reduces flow and stresses the unit.
Priming the system and testing both front and rear after install
Route hoses exactly like the factory path. Reinstall the liner and replace damaged clips.
Prime carefully: fill the washer reservoir, hold the wash command for several seconds, and cycle both front and rear until spray is steady. If the rear still fails, the wiring or relay logic likely needs testing — swapping the unit alone won’t restore rear spray.
- Confirm no leaks at the grommet and hoses.
- Check wipers and wash function respond promptly.
Costs, parts, and options in the United States
Before you click buy, let’s map costs, delivery options, and return rules that matter.
Typical parts and price ranges:
- Washer pump: $15–$45 aftermarket; $50–$90 OEM.
- Reservoir: $60–$160, depending on sensor ports and trim.
- Grommet/seal: $5–$12. Add clips and a jug of washer fluid.
Shop smart: delivery, returns, and ratings
Compare listings at your favorite auto parts store. Look at star ratings and customer photos. Higher stars often mean better fit on a ford escape.
Standard shipping usually arrives in 2–5 days. Expedited delivery shortens downtime if this is your daily vehicle.
Check return windows before purchase—most retailers accept returns for 30–90 days if the part is unopened and clean. Keep the receipt and original packaging to speed a return.
Choices and a quick engine note
Options include OEM for guaranteed fit, premium aftermarket for value, or kits that bundle pump, grommet, and hose segments. Confirm part numbers by VIN for the reservoir — a mismatch causes fit and leak problems.
Engine water pump (cooling system) is a different item: parts run $80–$250. Expect 2.5–5 hours labor at typical U.S. shop rates, with total costs roughly $400–$900+. AWD and EcoBoost variants trend higher.
Final tip: Many DIYers apply 12V directly to a removed unit to confirm function before ordering. That saves money if the real issue is wiring or relay logic rather than a failed part. Thanks for planning ahead — smart shopping and checking reviews and delivery windows keeps the repair simple and predictable.
Ford Escape washer pump troubleshooting tips and pro-level checks
A quick fused-jumper check often shows whether the motor or the control path is at fault. We’ll cover bench testing, in-vehicle signals, and best practices that keep diagnostics tidy and safe.
Bypassing with a 12V supply to confirm direction and flow
Remove the unit and use a fused jumper pack on the bench. Apply 12V one way — one outlet should spray. Reverse polarity and the opposite outlet should run.
Mark each port so reassembly restores correct routing for the front and rear lines.
Switch and module signals: column switch vs. wiper motor relay behavior
Back-probe the vehicle connector while commanding front then rear wash. The meter should show polarity flip for a reversible unit.
If polarity never changes, the relay logic inside the wiper motor module or a broken conductor in the liftgate wiring is usually at fault — not the motor.
- Flex-test the liftgate boot while commanding rear wash; movement that causes intermittent function points at broken wires.
- Scan tools that read body and wiper modules can show requests and help isolate the column switch from the relay path.
- If you need test leads or an inline fuse holder, pick items at your local store with high stars and verified photos.
| Symptom | Likely cause | Pro check | Action |
|---|---|---|---|
| One outlet works only | Polarity not switching | Back-probe connector during commands | Trace relay path or module |
| Unit works on bench, not in car | Open circuit or relay fault | Scan live data for wash requests | Repair wiring or replace module |
| Intermittent rear spray | Broken conductors in liftgate boot | Flex-test while commanding | Repair harness and retest |
| No sound, no flow | Blown fuse or open power | Check fuses and voltage at connector | Replace fuse or trace power feed |
Document voltages, connector views, and photos as you work. That view helps later checks and speeds reassembly.
Thanks for taking the careful route — these pro checks cut parts swaps and find the real fault so your wipers and washers work reliably in all conditions.
Conclusion
In conclusion, simple checks often reveal wiring or relay faults long before a parts swap is needed.
We learned that one reversible pump serves both front and rear. If the front sprays but the rear does not and there’s no voltage at the connector, chase wiring and wiper relay logic first.
Use our step-by-step content to separate a bad motor from a clogged nozzle or torn grommet. Clean screens, verify polarity, and only then replace the unit or the reservoir. For cracks or slow leaks, a new washer reservoir restores capacity and peace of mind.
When you buy parts, pick a trusted store, check stars and return rules, and plan delivery days so the job finishes in a weekend. This content gives one last clear view—test calmly, pick smart options, and your windshield and wiper setup will work reliably.
FAQ
What are the first quick checks when the washer system won’t spray?
Start with simple steps — confirm there’s fluid in the reservoir, check the fuse for the washer pump, and listen for pump noise when you activate the switch. If you hear the pump but get no spray, inspect hoses and nozzles for clogs. If there’s no sound, test for power and ground at the pump connector.
How can we tell if the pump itself is bad?
A failed pump often makes no noise and won’t move fluid even with power present. We check by applying 12V directly to the pump connector (with a fused lead). If the motor runs and pushes fluid, the pump is okay — otherwise replace it. Also inspect for cracks or leaks in the reservoir around the pump seal.
Why does the front spray work but the rear doesn’t?
Many Escape models use a reversible motor that feeds front or rear lines depending on polarity. If front works and rear doesn’t, verify hose routing and check for blockages or a disconnected rear hose. Also test that the pump reverses direction when rear switch is selected — wiring or relay issues can prevent reversal.
What’s the difference between no spray and no sound from the system?
No sound usually points to electrical problems — blown fuse, bad switch, open wire, or failed pump. No spray with sound indicates a plumbing issue — clogged nozzles, kinked hoses, or a leaking reservoir/pump seal that prevents pressure buildup.
How do we check fuses and wiring at the pump connector?
Locate the fuse panel and verify the washer pump fuse with a tester or spare fuse. Back at the pump, use a multimeter to check for 12V on the power pin and continuity to ground while operating the switch. Wiggle the harness — look for corrosion, bent pins, or damaged insulation in the fender area and liftgate path.
Can we bypass the vehicle wiring to test pump direction and flow?
Yes — briefly apply a fused 12V lead between the two pump pins to confirm rotation and flow direction. Reversing polarity should swap flow between front and rear outlets. Only perform this with safety measures and a fused source to avoid shorts.
How do we remove the pump from the reservoir on an Escape?
Access usually requires removing the inner fender liner or reaching down from the engine bay for front reservoirs. Drain fluid, disconnect electrical connector and hoses, then twist or pry the pump assembly out of the reservoir depending on the design. Keep replacement O-rings or seals handy.
What’s involved in replacing the entire reservoir?
Remove fasteners and clips holding the bottle, drain fluid, disconnect pump connector and hoses, and extract the old bottle. Transfer any mounted sensors or pump assemblies to the new reservoir if needed, fit new seals, reinstall, refill with fluid, and test for leaks and proper operation.
How do we prime the system after installing a new pump or bottle?
Fill the reservoir, cycle the washer switch several times to purge air, and operate both front and rear spray modes. Inspect hoses and connections for leaks. If flow is weak, repeat cycles and check for trapped air at high points or clogged lines.
What parts and filters should we consider when ordering replacements in the U.S.?
Order the correct pump motor for your model year, new reservoir if cracked, and replacement seals or O-rings. Some kits include a strainer or inline filter — replace that if clogged. Check delivery times and return policies from reputable parts suppliers or Ford dealers.
How much does replacing the washer motor and reservoir typically cost?
Parts for the pump motor alone are usually affordable — often under –0 for aftermarket and higher for OEM. A full reservoir assembly raises cost. Labor varies by shop; DIY saves money. For engine cooling water pump replacement, costs are substantially higher — that’s a different system and should be quoted separately.
When should we inspect the wiring harness in the passenger fender and liftgate path?
Inspect these areas if symptoms are intermittent, if the rear spray fails while the front works, or after collision damage. Look for chafed wires, connector corrosion, or pinched sections where movement could cause breaks over time.
Any pro-level checks for stubborn problems?
Use a scan tool to monitor switch commands and module responses. Verify relay behavior and voltage at the pump under load. Pressure-testing lines with a small hand pump or visually inspecting flow at disconnected hose ends helps isolate blockages versus electrical faults.
Are there simple maintenance tips to prevent future issues?
Keep fluid topped up and use a winter mix in cold climates. Periodically spray to exercise the pump and clear nozzles. Replace brittle hoses and clean nozzles with a fine pin rather than harsh tools. Address leaks promptly to avoid pump cavitation and damage.
Recent Posts
Durable Jeep Wrangler American Flag License Plate Frame for Patriotic Drivers
Have you ever felt frustrated by a plain, worn-out license plate frame on your Jeep Wrangler? It’s a small detail, but it can really affect your vehicle’s look.Every time you see that dull...
Slim Design Audi Black License Plate Frame for Sleek Car Styling
Have you ever struggled with a bulky, noisy license plate frame that just doesn’t fit right? It can be so frustrating when your car’s style feels off or the frame rattles every time you...