
Fixing your car’s sagging or drooping interior roof (headliner) is totally doable for beginners. This guide walks you through safely removing the old fabric, cleaning the backing board, and using the right adhesive to secure it back perfectly, saving you time and money.
Seeing your car’s interior roof—the headliner—start to sag or peel away can be frustrating. It looks messy, and often, a small tear becomes a big, unsightly flap. This is a very common issue, especially in older cars where time and heat have weakened the glue. Don’t worry! You do not need a professional mechanic for this job. With a few simple tools and this clear guide, you can restore your car’s interior roof to look smooth and new again. We will go step-by-step, keeping things simple and safe. Let’s dive into the essential secrets for making your headliner look great!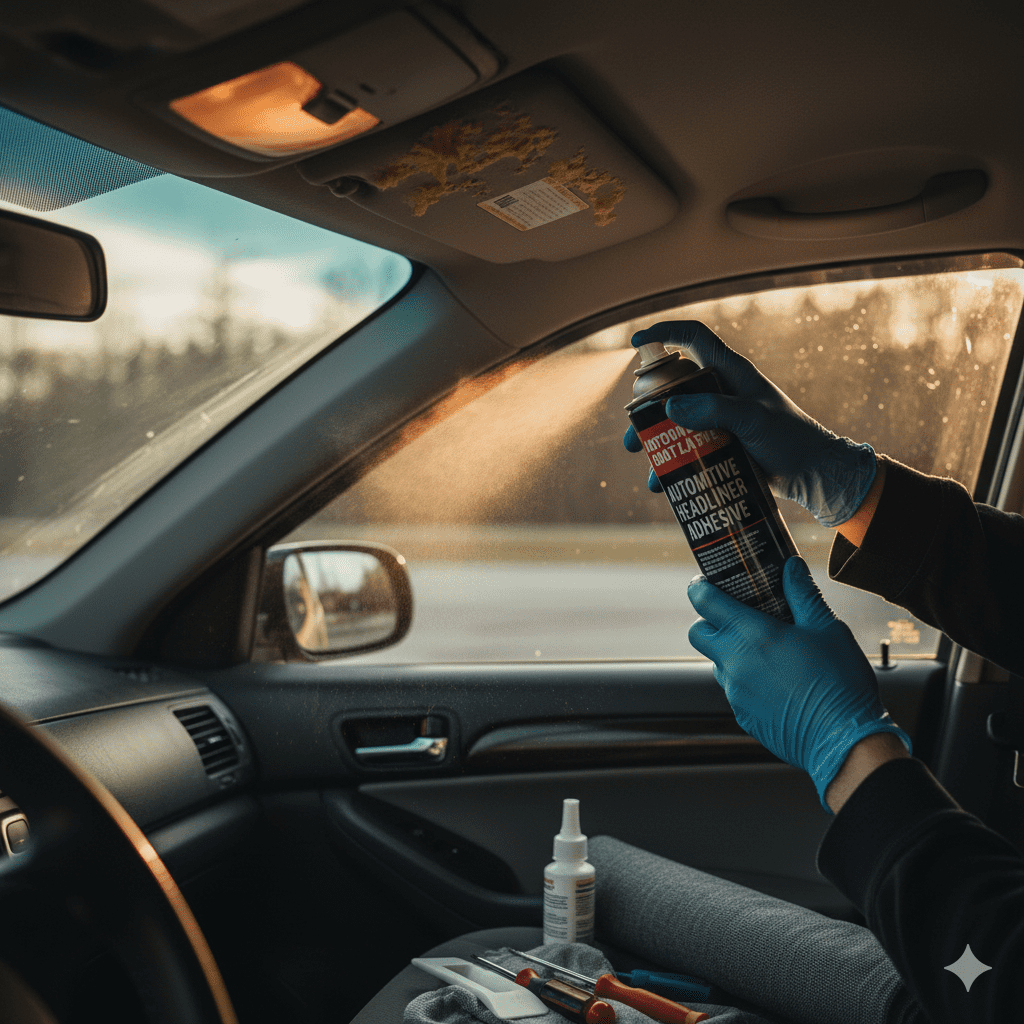
Why Do Car Headliners Sag? Unmasking the Culprits
Before we grab the glue, it helps to know why this happens. Understanding the cause helps prevent the problem from reappearing after your repair.
The car headliner is usually made of foam-backed fabric attached to a sturdy board which is then held up by clips or screws. The main culprit behind sagging isn’t usually a mechanical failure; it’s chemistry and age.
- Aging Adhesive: This is the biggest reason. The original spray adhesive breaks down over time. Heat from the sun baking the car accelerates this process, turning the sticky glue into a crumbly mess.
- Moisture Damage: If you have a slow leak from a seal (like around a sunroof or door frame), water can soak the backing board. Wet foam and fabric lose their grip and sag heavily.
- Temperature Swings: Constant heating up and cooling down causes the materials to expand and contract, stressing the limited holding power of the old glue.
- Physical Damage: Sometimes, cargo, a passenger trying to get out strangely, or installing non-standard electronics can put force on the material, causing it to detach.
If you suspect water damage, you must address the leak first. You can check seals by spraying a garden hose lightly over the roof area while the car is parked and checking inside for drips. For general aging, a simple re-glue job is the perfect fix.
Gathering Your Arsenal: Tools and Materials for the Job
The good news is you don’t need a huge toolbox for this project. Most materials are easy to find at any hardware store or auto parts shop. Having everything ready before you start makes the process smooth and enjoyable.
Essential Tools You’ll Need
These tools help safely dismantle and clean the area:
- Trim Removal Tools: Plastic pry bars are crucial. Metal tools can easily scratch your plastic trim pieces. These are inexpensive and prevent damage.
- Screwdrivers/Socket Set: You will usually need a Phillips head screwdriver or a small socket set to remove dome lights, visor clips, and grab handles.
- Safety Glasses and Gloves: Always protect your eyes, especially when scraping old adhesive.
- Vacuum Cleaner (Shop Vac recommended): Necessary for spotless cleaning after the old material is removed.
The Right Materials for a Successful Repair
Choosing the correct adhesive is the secret sauce to a long-lasting fix. Do not use standard household glue!
- Headliner Adhesive (Spray or Contact Cement): Look specifically for high-heat, automotive-grade spray adhesive or a heavy-duty contact cement designed for upholstery. These can withstand the temperature changes inside a car.
- New Headliner Fabric (Optional): If your old fabric is ripped, stained, or crumbling, you’ll need replacement material, often available at fabric/upholstery stores or online automotive suppliers.
- Clean Rags and Acetone/Rubbing Alcohol: Used for chemical cleaning of the backing board.
- Clothespins or Clips: To temporarily hold the fabric while the glue dries.
Pro Tip on Adhesives: For large, flat areas, a high-quality spray adhesive (like 3M Super 77 or similar automotive spray) is easiest for beginners. For lifting heavy sections, a contact cement brushed onto both surfaces offers stronger, more durable bonding.
The Complete Guide: How to Fix Car Interior Roof (Sagging or Peeling)
We will break this down into three main phases: Removal, Preparation, and Re-Adhesion. Patience is key in the preparation stage—it determines the final quality.
Phase 1: Careful Disassembly and Removal
The goal here is to remove anything holding the headliner in place without snapping plastic clips. If you are only fixing a small local sag, you might skip full removal, but for a complete overhaul, take it down.
- Disconnect Power: Always start by disconnecting the negative terminal of your car battery. This prevents accidental shorts when removing interior lights or sensors.
- Remove Trim Pieces: Start with the easiest parts. Remove sun visors, overhead consoles (which hold dome lights and potentially the OnStar module), and grab handles. These are almost always held on by screws hidden under small plastic covers. Use your plastic trim removal tool to gently pop off these covers.
- Detach Interior Lights and Sensors: Gently twist or unclip dome lights. If you have side pillar trim panels that overlap the headliner, carefully pry them outward using your plastic tools to reveal the clips holding the headliner board up.
- Lower the Headliner Board: Once all attached hardware is removed, the board is often held up by small tension clips along the edges. Carefully push up slightly on the board while gently pulling down until the clips release. In many modern cars, the board can be carefully slid out through a rear door if you fold down the rear seats.

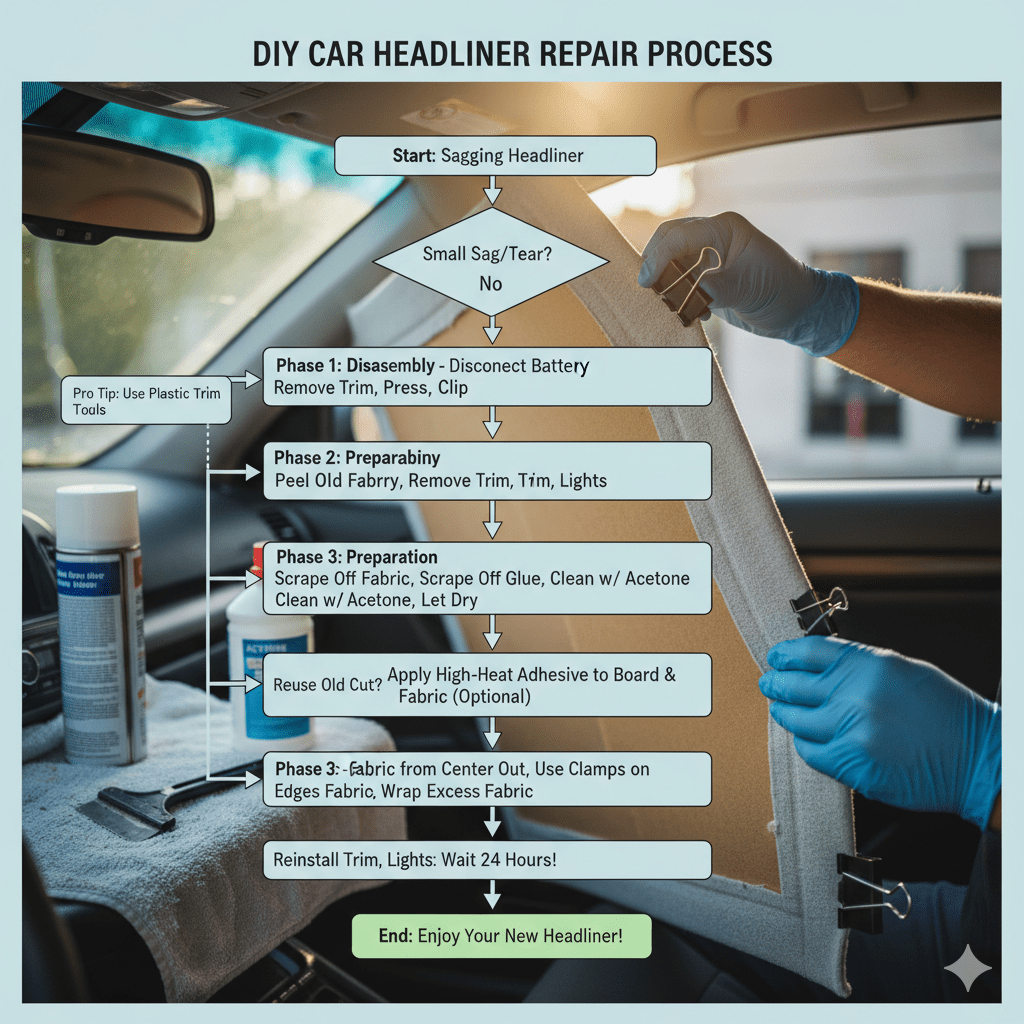
DIY car headliner repair flowchart showing steps for fixing a sagging interior roof, from disassembly and cleaning to adhesive application and reinstallation, with tools visible
Phase 2: The Secret to Lasting Adhesion—Preparation
This step is often rushed by DIYers, leading to failure within a year. Do not skip cleaning!
If you are replacing the fabric entirely, peel the old fabric away from the backing board. You will notice the old foam backing clinging to the board. This must go.
- Scrape Off Old Foam and Glue: Using a plastic scraper or a putty knife held at a very shallow angle, gently scrape away all the remnants of the old foam and adhesive residue from the structural backing board. Goal: A clean, smooth, bare board surface.
- Deep Clean the Board: Once scraped, use a rag dampened with acetone or strong rubbing alcohol to wipe down the entire surface. This removes any oily film left by degraded glue. A clean surface allows the new adhesive to bite properly. You can find great resources on safe cleaning agents through automotive safety guides, such as those provided by organizations promoting vehicle maintenance standards.
- Cleaning the Fabric (If Reusing): If the fabric is only slightly loose and you plan to reuse it, you must still remove the old, dry adhesive from the foam backing of the fabric. This is trickier. You may need to gently brush or use a wire brush softly. If the foam is crumbling off the fabric, you must remove the fabric entirely and proceed with new material.
- Drying Time: Allow the backing board to dry completely—at least 30 minutes—after cleaning before applying new glue.
Phase 3: Applying New Adhesive and Securing It Securely
This stage requires speed and precision, especially with spray adhesives.
If Replacing the Fabric:
- Measure and Cut: Lay your new headliner fabric face-down on a large clean area. Place the bare backing board on top. Cut the fabric, leaving at least 4 to 6 inches of overhang on all sides for wrapping around the edges later.
- Apply Adhesive to the Board: Following the directions on your automotive spray adhesive, spray a light, even coat onto the bare backing board. Let it “flash” (become slightly tacky) for the time specified on the can (usually 2–5 minutes).
- Apply Adhesive to the Fabric (Optional): Some stronger contact cements require application to both surfaces. Check your adhesive instructions!
- Lay the Fabric: Working from the center outward, carefully lay the fabric onto the prepared board. If using spray adhesive, you must place it correctly the first time. If you need repositioning, gently lift an edge.
- Use Clamps/Clips: Once laid, use heavy-duty clamps or clothespins along the edges to press the fabric firmly against the board while the glue cures.
- Wrap the Edges: Carefully trim the excess fabric around the perimeter, leaving enough material to wrap tightly around the edges of the board. Use a smaller amount of adhesive on the edges to secure the fabric wrap underneath.
If Re-Adhering Original Fabric (Localized Fix):
If only a section is drooping, you can often fix it without full removal. Work in small 1-foot sections.
- Gently pull the sagging fabric away from the board slightly, exposing the dirty adhesive underneath.
- Using a scrap piece of cardboard or plastic, gently push the new adhesive into the gap, aiming for the board surface underneath. Avoid soaking the fabric side heavily.
- Press the fabric firmly back against the board, holding it tightly for several minutes, or use binder clips to hold it in place while the glue sets.
Final Curing and Reinstallation
Once the adhesive is dry (usually 24 hours for full cure), you can reinstall the board. Check the surface firmness before putting it back in the car. Reinstall all handles, lights, and trim in the reverse order of removal. Remember to plug the battery back in!
Troubleshooting Common Headliner Issues
Even the best plans hit small snags. Here is how to handle the most common beginner headaches.
| Problem Encountered | Likely Cause | Simple Solution |
|---|---|---|
| Fabric is wrinkling after gluing | Not stretched evenly, or adhesive flashed too long. | Carefully peel back the wrinkled area, apply a bit more adhesive underneath, and press down evenly, smoothing with a soft cloth from the center out. |
| Adhesive bleeds through the fabric | Too much adhesive applied, or fabric is too thin. | This is cosmetic. If minor, let it dry. If severe, you must replace the fabric layer. |
| The board feels flimsy or soft | Water damage was present and not dried/treated. | Try reinforcing the board with a thin sheet of panel adhesive or thin plywood/MDF glued to the back side for stability. |
| Mounting points for handles pull out | Original plastic anchors are stripped or broken. | Use slightly longer or wider screws if the original hole is stripped, or use plastic epoxy putty to rebuild the anchor point before re-screwing. |
The Right Way to Clean Old Foam Backing: A Deeper Dive
The single most important variable in your success is how clean the backing board is before you apply new glue. The old, degraded foam acts like a barrier, preventing good adhesion. We need to get down to the bare substrate (the cardboard or fiberglass layer of the board).
We must be firm but gentle to avoid damaging the integrity of the board itself. Many modern cars use thin fiberglass or composite boards which are more brittle than older cardboard types.
Technique Focus:
- The Initial Peel: Start by pulling off the largest chunks of foam-backed fabric by hand. This usually leaves a thin, crumbly layer stuck to the board.
- Plastic Scraper/Putty Knife: Hold your scraper at an extremely shallow angle—almost flat against the board. Use long, sweeping motions. This shears the old glue rather than digging into the board. If the board starts to tear, you are pushing too hard or your angle is too steep.
- Chemical Assistance: For stubborn residue, a small amount of a low-VOC adhesive remover or specialized citrus cleaner can soften the old glue, making scraping much easier. Always test these chemicals on a small, unseen corner of the board first to ensure it doesn’t degrade the substrate material. Remember, manufacturers like those providing safety data sheets for common solvents offer usage guidelines you should follow.
- The Final Wipe: Once 95% of the debris is gone, use acetone or lacquer thinner on a clean cloth. Do not soak the board; just wipe the entire surface to remove any oils or fine dust that could interfere with the new glue connection.
Allowing this board to air out will help dissipate any chemical residue, ensuring a perfect bond for your new fabric.
When to Consider Professional Help or Full Replacement
While this is a great DIY project, there are times when calling an auto upholstery professional is the wiser choice.
You should seek professional help if:
- Sunroof Presence: Cars with sunshades or complicated sunroof mechanisms integrated into the headliner require precise disassembly. Mistakes here can lead to leaking sunroofs or misaligned glass.
- Delicate Sensors: If your car has curtain airbags deployed from the headliner area, do not attempt to remove or manipulate the board, as you risk damaging or interfering with the safety systems.
- Material Crumbling: If the fabric is so old that it disintegrates into dust when you touch it, the adhesion failure is total. Trying to reuse it is often impossible, and replacing the entire board might mean purchasing an expensive OEM part and having it professionally installed.
For most standard sagging issues, however, the DIY approach saves hundreds of dollars. Professionals often charge $300 to $700+ for this simple job, depending on the vehicle complexity.
Headliner Repair FAQ for Beginners
Q1: Can I just glue the sagging part without removing the whole headliner?
A: Yes, for small sags or tears, you can gently inject automotive spray adhesive into the gap beneath the fabric using a thin plastic spreader. Press firmly and clip it in place while it dries.
Q2: How long does the new adhesive take to dry before I can drive the car?
A: Most high-heat spray adhesives require 2 to 24 hours for a full, strong cure. Do not try to reinstall the board or drive the car for at least 4 hours after gluing, and preferably wait a full day before putting heavy stress on the ceiling.
Q3: What is the best type of glue to use for headliners?
A: The best glue is a specialized automotive spray adhesive or contact cement rated for high heat and upholstery from reputable brands. A typical recommendation is a product specifically labeled for “Headliner Repair.”
Q4: Can I reuse the old headliner fabric?
A: Yes, if the fabric itself is intact, not ripped, and not heavily stained. However, you absolutely must remove all the old, crumbly foam backing from the fabric before applying new glue to it.
Q5: What if I break a plastic clip during removal?
A: Broken clips are common. You can usually buy replacement clip kits (often called “headliner bow clips” or “trim clips”) online or at major auto parts stores very cheaply. Take a sample of the broken clip with you for an exact match.
Recent Posts
Car Fridge Dual Zone: Ultimate Portable Cooler for Travel and Camping
Have you ever opened a car cooler only to find your drinks warm and your snacks spoiled? It’s frustrating when a simple road trip or camping day turns uncomfortable because your food isn’t...
Car Fridge And Warmer: Ultimate Portable Cooler for Travel and Camping
Have you ever been stuck on a long drive with warm drinks and soggy snacks? It’s frustrating when your food and beverages don’t stay fresh.This small annoyance can spoil your whole trip or...