
Quick Summary:
Clean your piano black car interior by dusting regularly with a microfiber cloth, then using a dedicated interior cleaner and another microfiber to gently wipe away smudges. For deeper cleaning, a specialized plastic cleaner or a diluted all-purpose cleaner can be used. Always avoid abrasive materials to protect the glossy finish.
Piano black trim in your car looks sleek and modern, but it’s also a magnet for dust, fingerprints, and annoying smudges. It can be frustrating when these glossy surfaces lose their shine, making your car’s interior look dull. But don’t worry! Keeping your piano black trim looking its best doesn’t require a professional detailer. With the right tools and a simple, step-by-step approach, you can restore that effortless shine and keep it looking spectacular.
This guide will walk you through everything you need to know, from the essential supplies to the easy cleaning techniques that will banish smudges and bring back that showroom gleam.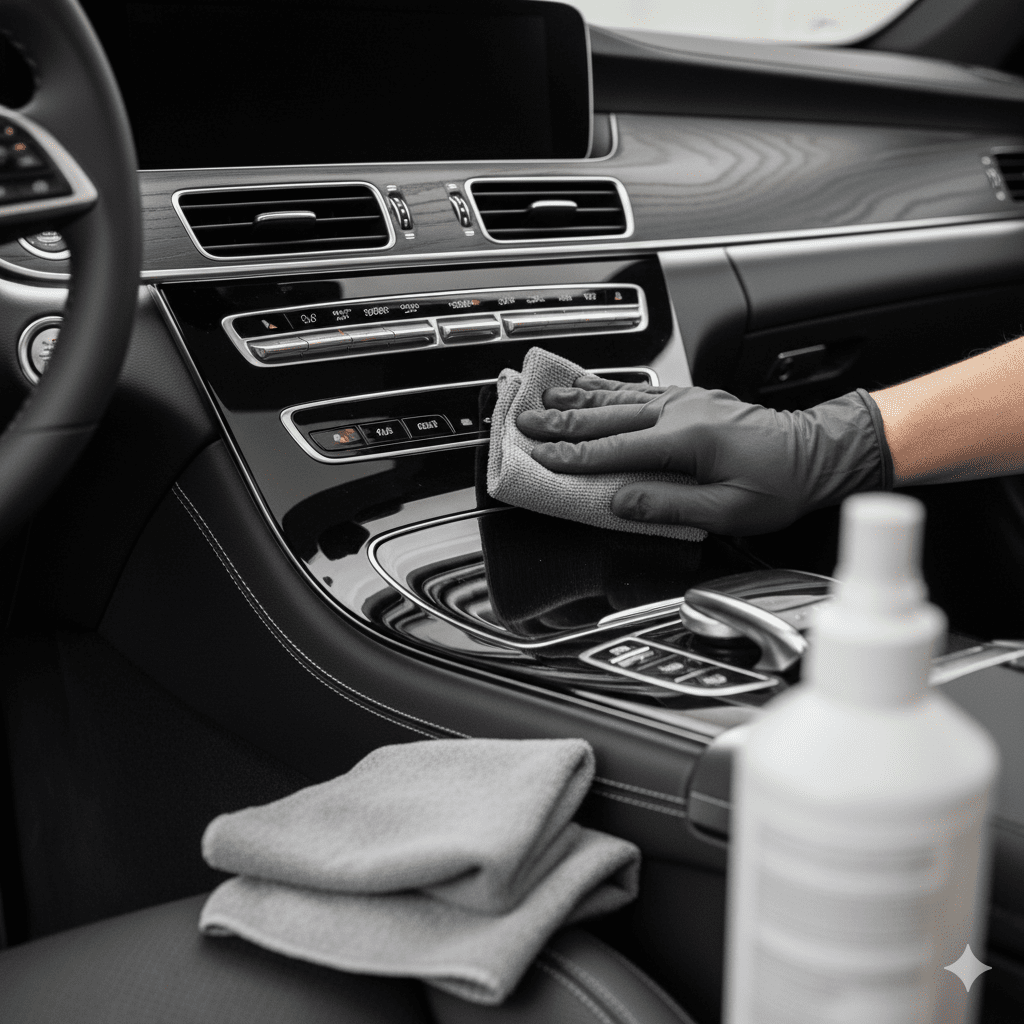
Gather Your Cleaning Supplies
Before you start, having the right tools makes all the difference. For cleaning piano black trim, you want to use gentle products that won’t scratch or damage the finish. Think of it like cleaning a delicate piece of furniture – soft materials and mild solutions are key.
Here’s a list of what you’ll need:
Essential Tools and Products:
- Microfiber Towels: You’ll need at least two high-quality microfiber towels. One for applying cleaner and one for buffing. Microfiber is incredibly soft and won’t leave scratches, which is crucial for glossy surfaces.
- Interior Cleaner: A dedicated interior cleaner specifically designed for car interiors is a great choice. Look for one that is pH-neutral and safe for glossy plastics.
- Spray Bottle with Water: For diluting certain cleaners or for a quick rinse.
- Isopropyl Alcohol (Optional, Diluted): A small amount of diluted isopropyl alcohol (50% alcohol, 50% distilled water) can be effective for stubborn fingerprints, but use it sparingly and test in an inconspicuous spot first.
- Detailing Brushes (Optional): Soft-bristled brushes can help clean in tight crevices around the trim.
- Glass Cleaner (Ammonia-Free): If your piano black trim also has integrated screens, you’ll need an ammonia-free glass cleaner. Ammonia can damage anti-glare coatings.
- Gloves (Optional): To protect your hands from cleaners.
Why These Tools Matter:
Using the correct microfiber towels is paramount. Cheap rags or paper towels can create micro-scratches that build up over time, making the glossy finish look hazy. Similarly, harsh chemical cleaners not designed for automotive interiors can dull the finish or even cause discoloration. By sticking to specialized, gentle products, you ensure your piano black trim stays as glossy as the day you bought your car.
Step-by-Step Guide to Cleaning Piano Black Interior
Cleaning your piano black car interior is a straightforward process. We’ll break it down into simple stages to ensure you get a flawless, smudge-free finish every time.
Step 1: Dry Dusting
Begin by gently dusting the piano black surfaces. This removes loose dirt and debris that could otherwise scratch the finish when you start using cleaning solutions.
- Take a clean, dry microfiber towel.
- Gently wipe across the surface in one direction. Avoid circular motions, as this can spread dust and create swirl marks.
- Pay attention to edges and corners where dust tends to accumulate.
This initial step is crucial, especially if it’s been a while since the interior was last cleaned. It prevents turning dry dust into a muddy paste when liquids are introduced.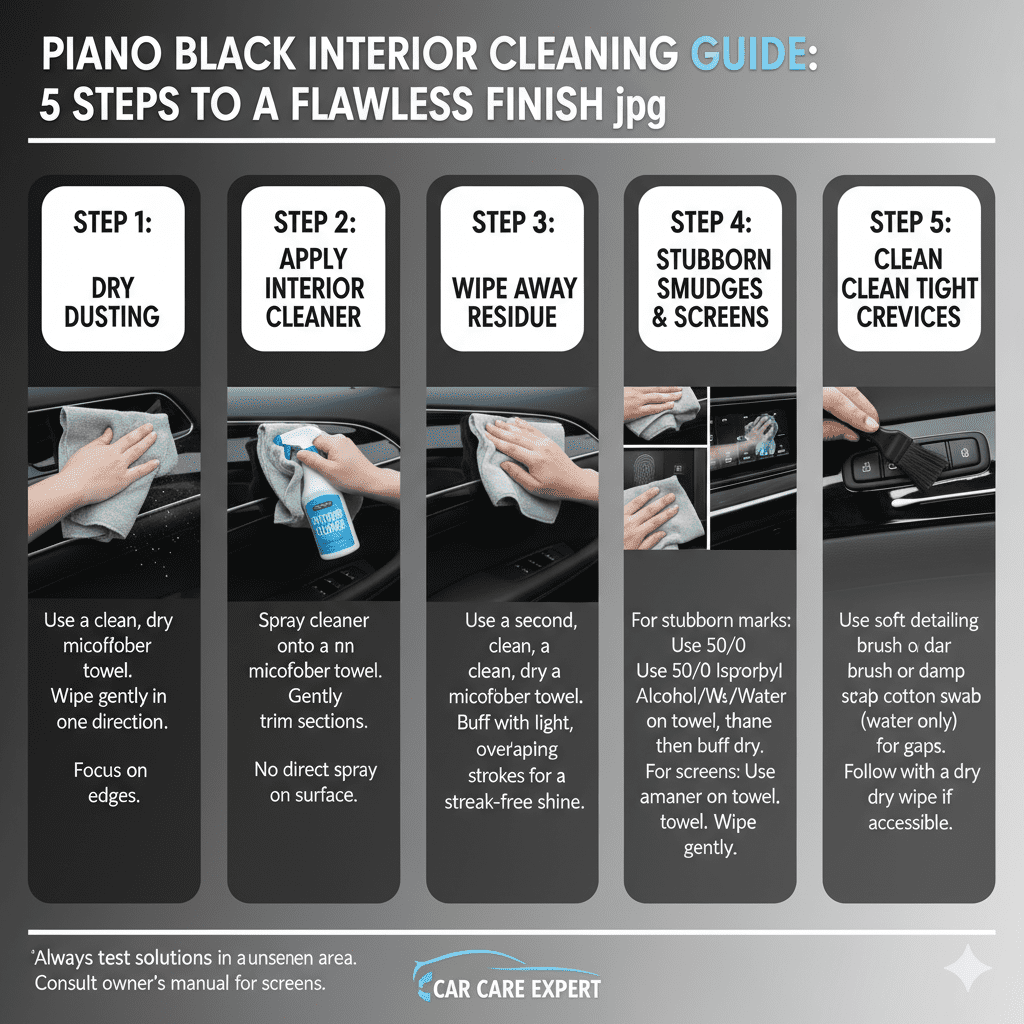
Step 2: Apply Interior Cleaner
Now it’s time to tackle any grime, fingerprints, and smudges that the dry dusting couldn’t remove.
- Lightly spray your chosen interior cleaner onto a clean microfiber towel, not directly onto the piano black surface. Spraying the towel prevents overspray onto other surfaces and ensures a more controlled application.
- Gently wipe the piano black trim. Work in sections, using light pressure.
- For stubborn spots, you might need to go over the area a couple of times. Avoid scrubbing aggressively.
Step 3: Wipe Away Residue
After applying the cleaner, you need to remove any leftover product and lift away the loosened dirt.
- Take a second, clean and dry microfiber towel.
- Gently buff the piano black surface. Use light, overlapping strokes.
- You should see a clear, streak-free shine emerge. If you notice any streaking, it might mean you used too much cleaner or didn’t buff enough.
Step 4: Addressing Stubborn Smudges and Screen Cleaning
Sometimes, fingerprints or sticky residues can be particularly persistent. For these, or if your piano black trim includes a display screen, you’ll need a slightly different approach.
- For stubborn finger marks on non-screen trim: Lightly dampen a section of your microfiber towel with a 50/50 solution of isopropyl alcohol and distilled water. Gently dab or wipe the stubborn smudge. Immediately follow up with a clean, dry microfiber towel tobuff. Test this solution in an unseen area first.
- For screen surfaces: Always use an ammonia-free glass cleaner. Spray a small amount onto a clean microfiber towel, never directly onto the screen. Gently wipe the screen in a consistent direction. Buff with a dry section of the towel to remove any streaks.
If your car has a touchscreen, consult your owner’s manual for specific cleaning recommendations. Many modern screens have special coatings that can be damaged by harsh chemicals.
Step 5: Clean Tight Crevices
The areas where trim pieces meet or around buttons can collect dust that’s hard to reach.
- If you have detailing brushes, use a soft one to gently sweep dust and debris out of these tight spots.
- You can also use a slightly damp (with water) cotton swab to carefully clean narrow gaps. Be sure to wring out excess moisture to avoid water stains.
- Follow your dusting or cleaning of these areas by giving them a light wipe with a dry microfiber towel if accessible.
Maintaining That Effortless Shine
Once your piano black interior is sparkling, the key is regular maintenance to prevent it from becoming a dirt and smudge magnet again. Consistent, gentle care is far more effective than waiting for it to get heavily soiled.
Regular Dusting is Key
Make it a habit to give your piano black surfaces a quick dusting at least once a week. A quick wipe-down with a clean, dry microfiber towel is usually enough to keep light dust at bay. This prevents buildup that makes deeper cleaning necessary.
Address Smudges Promptly
Fingerprints and smudges happen! When you notice one, take a moment with a clean microfiber cloth to gently buff it out. Sometimes, a dry cloth is all you need. If not, a quick spritz of interior cleaner on the cloth should do the trick.
Avoid Harsh Chemicals and Abrasives
This cannot be stressed enough. The high-gloss finish of piano black is susceptible to scratching and dulling. Steer clear of:
- Household glass cleaners (unless ammonia-free and for screens).
- Abrasive sponges or cloths.
- All-purpose cleaners not specifically formulated for automotive interiors and plastics.
- Excessive pressure when cleaning.
Think of it as polishing. You want to enhance the shine, not re-texture the surface.
Consider a Protectant
Once your piano black trim is clean and free of smudges, you might consider applying a dedicated interior protectant designed for glossy plastics. These can add a layer of protection against UV rays (which can cause fading and cracking over time) and make future cleaning easier by providing a smoother surface for dust to slide off. Look for products that provide a natural, non-greasy finish rather than a high-gloss shine, as this can sometimes exacerbate glare.
When choosing a protectant, always read the label to ensure it’s safe for piano black surfaces. Apply it according to the product’s instructions, usually by spraying onto an applicator pad or microfiber towel and then wiping the surface. Always buff off any excess.
Common Mistakes to Avoid
Even with the best intentions, it’s easy to make a misstep when cleaning delicate surfaces like automotive piano black trim. Being aware of these common pitfalls can save you from accidental damage and frustration.
Using the Wrong Cloths
As mentioned, standard household rags, paper towels, or rough towels are a big no-no. These materials can contain abrasive fibers that create tiny scratches, leading to a dull, swirled appearance over time. Always opt for plush, high-quality microfiber towels specifically made for automotive detailing.
Spraying Cleaner Directly Onto Surfaces
While it might seem efficient, directly spraying cleaner onto piano black trim can lead to overspray onto nearby areas like your dashboard, seats, or electronics. This can leave streaks or potentially damage other materials. It’s much safer to spray your gentle interior cleaner onto your microfiber towel first. This gives you more control and protects other parts of your car’s interior.
Excessive Pressure or Scrubbing
The glossy finish of piano black trim is sensitive. Trying to scrub away tough stains with force can easily cause micro-scratches or permanently mar the surface. Gentle wiping and allowing the cleaner to do its work is the best approach. If a mark is particularly stubborn, try a second application of cleaner or a slightly more specialized product rather than brute force.
Using Ammonia-Based Cleaners on Screens
Many car infotainment systems and instrument cluster screens use piano black trim. If your screen has an anti-glare coating, ammonia-based cleaners can strip this coating, leaving the screen permanently dulled or cloudy. Always use an ammonia-free cleaner specifically designed for electronics or automotive screens. A good rule of thumb is always to spray the cleaner onto your cloth, not the screen itself.
Forgetting to Dust First
This is a critical step that’s often overlooked. If you jump straight to applying a liquid cleaner on a dusty surface, you’re essentially creating a grinding paste. The dry dust particles will get mixed with the cleaner and then rubbed into the surface, leading to fine scratches.
Using All-Purpose Cleaners Without Concern
While some mild all-purpose cleaners might be safe, many household or generic automotive all-purpose cleaners are too harsh for sensitive, high-gloss finishes. They can contain solvents or degreasers that can dull or damage the clear coat on piano black trim. It’s always best to use products specifically labeled for interior plastics and glossy surfaces.
Troubleshooting Common Piano Black Interior Issues
Even with careful cleaning, you might encounter specific issues with your piano black trim. Here’s how to tackle them:
Swirl Marks
These fine, circular scratches often appear due to improper cleaning techniques or using abrasive materials. They can be frustrating, but sometimes a good quality interior detailer applied with a clean microfiber towel and buffed thoroughly can minimize their appearance by filling in some of the microscopic imperfections.
For more persistent swirls, a dedicated plastic polish designed for automotive interiors might be necessary. These polishes contain very fine abrasives that can gently level the surface. This is a more advanced technique and should be tested in an inconspicuous area first. For a beginner, focusing on preventing them through proper, gentle cleaning is the best strategy.
You can find detailed guides on plastic polishing at resources like Autopia’s Paint Correction Forums (an automotive detailing community resource).
Cloudiness or Hazing
This can be caused by using harsh chemicals, ammonia-based cleaners, or residues from cleaning products that weren’t fully buffed off. If it’s residue, a gentle wipe-down with a damp microfiber towel followed by dry buffing might resolve it. If it’s caused by chemical damage, restoring the finish can be more challenging. It might require a plastic polish or, in severe cases, professional attention.
Stubborn Fingerprints or Grease
For persistent smudges that don’t come off with a standard interior cleaner, try the diluted isopropyl alcohol solution (50% IPA, 50% distilled water) mentioned earlier. Apply to the towel, gently work the smudge, and then immediately buff with a clean, dry microfiber towel. Ensure good ventilation when using isopropyl alcohol.
Water Spots
If you use too much water during cleaning or if water is left to dry on the surface, it can leave mineral deposits that form water spots. These are often best treated with a cleaner that can break down mineral deposits. A mild all-purpose cleaner might work, but again, ensure it’s safe for glossy plastics. A clay bar designed for paintwork is also effective for removing baked-on mineral deposits, but use with extreme caution and lubrication on plastic surfaces.
Scratches from Keys or Jewelry
Unfortunately, deeper scratches are difficult to remove from piano black trim without aggressive polishing, which can alter the finish. For minor scratches, a plastic polish might help reduce their visibility. However, for significant scratches, the trim piece might need to be replaced. The best approach is prevention: be mindful of keys, rings, and bracelets when interacting with the center console or dashboard.
FAQ: Piano Black Car Interior Cleaning
Q1: What is the best way to clean piano black car interior?
The best way is to use a gentle approach. Start with dry dusting using a microfiber cloth. Then, use a dedicated interior cleaner sprayed onto a microfiber towel, gently wipe, and buff dry with another clean microfiber cloth. Avoid abrasive materials and harsh chemicals.
Q2: Can I use Windex on my piano black trim?
It’s generally not recommended to use standard Windex (which contains ammonia) on most piano black interior trim, especially if it’s part of a screen. Ammonia can damage anti-glare coatings and potentially dull the finish. If you need to clean a screen, use an ammonia-free glass cleaner specifically designed for automotive screens or electronics and always spray it onto your cloth first.
Q3: How do I get rid of fingerprints on piano black plastic?
Start with a clean, dry microfiber cloth to gently buff out the fingerprint. If that doesn’t work, use a dedicated interior cleaner sprayed onto your cloth. For very stubborn prints, a tiny amount of diluted isopropyl alcohol (50/50 with water) on a microfiber cloth can help, followed by buffing with a dry cloth.
Q4: Is it safe to use a plastic polish on piano black?
Yes, but with caution. Plastic polishes contain very fine abrasives that can help remove minor swirl marks. Always test in an inconspicuous area first and use a polish specifically designed for automotive plastics. Follow product instructions carefully, and use light pressure. Over-polishing can alter the finish.
Recent Posts
Car Fridge Dual Zone: Ultimate Portable Cooler for Travel and Camping
Have you ever opened a car cooler only to find your drinks warm and your snacks spoiled? It’s frustrating when a simple road trip or camping day turns uncomfortable because your food isn’t...
Car Fridge And Warmer: Ultimate Portable Cooler for Travel and Camping
Have you ever been stuck on a long drive with warm drinks and soggy snacks? It’s frustrating when your food and beverages don’t stay fresh.This small annoyance can spoil your whole trip or...