
Quick Summary: You can safely attach your surfboard to a roof rack by properly securing the rack to your car, placing the board(s) on the rack, and using strong straps to tie them down tightly and evenly. Always double-check connections before driving.
Heading out for a surf session should be exciting, not stressful! Getting your surfboard to the beach safely is key. For many of us, that means using a roof rack. But if you’re new to this, the thought of strapping your prized board to the top of your car can feel a bit daunting. Don’t worry, it’s much simpler than it looks! This guide will walk you through everything you need to know, step-by-step. We’ll break down the process so you can feel confident loading your surfboard and hitting the waves in no time. Let’s make sure your ride to the surf is smooth sailing (or driving!).
Why Properly Attaching Your Surfboard Matters
Attaching your surfboard to a roof rack isn’t just about getting it from point A to point B. It’s about safety—for you, your car, other drivers, and your surfboard. A loose board can shift or even fly off, causing accidents. It can also damage your car’s roof or your board. Getting it right means peace of mind, knowing your gear is secure and you can focus on the waves. This guide will ensure you do it the right way, every time.
Understanding Your Roof Rack System
Before we even touch a surfboard, let’s get familiar with the roof rack itself. Most roof racks designed for carrying surfboards consist of a few key components:
- Crossbars: These are the horizontal bars that run across your car’s roof. They are the primary support for your surfboard.
- Rack Pads: These are foam or rubber sleeves that go around the crossbars. They protect your surfboard from scratches and provide a bit of grip.
- Straps: These are the critical pieces that hold your surfboard down. They are usually cam buckle straps or tie-down straps with ratchets.
- Hardware: This includes any clamps, feet, or mounting systems that attach the crossbars to your car’s roof.
There are several types of roof rack systems:
| Rack Type | Description | Best For |
|---|---|---|
| Factory-Installed Racks | Racks that come built into your car by the manufacturer. Often have specific attachment points. | Cars already equipped with them. May require specific accessories for surfboards. |
| Universal Crossbars | Crossbars that clamp onto your car’s door frames or existing roof rails. | Cars without factory racks. Can be a more budget-friendly option. Ensure they are rated for the weight. |
| Specialty Surfboard Racks | Racks designed specifically to hold surfboards, often with padding and dedicated strapping systems. Some attach directly to crossbars, others are standalone systems. | Frequent surfers who want the most secure and convenient setup. |
If you have a newer vehicle, it might have “flush racks” or “raised rails.” These often require specific adapter kits to mount crossbars. It’s always a good idea to consult your car’s manual or the roof rack manufacturer’s instructions for the correct installation of the base rack system onto your vehicle. You can find excellent resources on correct base rack installation for various vehicle types from organizations like NHTSA, which emphasizes vehicle structural integrity, including how roof racks can affect it when properly installed.
Gathering Your Essential Tools and Gear
Before you start loading your board, make sure you have everything ready. This makes the process smoother and less frustrating. Here’s what you’ll need:
- Your Roof Rack System: Ensure it’s correctly installed on your car.
- Surfboard(s): Clean and free of excess wax that could slide.
- Cam Straps or Tie-Down Straps: Most common and reliable. Ensure they are long enough to go around your surfboard and the crossbars. Aim for straps that are at least 9 feet long, especially for larger boards or multiple boards.
- Soft Rack Pads (if not built-in): To protect your board and car.
- Optional: A small step stool or ladder can be helpful for taller vehicles.
- Optional: A towel to protect your car’s paint from the board or straps.
When choosing straps, look for robust buckles. Cam buckle straps are generally easier for beginners than ratchet straps, which can overtighten and damage your board if not used carefully. For the best advice on strap types and their load ratings, checking resources from organizations like the Occupational Safety and Health Administration (OSHA) on securing loads can provide a good understanding of best practices for safe transport, even though they focus on workplace safety.
Step-by-Step Guide: Attaching Your Surfboard to the Roof Rack
Now for the main event! Follow these steps carefully to attach your surfboard securely. We’ll assume you have a standard crossbar system with rack pads.
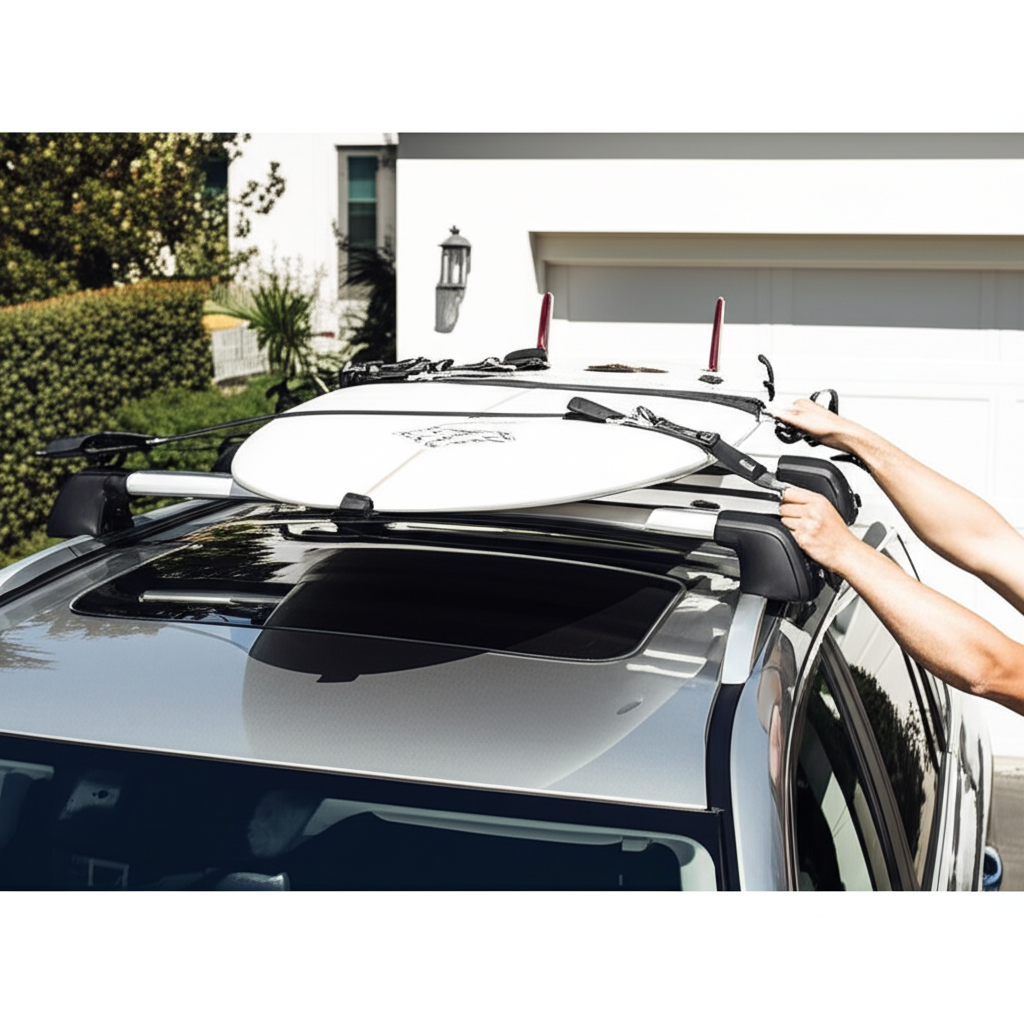
Step 1: Position Your Surfboard on the Rack
Open your car doors. This gives you better access to the crossbars and makes it easier to thread the straps. Carefully lift your surfboard onto the roof rack. Place the board(s) upside down (deck down, fins up) on the rack pads. This protects the fins and the deck. If you have multiple boards, stack them neatly, again, fins up on the bottom board, and deck down on subsequent boards. Ensure the boards are centered on the crossbars and that the weight is balanced. The tail of the board should ideally extend slightly past the rear of your car, but not excessively. A good rule of thumb is to have the board centered lengthwise on your car.
Step 2: Thread the Straps
Take one cam strap. Pass it over the surfboard and under the crossbar on one side of the car. Then, bring the strap back over the surfboard and under the crossbar on the other side. The buckle end should be on one side, and the free end on the other. Repeat this for the other crossbar. If you have two crossbars, you’ll use at least two straps—one for the front crossbar and one for the rear crossbar. For extra security, especially on longer trips or with multiple boards, you can use a third strap secured around the tails of the boards and the rear crossbar, or even at the nose.
Step 3: Cinch Down the Straps Tightly
This is the most crucial step for security.
For cam straps: Pull the free end of the strap through the cam buckle. Pull firmly to tighten. You should feel the strap snugging down around the board and crossbar. Make sure the strap is flat and not twisted, as this can weaken it.
For ratchet straps: Use the ratchet mechanism to tighten the strap. Be careful not to overtighten, especially with a fiberglass board, as you can crack the board or even damage the car roof. A good, firm tension is what you’re aiming for. The board should feel solid and not shift at all.
| Strap Type | Pros | Cons | Beginner Tip |
|---|---|---|---|
| Cam Straps | Easy to use, quick to adjust, less risk of overtightening. | Can loosen slightly if not double-checked, may not achieve extreme tension for very heavy loads. | Ensure buckle is properly seated and strap is pulled taut. Easy to re-tighten. |
| Ratchet Straps | Can achieve very high tension, excellent for heavy loads. | Risk of overtightening and damaging gear or vehicle. Can be harder to release. | Tighten gradually and check for compression of the board or roof. Don’t force it. |
Step 4: Secure the Loose Ends
Once the straps are tight, you need to deal with the excess strap length. You don’t want them flapping in the wind, which is noisy and can damage your car or the strap. You can tie the loose ends into a secure knot, or use Velcro straps (often part of the cam strap system) to neatly bundle them up. Tuck them away so they don’t get caught in doors or wheels.
Step 5: Check All Connections – The Double-Check
Before you drive off, perform a thorough double-check.
Gently try to wiggle the surfboard. It should not move relative to the crossbars.
Check each strap end to ensure the buckle is securely fastened and the strap is properly threaded.
Inspect the straps themselves for any signs of fraying or damage.
Ensure the rack pads are in place and protecting the board.
Step 6: Test Drive and Re-check
Drive away slowly and keep your radio volume down. Listen for any unusual flapping or loose strap noises. After a mile or two, pull over in a safe location (like a quiet parking lot) and perform another check of all the straps. It’s also a good idea to re-check your straps after about 15-30 minutes of driving, especially on longer journeys, to account for any initial settling.
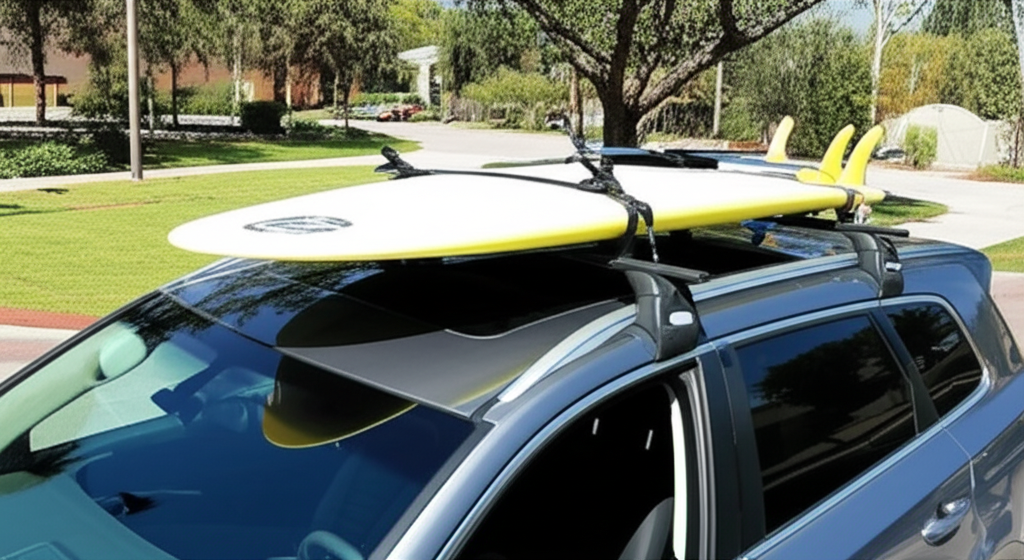
Tips for Carrying Multiple Surfboards
If you’re heading out with a quiver of boards, the process is similar but requires a little more care:
- Stacking Order: Place your largest or heaviest board on the bottom. Stack subsequent boards with their fins facing upwards. Ensure fins don’t dig into the boards below.
- Secure Each Layer: Use straps to secure the entire stack to the crossbars, as described above. You might need longer straps for multiple boards.
- Consider a Fin Sock: For added protection between boards, especially where fins might rub, a fin sock can be a great addition.
- Board Bags: If you have board bags, loading them into the bags first can offer an extra layer of protection and can make stacking easier and more secure.
- Aerodynamics: Be mindful of how the stacked boards affect your car’s aerodynamics. A significant stack can create more wind noise and drag.
For carrying multiple boards, it’s often recommended to use dedicated surfboard racks that might have specific cradles or wider platforms. Companies like Thule and Yakima offer specialized systems. For guidance on load limits and how to best secure multiple items, consulting resources on vehicle load balancing and weight distribution, such as those from the Federal Highway Administration, can be beneficial in understanding the principles of safe cargo transport.
Safety Considerations and Best Practices
Your safety and the safety of others on the road are paramount. Here are some crucial safety points:
- Load Capacity: Never exceed the weight limit of your roof rack or your vehicle. Check your car’s manual and your rack manufacturer’s specifications.
- Strap Condition: Regularly inspect your straps for wear and tear. Replace any straps that show signs of damage.
- Wind Noise and Drag: Be aware that carrying a surfboard will increase wind noise and fuel consumption.
- Center of Gravity: A surfboard on the roof will raise your vehicle’s center of gravity, so take corners more slowly and gently.
- Fins and Antennas: Ensure fins are either removed from the bottom board or protected. Be mindful of retractable car antennas.
- Weather Conditions: High winds or heavy rain can affect how securely your board is attached. Double-check your straps in adverse weather.
- Parking Garages/Low Clearances: Always be aware of your added height. Many accidents happen in parking garages, drive-thrus, or under low bridges.
Troubleshooting Common Issues
Even with the best intentions, you might run into small problems. Here’s how to fix them:
- Straps slipping: Ensure the cam buckle is fully engaged and the strap is pulled as tight as possible without overtightening. Check for any debris in the buckle. Sometimes, twisting the strap slightly over itself before tightening can create more friction.
- Noisy straps: Loose strap ends are usually the culprit. Tie them securely or use Velcro. If the main straps are noisy, they might not be tight enough, or the board might be shifting slightly.
- Board sliding on pads: Make sure the rack pads are securely on the crossbars. If the board is still sliding, it might indicate that the straps aren’t tight enough or are too far apart. Consider using a third strap in the middle.
- Difficulty reaching the roof: For taller vehicles, a small, portable step stool or a sturdy, non-slip mat can provide the extra height needed to secure straps effectively.
Frequently Asked Questions (FAQ)
Q1: How do I know if my roof rack is installed correctly?
A: A correctly installed roof rack should feel solid with no excessive movement or rattling when you gently push or pull on the crossbars. Check that it is firmly attached to your vehicle’s designated mounting points as per the manufacturer’s instructions and that all clamps or feet are securely fastened.
Q2: Can I use bungee cords to tie down my surfboard?
A: No, bungee cords are not recommended for securing surfboards to roof racks. They are elastic, which means they can stretch and loosen unexpectedly, especially with changes in speed or temperature, making them unsafe for transporting gear.
Q3: What is the best way to secure my surfboard’s fins?
A: For short trips or when using a roof rack, it’s often easiest and safest to remove the fins. If you can’t or don’t want to remove them, ensure they are pointing upwards and consider placing a towel or padding between the board and the rack to prevent damage.
Q4: How tight should the straps be?
A: The straps should be tight enough to prevent the surfboard from moving at all when you try to wiggle it, but not so tight that they cause visible compression or damage to the surfboard or your car’s roof. A firm hold is what you’re aiming for.
Q5: How often should I check my surfboard straps?
A: You should perform an initial check after a few miles of driving, and then again after 30 minutes to an hour on longer trips. It’s also good practice to check them before any significant journey and at the start of each trip.
Q6: Can I carry more than one surfboard on my car?
A: Yes, you can carry multiple surfboards, but you must ensure your roof rack system is rated for the combined weight and that the boards are stacked and secured properly to maintain stability and avoid damage. Longer straps may be required.
Q7: What are ACA and ASTM standards related to roof racks?
A: While ACA (American Canoe Association) and ASTM (American Society for Testing and Materials) don’t directly certify surfboard roof racks, they set safety standards for watercraft and cargo carrying systems. Reputable roof rack manufacturers often design their products to meet or exceed general cargo-securing guidelines and safety expectations, ensuring reliability and safety for their intended use.
Conclusion
Mastering how to attach your surfboard to a roof rack is a fundamental skill for any surfer who loves to explore different breaks. By following these steps, using the right gear, and always prioritizing safety checks, you can ensure your journey to the beach is as smooth and stress-free as possible. Remember, a properly secured board means a safer trip for everyone and a protected surfboard ready for action. So, take your time, double-check every strap, and enjoy the ride to your next epic surf session. Happy surfing!
Recent Posts
Jumper Cables With Bag: Heavy Duty Booster Cables for Easy Storage
There’s nothing more frustrating than turning the key in your car and hearing silence. A dead battery can ruin your day in an instant.You might feel stuck, stressed, and unsure what to do next....
Strong Ram 1500 Heavy Duty License Plate Frame for Ultimate Durability
There’s nothing more frustrating than struggling with a flimsy license plate frame that bends, rusts, or just doesn’t fit right on your Ram 1500. You want something strong and reliable that...