

Car stereo whining noise? This common issue, often linked to your car’s electrical system, can be fixed by identifying and isolating the source of interference. Proven solutions involve checking ground connections, installing a noise filter, or upgrading your stereo’s components. We’ll guide you through simple steps to silence that annoying sound.
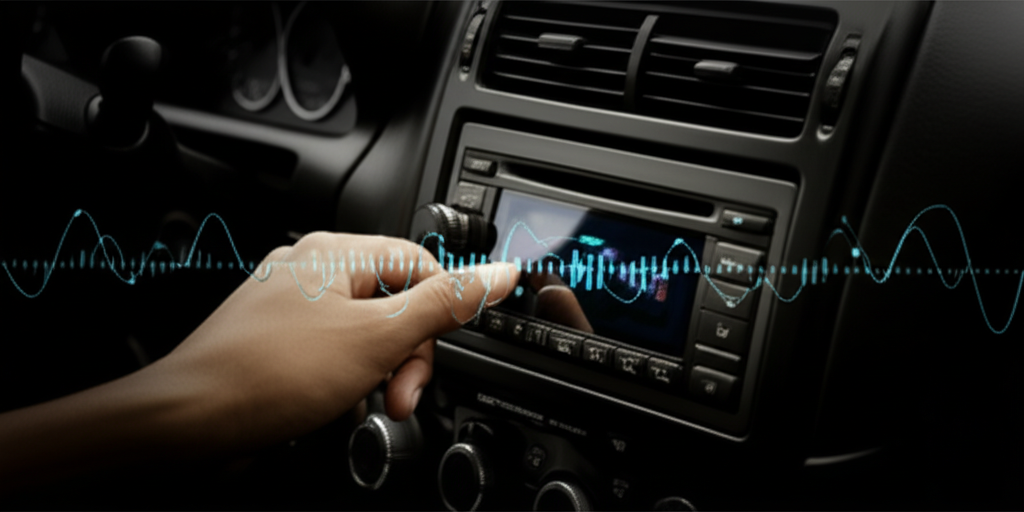
Have you ever noticed a strange whining sound coming from your car stereo, especially when you accelerate or turn the engine on? It’s a common and super frustrating problem that can really spoil your driving tunes. This annoying whirring, often called alternator whine, happens when your car’s electrical system creates interference that leaks into your audio system. Don’t worry, though! You don’t need to be a master mechanic to tackle this.
As your trusted automotive guide, Md Meraj, I’m here to break down exactly what causes this, and more importantly, how to fix it. We’ll go through easy-to-follow steps that will help you get your car stereo sounding clear and crisp again. Let’s dive in and get that peace and quiet (or great music!) back on the road.
Understanding Car Stereo Whining Noise: What’s Causing It?
That pesky whining sound you hear from your car stereo is usually a sign that something in your car’s electrical system is interfering with the audio signal. Think of it like a tiny radio wave getting picked up and amplified by your speakers. The most common culprit is your car’s alternator.
The alternator is a crucial part of your car; it generates electricity to power your car’s systems and recharge the battery. However, it also produces a lot of electrical noise, especially when it’s working harder, like when you accelerate. This noise can travel through the wiring to your stereo. Other sources can include your car’s ignition system, electric fans, or even poorly shielded aftermarket accessories.
The whine often changes pitch with your engine speed—getting higher as you accelerate and lower as you slow down. This is a classic symptom of alternator whine. If the whine stays at a constant pitch regardless of engine speed, it might be coming from a different source, but often, it’s directly related to the engine’s RPM.
Common Causes of Car Stereo Whining Noise:
- Alternator Interference: The most frequent cause. Electrical noise from the alternator is picked up by audio cables.
- Loose or Corroded Ground Connections: Poor ground connections are a major source of electrical noise in any vehicle.
- Unshielded or Damaged Wiring: Audio signal wires and power wires need to be properly shielded and kept away from noise-generating components.
- Faulty Stereo Components: Less common, but internal issues with the head unit or amplifier can also cause noise.
- Other Electrical Accessories: Things like electric fuel pumps, cooling fans, or even certain dashboard lights can sometimes introduce noise.
Diagnosing the Whining Noise: Pinpointing the Source
Before we start swapping parts or adding gadgets, we need to figure out exactly where the whine is coming from. This step is key to a successful fix. We’ll be doing a bit of simple troubleshooting, much like a detective looking for clues.
The first and easiest thing to check is how the noise changes. Does it get louder when you accelerate? Does it disappear when you turn off the engine? Does it change if you turn on your headlights or the air conditioning? These answers will give you valuable hints.
We’ll start with the most obvious potential problems and work our way to the less common ones. Remember to always work safely and disconnect the car battery before touching any electrical components. This prevents accidental shorts and protects you from electric shock.
Step-by-Step Diagnosis:
- Listen Carefully: Turn on your car’s ignition (engine off) and play your stereo. Note the type and volume of any noise. Then, start the engine. Does the noise change? Does it get louder?
- Check Accessories: With the engine running and the stereo playing, turn on other electrical accessories one by one. Do your headlights dim slightly? Does the whine change when you turn on the A/C or wipers? This can help isolate the source.
- Test with Lights: Turn your headlights on and off. If the whine changes pitch or volume, it often points to the alternator or charging system.
- Disconnect Devices: If you have any aftermarket electronic devices connected (like a phone charger, dashcam, or amplifier), try disconnecting them one by one to see if the noise stops.
Proven Fixes for Car Stereo Whining Noise
Now that we have a better idea of what might be causing the whine, let’s get to the fixes! These are tried-and-true methods that many car owners have used successfully. We’ll cover the most common solutions first, starting with the simplest and cheapest.
Fix 1: Improve Ground Connections – The Foundation of Good Audio
A solid ground connection is absolutely essential for any car audio system. It’s like the foundation of a house; if it’s weak, everything else can go wrong. A poor ground connection allows electrical noise to creep into your system.
What you’ll need:
- Socket set or wrenches
- Wire brush or sandpaper
- Silicone spray or dielectric grease
- New ring terminals (if old ones are bad)
How to do it:
- Locate Ground Points: The stereo (head unit) has a ground wire, usually brown or black. This wire should connect to a clean metal surface on your car’s chassis. The car’s main stereo harness will also have a ground. If you have an aftermarket amplifier, it will have its own power and ground wires that need to connect directly to the battery’s negative terminal or a very clean chassis ground.
- Inspect Connections: Look for any signs of corrosion (a fuzzy, green or white powdery substance) or loose connections on the ground wire and the metal point it’s attached to.
- Clean the Area: Disconnect the car battery’s negative terminal first! Then, disconnect the ground wire. Use a wire brush or sandpaper to thoroughly clean both the metal terminal on the wire and the spot on the car’s chassis where it connects. You want to see bare, shiny metal.
- Make it Secure: Reconnect the ground wire, ensuring it’s tightly fastened. Applying a thin layer of silicone spray or dielectric grease can help protect the connection from future corrosion.
- Test Again: Reconnect the car battery and start the car to see if the whine is gone.
Fix 2: Install a Ground Loop Isolator – Simple and Effective
If cleaning your grounds doesn’t fully solve the issue, or if you have multiple components like an amplifier and speakers connected, you might have a “ground loop.” This is where two or more components are grounded at different points in the car’s electrical system, creating a path for noise. A ground loop isolator breaks this loop.
| Pros of Ground Loop Isolator | Cons of Ground Loop Isolator |
|---|---|
| Easy to install. | Can sometimes slightly degrade audio quality (though often imperceptible to beginners). |
| Relatively inexpensive. | Only addresses ground loop noise; won’t fix other types of interference. |
| Effective for specific types of whine. | Adds an extra connection point in your audio chain. |
What you’ll need:
- Ground loop isolator (available for RCA inputs or speaker-level inputs)
- Wire strippers (if needed)
- Screwdriver or pliers
How to do it (RCA type):
- Locate RCA Cables: These are the red and white (or black) cables that connect your head unit to an amplifier.
- Install Isolator: Unplug the RCA cables from the amplifier. Plug the isolator’s input side into the amplifier’s RCA jacks, and then plug the original RCA cables into the isolator’s output jacks.
- Test: Start your car and check if the whine is gone.
How to do it (Speaker-level type):
This type is for when you don’t have RCA cables, like with factory stereos. It often connects between the factory stereo wiring and an aftermarket amplifier. Follow the specific instructions that come with your isolator, as wiring configurations can vary. You’ll typically connect wires from the stereo to the isolator, and then from the isolator to the amplifier.
Fix 3: Install a Noise Filter – Addressing Alternator Whine Directly
A noise filter, often called a DC power filter or noise suppressor, is designed specifically to block the high-frequency noise generated by the alternator and other engine components from reaching your stereo. It’s a very effective solution for alternator whine.
What you’ll need:
- DC power noise filter
- Wire strippers
- Wire connectors (like butt connectors or crimp caps)
- Pliers or crimping tool
- Electrical tape
- Multimeter (optional, but helpful for checking power)
How to do it:
- Disconnect Battery: Always disconnect the negative battery terminal before you begin.
- Locate Power Wire: Find the positive (+) power wire going to your car stereo (usually red or yellow, depending on the wiring harness adapter). If you have an amplifier, you’ll need to install a filter on its main power wire.
- Cut and Connect: Carefully cut the power wire. Strip a small amount of insulation from both cut ends.
- Install Filter: Connect one end of the noise filter to one of the cut wire ends using appropriate connectors. Connect the other end of the filter to the other cut wire end. Many filters have clear markings for input and output or polarity (+/-). Ensure you follow them. For instance, the wire coming from the car’s fuse box connects to the filter’s input, and the filter’s output connects to the stereo’s power wire.
- Secure and Isolate: Use electrical tape to wrap the connections securely. Make sure no bare wires are exposed. If the filter has a ground wire, connect it to a good chassis ground.
- Test: Reconnect the battery and start the engine to see if the whine is gone.
For a visual guide on filter installation, resources like AutoZone’s DIY guide can offer helpful diagrams.
Fix 4: Shielding and Rerouting Wires – Keeping Noise Away
Sometimes, the problem isn’t the components themselves, but how the wires are run. Audio signal wires (especially RCA cables) are like little antennas. If they run too close to noisy electrical components or power wires, they can pick up interference.
What you’ll need:
- Braided wire loom or shielded cable
- Zip ties
- Wire loom clamp or tie wraps
- Electrical tape
How to do it:
- Identify Problematic Areas: Try to trace where your audio cables run. Are they bundled with power wires from the alternator, ignition coils, or engine control module?
- Reroute Cables: The best solution is to reroute your audio signal cables (RCA cables, speaker wires if they carry low-level signals) away from the main wiring harnesses that carry power and ignition signals. Run them along the opposite side of the vehicle from these noise sources. For example, if the main power looms are on the driver’s side, run your audio cables on the passenger side.
- Use Shielded Cable: If rerouting isn’t entirely possible, consider using shielded RCA cables or adding braided wire loom (like split loom tubing specifically designed for automotive use) around the existing audio wires. This metal shielding acts as a barrier against electrical noise.
- Secure Properly: Use zip ties or loom clamps to secure the wire loom and keep wires neatly organized and away from moving parts or heat sources.
- Test Again: After making changes, reconnect the battery and test your stereo.
Fix 5: Upgrade Your Stereo or Components – When All Else Fails
If you’ve tried the above steps and the whine persists, it’s possible that your stereo head unit, amplifier, or even speakers are not well-shielded themselves, or there’s a fault within the unit. This is less common for factory systems but can happen with older or very cheap aftermarket equipment.
When to consider an upgrade:
- You’ve exhausted all other troubleshooting steps.
- Your current stereo or amplifier is very old or of low quality.
- You’re experiencing other audio problems like distortion or intermittent sound.
What to look for:
- Reputable Brands: Stick with well-known car audio manufacturers.
- Built-in Noise Rejection: Many modern head units and amplifiers have better internal noise filtering and shielding.
- Quality Wiring: Use good quality, properly shielded RCA cables and power/ground wires when installing new components.
Upgrading can be a more involved process, often requiring new wiring harnesses and installation kits. If you’re not comfortable with this, it might be time to consult a professional car audio installer.
Troubleshooting Table: Quick Reference
Here’s a quick guide to help you choose the right fix based on common symptoms:
| Symptom | Likely Cause | Recommended Fix |
|---|---|---|
| Whine changes pitch with engine RPM. | Alternator noise, charging system interference. | Install a noise filter or DC power filter. Ensure good ground connections. |
| Whine is constant and present even when engine is off (but ignition is on). | Ground loop, interference from other accessories. | Check and clean ground connections. Install a ground loop isolator. Reroute/shield wires. |
| Whine disappears when you unplug a specific accessory (e.g., phone charger). | Interference from that specific accessory. | Replace the accessory or use a different power source for it. |
| Whine is rough, crackly, or distorted, not a pure whine. | Poor quality wiring, faulty component, or bad installation. | Inspect and reroute/shield all wiring. Check all connections. Consider upgrading components. |
Frequently Asked Questions (FAQ)
Q1: Why does my car stereo whine when I accelerate?
A1: When you accelerate, your engine works harder, and so does the alternator. This causes the alternator to produce more electrical “noise.” If your stereo’s wiring or components aren’t properly shielded, this noise can be picked up and amplified, resulting in a whine that changes pitch with engine speed.
Q2: Can I fix car stereo whine myself?
A2: Absolutely! Many common causes, like loose grounds or simple interference, can be fixed with basic tools and straightforward steps. The fixes we’ve discussed, such as cleaning grounds or installing a noise filter, are beginner-friendly.
Q3: What is a ground loop, and how does it cause stereo whine?
A3: A ground loop occurs when two or more pieces of audio equipment are connected to different ground points in the vehicle. Because these ground points may have slightly different electrical potentials (voltages), current can flow between them through the audio cables, creating a humming or whining noise. A ground loop isolator breaks this circuit.
Q4: How much does it cost to fix a car stereo whine?
A4: Many fixes, like cleaning grounds or rerouting wires, are free! The most common component you might need to buy is a noise filter or ground loop isolator, which typically costs between $10 to $30. Upgrading components would be significantly more expensive.
Recent Posts
Durable Jeep Wrangler American Flag License Plate Frame for Patriotic Drivers
Have you ever felt frustrated by a plain, worn-out license plate frame on your Jeep Wrangler? It’s a small detail, but it can really affect your vehicle’s look.Every time you see that dull...
Slim Design Audi Black License Plate Frame for Sleek Car Styling
Have you ever struggled with a bulky, noisy license plate frame that just doesn’t fit right? It can be so frustrating when your car’s style feels off or the frame rattles every time you...