
When you slam on the brakes and your car suddenly veers left, it’s a clear sign something isn’t right. This often points to a brake system issue on one side. Addressing it promptly ensures your safety and helps maintain stable braking control. Our guide breaks down the common causes and how to fix them.
Ever slammed on your car’s brakes in an emergency, only to feel it pull sharply to one side? It’s a jarring experience that can leave you feeling unsteady and worried. Many drivers find themselves asking, “Why does my car pull to the left when braking hard?” This isn’t just an annoying quirk; it’s a critical safety concern that needs your attention. Your car’s ability to stop straight and true is fundamental to safe driving, and a pull to one side during hard braking indicates a problem in the brake system.
Don’t worry if car mechanics sound complicated—we’re here to make it easy. This guide is designed for everyday drivers like you. We’ll walk you through the most common reasons behind this braking issue, explain them in simple terms, and provide clear, step-by-step solutions. You’ll learn what to look for, what you might be able to fix yourself, and when it’s time to consult a trusted mechanic. By the end, you’ll feel more confident about your car’s health and how to keep it running safely.
Understanding “Car Pulls To The Left When Braking Hard”: What’s Happening?

When you apply the brakes, your car’s braking system works to slow down each wheel evenly. If one side of the car brakes more effectively than the other when you brake hard, the car will naturally pull towards the side with better braking force. Think of it like trying to pull a rope where one person is pulling much harder than the other – the rope will go in the direction of the stronger pull. Similarly, your car is being pulled towards the side that’s slowing down more aggressively.
This uneven braking can be caused by a variety of issues, most of which are related to the brake components. These systems are designed for balance, and any imbalance can lead to your car pulling. Identifying the exact cause is the first step toward a safe and reliable fix.
Common Culprits: Why Your Car Pulls Left During Hard Braking
Several parts of your braking system can cause this problem. Let’s break down the most frequent offenders:
1. Brake Fluid Issues
Brake fluid is the hydraulic fluid that transmits the force from your brake pedal to the brake pads. If the brake fluid is low or contaminated, it can affect braking performance.
- Low Brake Fluid: If the brake fluid reservoir is low, it can mean there’s a leak somewhere in the system, or your brake pads are severely worn. Low fluid can lead to air getting into the lines, causing spongy brakes and uneven pressure.
- Contaminated Brake Fluid: Over time, brake fluid can absorb moisture and become contaminated. This reduces its effectiveness and can lead to corrosion within the brake system components.
2. Worn or Damaged Brake Pads and Rotors
Brake pads and rotors are the heart of your braking system. They work together to create friction, slowing your wheels.
- Uneven Wear: If the brake pads on one side are more worn than the other, they won’t create the same amount of friction. Similarly, if a brake rotor is warped or damaged on one side, it can cause uneven braking.
- Glazed Pads/Rotors: Overheating can cause brake pads and rotors to become “glazed,” developing a shiny, hard surface that reduces friction. If this happens unevenly, it can cause a pull.
3. Sticking Brake Caliper
Brake calipers are the clamps that squeeze the brake pads against the rotor. If a caliper sticks, it can apply constant or uneven pressure.
- Seized Caliper Piston: A caliper piston might rust or get stuck, preventing it from retracting fully or applying pressure evenly. This can cause one side to brake harder or not release properly, leading to uneven braking when you apply the pedal.
- Sticking Caliper Slide Pins: These pins allow the caliper to move freely. If they get dirty or corroded, the caliper can become stuck, leading to uneven pad pressure.
4. Issues with Brake Hoses or Lines
Brake hoses and lines carry the brake fluid. Any damage or blockage here can seriously impact braking.
- Collapsed Brake Hose: A flexible brake hose can degrade internally over time. If it collapses on the inside, it can restrict fluid flow to one brake, or worse, trap fluid and keep the brake applied.
- Kinked or Blocked Lines: A physical obstruction in a brake line can cause similar problems to a collapsed hose.
5. Problem with the Master Cylinder
The master cylinder is the heart of the hydraulic brake system. It converts the mechanical force of your foot on the brake pedal into hydraulic pressure.
- Internal Leaks: If there’s an internal leak within the master cylinder, it might not be able to maintain equal pressure to all four wheels. This often manifests as a spongy pedal and can lead to uneven braking.
6. Suspension Components
While primarily a brake system issue, sometimes worn suspension parts can exacerbate or mimic the symptoms of a braking problem.
- Worn Ball Joints or Tie Rod Ends: While not directly causing braking issues, if these components are very loose, they can allow the wheel to move more than it should under braking forces, contributing to a feeling of pulling.
DIY Diagnosis: Checking the Brakes Yourself
Before you rush to a mechanic, there are a few things you can check yourself to get a better idea of what might be wrong. Safety first – if you’re not comfortable, it’s always best to have a professional look at it.
Tools You Might Need:
- Car Jack and Jack Stands
- Lug Wrench
- Gloves
- Wheel Chocks
- Flashlight
- Brake Cleaner (optional)
- Torque Wrench (if removing wheels)
Step-by-Step Checks:
- Park Safely and Chock Wheels: Find a level surface. Engage the parking brake, turn off the engine, and place wheel chocks behind the rear wheels to prevent accidental rolling.
- Loosen Lug Nuts: With the car still on the ground, use a lug wrench to slightly loosen the lug nuts on the wheels you want to inspect (usually the front ones, as they do most of the work). Just loosen them a half-turn to a full turn – don’t remove them yet.
- Jack Up the Vehicle: Consult your car’s owner’s manual for the correct jacking points. Safely lift the front of the car with your jack.
- Secure with Jack Stands: Place jack stands under the recommended support points and slowly lower the car onto the stands. Never work under a car supported only by a jack.
- Remove the Wheels: Now, fully unscrew the lug nuts and remove the wheels.
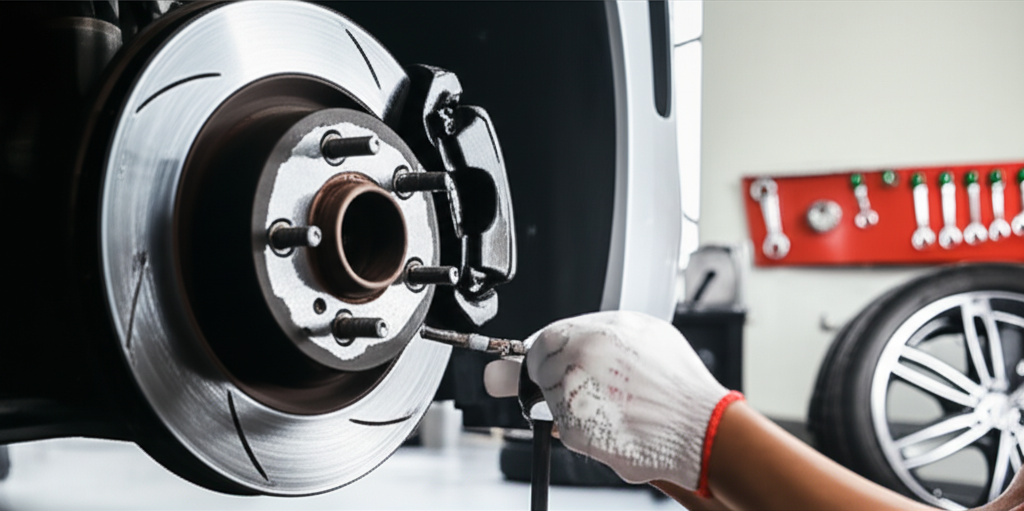
- Visual Inspection of Brake Pads and Rotors:
- Pads: Look at the brake pads. They are the rectangular or crescent-shaped material pressed against the rotor. You want to see a decent amount of friction material left. If it’s very thin (less than about 3mm or 1/8 inch), they need replacing. Check both the inner and outer pads. Are they worn evenly?
- Rotors: Inspect the brake rotors (the shiny metal discs). Look for deep grooves, scoring, discoloration (blueish or rainbow-like hues suggest overheating), or any visible cracks. A rotor should ideally be smooth.
- Check for Fluid Leaks: Look around the brake caliper, brake lines, and hoses for any signs of brake fluid leaks. Brake fluid looks oily and is usually clear or amber-colored. If you see wet spots or grime buildup from fluid, you likely have a leak.
- Inspect Caliper Movement (If Comfortable): Gently try to wiggle the brake caliper. It should move somewhat freely. If it feels seized or uneven, this could be a sign of a problem. You can also check if the caliper slide pins are lubricated and move smoothly. (This might require removing the caliper, which is more advanced).
- Check Brake Fluid Level and Condition: With the car safely on the ground and the engine off, locate the brake fluid reservoir under the hood (check your owner’s manual). The fluid level should be between the “MIN” and “MAX” lines. If it’s low, you likely have a leak. If the fluid looks dark and dirty, it may need to be flushed and replaced.
- Re-Install Wheels and Lower Vehicle: Once you’re done inspecting, carefully put the wheels back on, hand-tighten the lug nuts, and then use the jack to lift the car off the jack stands. Lower the car and then use a torque wrench to tighten the lug nuts to your vehicle’s specifications (found in the owner’s manual) in a star pattern.
Remember, a visual inspection can reveal a lot, but it might not show all issues, especially internal ones within the master cylinder or brake lines.
Essential Fixes: Addressing the Problem
Once you’ve identified the likely cause, here are the essential fixes. Some are beginner-friendly, while others might be best left to professionals.
1. Addressing Brake Fluid Problems
- Topping Up: If the fluid is just low and there are no obvious leaks and your pads are significantly worn, topping up might be a temporary fix. However, the root cause (worn pads or a leak) needs to be addressed. Always use the correct type of brake fluid recommended for your vehicle. You can find a list of common brake fluid types here: Brake Fluid Types.
- Brake Fluid Flush: If the fluid is old and dirty, a complete flush and replacement are necessary. This involves bleeding the brakes to remove all old fluid and air, then refilling with fresh fluid. This is a task that many DIYers can do with the right tools and a helper, or it’s a routine service for your mechanic. A guide on flushing brake fluid can be found on many automotive YouTube channels or DIY forums dedicated to your car model.
2. Replacing Brake Pads and Rotors
This is a common DIY repair for many car owners. It involves removing the caliper, unbolting the old pads and rotors, and installing new ones.
Steps generally include:
- Remove the wheel.
- Remove the caliper mounting bolts.
- Open the caliper to access the pads (you might need to compress the caliper piston back into its bore – use a C-clamp or a specific tool for this).
- Remove the old brake pads.
- Remove the caliper from the rotor and set it aside, supported by a wire or bungee cord (don’t let it hang by the brake line).
- Remove the rotor attachment bolts (if any) and slide off the old rotor.
- Clean the hub surface where the new rotor will sit.
- Install the new rotor.
- Install new brake pads into the caliper bracket.
- Reinstall the caliper over the new pads and rotors.
- Reinstall the caliper mounting bolts and torque them to spec.
- Reinstall the wheel** and torque lug nuts.
Tip: Always replace brake pads and rotors in pairs (both front left and front right, or both rear left and rear right) even if only one side seems worn. This ensures even braking.
For detailed instructions specific to your vehicle, consult a repair manual or reputable online automotive resources like those from NHTSA’s vehicle safety section on brakes.
3. Repairing or Replacing a Sticking Caliper
A sticking caliper is often due to corrosion on the slide pins or a seized piston. The fix can involve:
- Cleaning and Lubricating Slide Pins: This is the easier fix. The caliper might need to be removed, the pins pulled out, cleaned of old grease and corrosion, and then re-lubricated with high-temperature brake grease. This can free up a caliper that’s sticking slightly.
- Replacing the Brake Caliper: If the piston is seized, or cleaning and lubrication don’t work, the entire caliper assembly usually needs to be replaced. This is a more involved job, often requiring a brake fluid flush and bleed afterward.
4. Fixing Brake Hoses and Lines
If a brake hose is swollen, cracked, or a line is kinked or corroded, it needs to be replaced. This is a job that requires precise work and proper bleeding of the brake system afterward to ensure no air is trapped.
Why professional help is often recommended for lines/hoses:
- Precision Required: Brake lines need to be bent correctly to avoid stress points.
- Flaring: If you’re replacing metal lines, you’ll need to “flare” the ends to create a proper seal, which requires special tools.
- System Bleeding: Any work on brake lines necessitates bleeding the entire system to ensure optimal performance and safety.
5. Master Cylinder Repair or Replacement
If the master cylinder is the culprit, it typically needs to be rebuilt or replaced. This is a complex job that requires a thorough understanding of hydraulic systems and a full brake bleed. For most drivers, this is a task best left to experienced automotive technicians.
When to Call a Professional
While some brake maintenance is achievable for a confident DIYer, certain situations absolutely warrant professional attention:
- You’re Unsure: If you’ve done your checks and are still not confident about the cause or the fix, it’s safer to let a pro diagnose it.
- Brake Fluid Leaks Detected: Especially if you can’t pinpoint the source, a leak needs expert attention.
- Sticking Caliper Issues That Persist: If cleaning doesn’t work, a seizing caliper is a serious safety concern.
- Brake Line or Hose Replacement: Due to the precision and bleeding involved, this is often best left to mechanics.
- Master Cylinder Problems: This is a core component of the brake system, critical for safety.
- ABS System Warning Lights: If your Anti-lock Braking System (ABS) light comes on, there’s a complex electronic or hydraulic fault that needs specialized tools and knowledge.
- After Performing Major Brake Work: If you’ve replaced major components but the problem persists, or if you want a final safety check.
Professional mechanics have the specialized tools, diagnostic equipment, and expertise to quickly and accurately identify and fix brake issues, ensuring your car is safe to drive.
Brake Maintenance Schedule & Tips
Preventing brake problems is always easier and cheaper than fixing them. Here’s a simple maintenance schedule:
Regular Checks:
- Every Oil Change: Ask your mechanic to give your brakes a quick visual inspection (pads, rotors, fluid level).
- Listen for Noises: Squealing, grinding, or clicking noises during braking are warning signs.
- Feel Your Brakes: Notice any sponginess, pulsing, or a pedal that goes too far down? Investigate.
Key Maintenance Points:
- Brake Fluid: Most manufacturers recommend flushing and replacing brake fluid every 2-3 years, as it absorbs moisture over time. This is often overlooked but vital for brake longevity and performance.
- Brake Pads and Rotors: Keep an eye on their wear. Replacing them proactively before they are completely worn down can sometimes save the rotors from damage.
- Cleanliness: Keeping brake components clean from excessive dust and dirt can help them function better.
A proactive approach to maintenance can save you from unexpected issues and costly repairs down the road. Learning about your car’s needs empowers you to keep it safe and reliable.
FAQ: Your Questions Answered
Q1: How dangerous is it if my car pulls to the left when braking hard?
A1: It is very dangerous. A car pulling to one side during hard braking means your braking force is uneven. This can drastically increase your stopping distance and, more importantly, make it difficult or impossible to steer effectively while braking, potentially leading to accidents.
Q2: Can I just ignore this problem if it’s only happening during hard braking?
A2: No, you should not ignore it. The problem indicates an underlying issue in your brake system that could worsen over time. What seems minor now could lead to brake failure or a loss of control in a critical situation.
Recent Posts
Durable Jeep Wrangler American Flag License Plate Frame for Patriotic Drivers
Have you ever felt frustrated by a plain, worn-out license plate frame on your Jeep Wrangler? It’s a small detail, but it can really affect your vehicle’s look.Every time you see that dull...
Slim Design Audi Black License Plate Frame for Sleek Car Styling
Have you ever struggled with a bulky, noisy license plate frame that just doesn’t fit right? It can be so frustrating when your car’s style feels off or the frame rattles every time you...