
Quick Summary:
If your car overheats after a thermostat and water pump replacement, it’s often due to air trapped in the cooling system or incorrect installation. Follow these proven fixes to purge air, ensure proper component function, and get your engine running cool again.
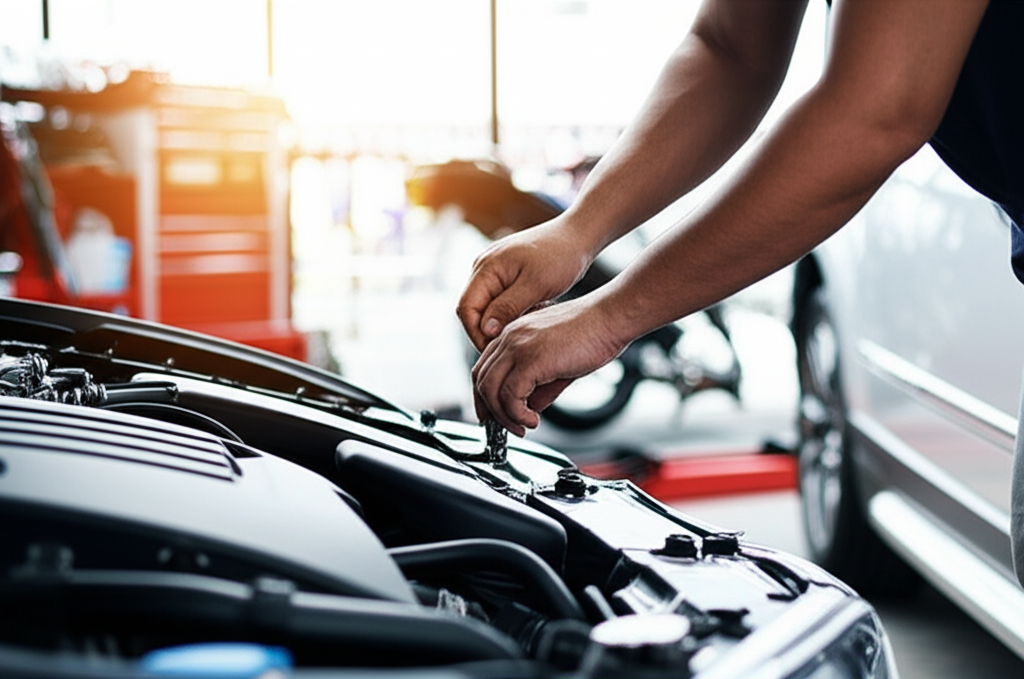
It can be incredibly frustrating when, after putting in the effort to replace your car’s thermostat and water pump, the engine still overheats. You might feel defeated, thinking you made a mistake or that the new parts are faulty. But don’t worry! This is a surprisingly common issue, and usually, the fix is simpler than you think. We’ll walk through the most likely reasons your car is still running hot and give you easy, step-by-step solutions.
Why Your Car Might Still Be Overheating Post-Fix
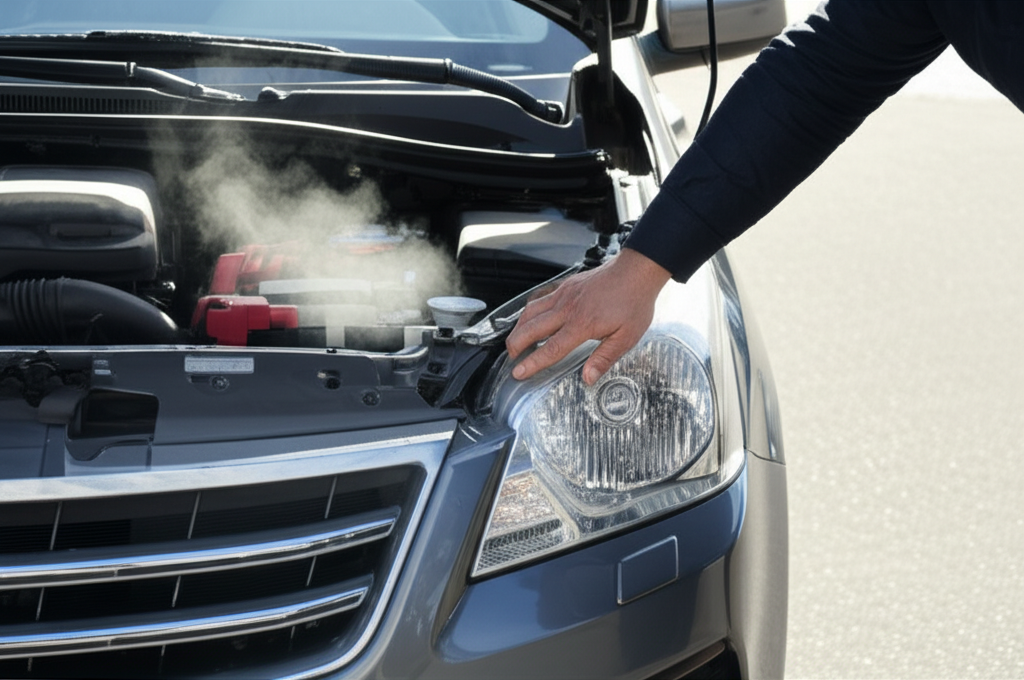
You’ve done the work, replaced the parts, and now… disaster strikes. The temperature gauge climbs right back up. Before you start second-guessing your DIY skills, let’s look at the usual suspects:
- Air in the Cooling System: This is the #1 reason. When you drain and refill the coolant, air can get trapped. This trapped air acts like a blockage, preventing coolant from flowing freely and cooling the engine.
- Improper Component Installation: Even with new parts, a slight misplacement or a faulty seal can cause problems.
- Faulty New Parts: While less common, a brand-new part can sometimes be defective straight out of the box.
- Other Cooling System Issues: The problem might not be with the parts you just replaced. A clogged radiator, a worn fan belt, or a malfunctioning radiator fan could be the culprit.
The Proven Fixes: Getting Your Car Cool Again
Let’s tackle these issues one by one. We’ll start with the most common and easiest fixes.
Fix 1: Bleeding the Cooling System (Purging Air)
This is often the magic bullet. Trapped air is the most frequent offender after a thermostat and water pump replacement. You need to get that air out so coolant can circulate properly.
What is Bleeding and Why Is It Important?
Bleeding, or purging, is the process of removing air pockets from your car’s cooling system. Your cooling system is designed to work with liquid coolant circulating evenly. Air pockets disrupt this flow, creating hot spots and causing your engine to overheat. Think of it like trying to drink through a straw with a hole in it – you won’t get much liquid through!
Tools and Materials You’ll Need:
For this task, you’ll likely need:
- New coolant (check your owner’s manual for the correct type and mixture)
- A funnel
- A clean container to catch old coolant
- Safety glasses and gloves
- Possibly a drain pan or shallow bucket
- A shop rag
- A screwdriver or wrench (depending on your vehicle’s bleed screw location)
Step-by-Step Bleeding Process:
The exact method can vary slightly by car model, so always consult your car’s service manual if possible. However, here’s a general guide:
- Ensure the Engine is Cool: This is crucial for your safety! Never open the radiator cap or coolant reservoir when the engine is hot.
- Locate the Bleeder Screw or Valve: Many cars have a small “bleeder” screw or a removable valve, often located on or near the thermostat housing, the engine block, or the radiator. Your owner’s manual or a quick online search for your specific car model will help you find it.
- Prepare for Coolant: Place a clean container under the bleeder screw to catch any overflow.
- Partially Fill the System: Open the radiator cap (or coolant reservoir cap, depending on your car’s design). Using a funnel, slowly fill the system with the correct coolant mixture until it’s almost full.
- Open the Bleeder Screw: Using the appropriate tool, slightly loosen the bleeder screw. You don’t need to remove it completely, just enough for air and coolant to escape.
- Watch for Coolant Flow: You’ll see air bubbles and potentially some coolant start to come out of the bleeder screw. Keep the radiator cap off and the coolant reservoir topped up as you go.
- Close the Bleeder Screw: Once a steady stream of coolant is coming out with no more bubbles, carefully tighten the bleeder screw.
- Fill and Cap: Top off the radiator or coolant reservoir to the correct level. Replace the radiator cap securely.
- Start the Engine: With the cap on, start your car’s engine. Turn the heater to its highest setting (and fan speed). This helps the heater core get flushed with coolant, which is another area where air can get trapped.
- Monitor and Refill: Let the engine run and reach its normal operating temperature. Watch the temperature gauge closely. You might need to let it run for 10-20 minutes, occasionally revving the engine gently (around 2000-2500 RPM) for short periods. This helps circulate the coolant and push any remaining air pockets towards the radiator.
- Recheck Coolant Level: As the engine cools down, the coolant level in the reservoir may drop as any final air pockets are purged. Once the engine is completely cool, recheck and top up the coolant reservoir to the ‘cold’ or ‘full’ mark.
Some modern vehicles have more complex systems that benefit from “vacuum bleeding.” This involves using a special tool to suck the air out and replace it with coolant. If your car has this system, you might need a specialized vacuum pump kit. You can find good information on vacuum bleeding tools from reputable automotive suppliers.
Fix 2: Checking for Proper Thermostat Installation
While you replaced your thermostat, it’s worth double-checking if it’s installed correctly. A thermostat can be installed backward, which would prevent it from opening properly and circulating coolant.
How to Inspect the Thermostat
For most common car models, the thermostat is located on the engine where the upper radiator hose connects. If you’ve just replaced it, you’ll have direct access. If you’re unsure, a quick search online for “thermostat location [your car make and model]” will show you pictures or diagrams.
Steps to Check:
- Safety First: Ensure the engine is completely cool.
- Access the Thermostat Housing: You might need to remove the upper radiator hose or the thermostat housing cover.
- Remove the Thermostat: Carefully take out the thermostat.
- Inspect for an Arrow or Markings: Most thermostats have a small arrow or a “jiggle pin” on the side. This indicates the correct direction for installation. Generally, the arrow or the jiggle pin should point upwards or towards the radiator hose outlet.
- Check for Obstructions: Make sure there’s no debris preventing it from seating correctly.
- Reinstall Correctly: Insert the thermostat in the proper orientation, ensuring the seal is good. Reattach the housing and hose, tightening bolts to the manufacturer’s specifications.

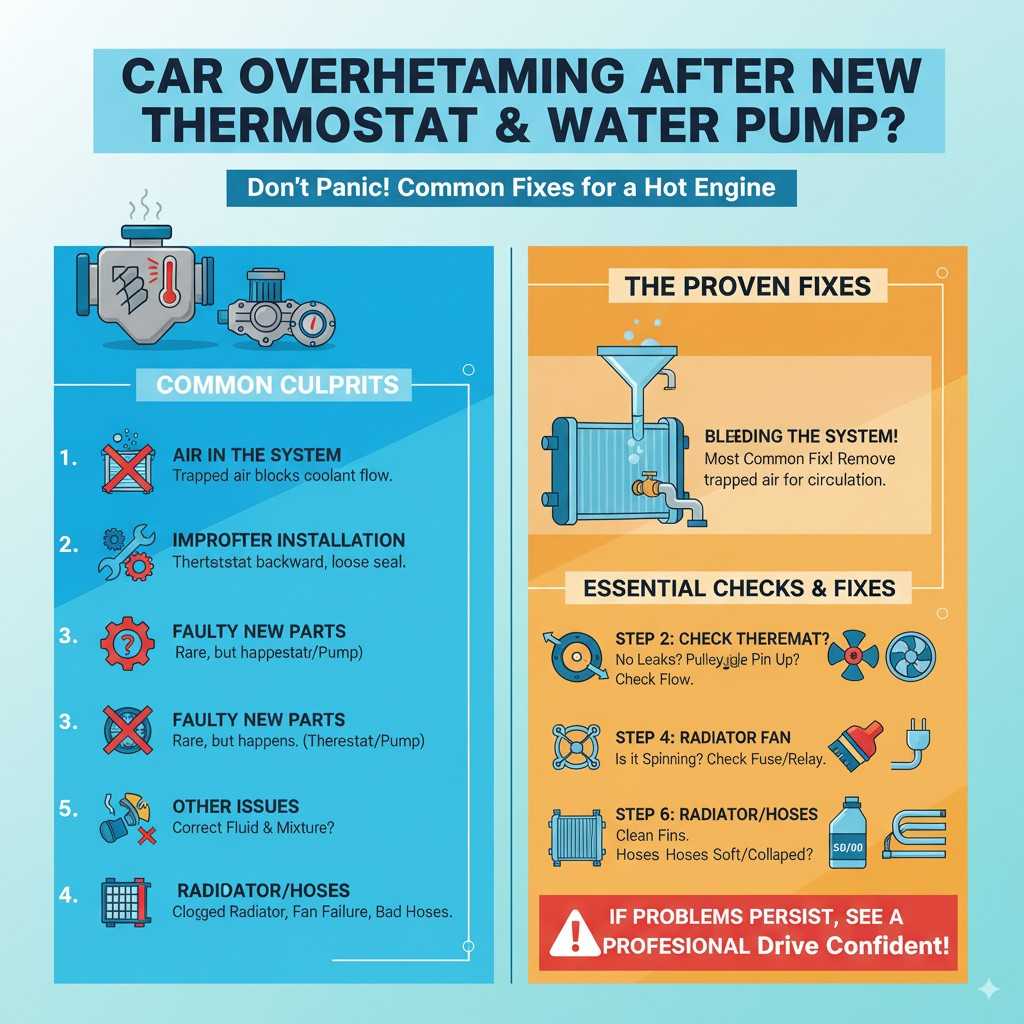
Fix 3: Verifying Water Pump Installation and Function
The water pump is the heart of your cooling system, circulating coolant. An improperly installed or functioning water pump will lead to overheating.
Checking the Water Pump
Installation Check:
- Gasket Seal: Ensure the gasket on the water pump was installed correctly and that all bolts are tightened evenly and to the correct torque specifications. A leak is a sure sign of an improper seal.
- Pulley Alignment: Make sure the water pump pulley is spinning freely and is aligned with other pulleys driven by the serpentine belt.
Functionality Check (More Advanced):
To check if the water pump is actively circulating coolant, you can observe the coolant flow. With the engine cool and the radiator cap off (or reservoir cap off if your system doesn’t have a radiator cap), start the engine and let it idle. Watch the coolant in the radiator or reservoir. You should see a gentle ripple or flow of coolant as the water pump pushes it through the system. If there’s no movement, the pump might not be working, or air is still preventing circulation.
Fix 4: Inspecting the Radiator Fan
The radiator fan is crucial for cooling the coolant when the vehicle is stationary or moving at low speeds. If the fan isn’t turning on, the coolant won’t be cooled effectively, leading to overheating, especially in traffic.
How to Check the Radiator Fan
This can vary depending on whether you have an electric fan or a belt-driven fan with a clutch.
For Electric Fans:
- With the engine running and at normal operating temperature (or slightly above), the fan should kick on. You can sometimes encourage it by turning on the air conditioning, as this often triggers the fan.
- Check Fuses and Relays: If the fan doesn’t turn on, check the fuse and relay associated with the cooling fan in your car’s fuse box. Consult your owner’s manual for their location.
- Sensor Issues: The fan might not be turning on because the temperature sensor that tells it to do so is faulty.
For Belt-Driven Fans with Clutches:
- When the engine is off and cool, try to spin the fan blades by hand. There should be some resistance.
- If it spins too freely with no resistance, the fan clutch may be worn out.
- If it’s very hard to turn or won’t turn at all, there might be an issue with the belt or the fan bearing.
Fix 5: Examining the Radiator and Hoses
Even with a new thermostat and water pump, a clogged radiator or a collapsed hose can prevent proper coolant flow.
Radiator Inspection:
External Blockage: Check the fins of the radiator from the outside. If they are clogged with dirt, bugs, or debris, airflow will be restricted. You can gently clean them with a soft brush or low-pressure water. Be careful not to bend the delicate fins.
Internal Blockage: This is harder to diagnose without professional tools. A severely clogged radiator won’t transfer heat effectively. Signs include coolant that looks very dirty or rusty (indicating buildup). If you suspect this, a radiator flush might help, but replacement may be necessary.
Hose Inspection:
- Collapsible Hoses: Feel the radiator hoses when the engine is running and hot (be very careful of moving parts and hot surfaces). If a hose feels soft and mushy, or seems to be collapsing inward, it might be failing and restricting flow. This is especially common for the lower radiator hose, which can collapse under suction from the water pump.
- Cracks and Leaks: Visually inspect all hoses for cracks, bulges, or signs of leaks.
Fix 6: Verifying Coolant Type and Mixture
Using the wrong type or incorrect mixture of coolant can affect its boiling and freezing points, and its ability to transfer heat. It can also cause corrosion and damage to cooling system components.
What to Look For:
- Consult Your Owner’s Manual: Always use the coolant recommended by your vehicle manufacturer. There are different types (e.g., traditional green, HOAT, OAT) that are not always interchangeable.
- Proper Mixture: Coolant is typically a 50/50 mix of antifreeze and distilled water unless specified otherwise. Too much water lowers the boiling point, and too much antifreeze can reduce its heat transfer capability.
- Fresh Coolant: Ensure the coolant is not old and degraded, as its effectiveness diminishes over time.
When to Seek Professional Help
While many overheating issues after part replacements are DIY-fixable, don’t hesitate to call a mechanic if:
- You’ve tried bleeding and checked the common issues, and the car still overheats.
- You’re uncomfortable performing any of the checks or fixes mentioned.
- You suspect a more complex problem like a blown head gasket (indicated by white smoke from the exhaust, coolant in the oil, or oil in the coolant).
- You don’t have the right tools or space to work safely.
A professional mechanic has the diagnostic tools and experience to pinpoint the exact cause quickly and accurately.
Frequently Asked Questions (FAQs)
Q1: Can a thermostat be installed backward?
Yes, absolutely. If installed backward, the thermostat won’t open correctly, preventing coolant from circulating and leading to overheating. Always check for directional arrows or pins on the thermostat body before installation.
Q2: How long does it take to bleed a cooling system?
It can take anywhere from 15 minutes to over an hour, depending on the vehicle and how much air is trapped. Be patient, let the engine reach operating temperature, and keep the heater on to help circulate coolant through the heater core.
Q3: Is it normal for coolant to bubble after a replacement?
Some initial bubbling is normal as trapped air is purged. However, if the coolant is vigorously bubbling or boiling after the bleed process, it can indicate that there’s still a lot of air in the system, a blocked passage, or a more serious issue like a faulty head gasket or a non-functioning water pump.
Q4: My new water pump is leaking. What should I do?
If your new water pump is leaking, it likely wasn’t installed correctly or the gasket is faulty. You will most likely need to remove the water pump again, inspect the area for debris, ensure the surfaces are clean and flat, use a new gasket (and sealant if recommended by the manufacturer), and reinstall the pump, torquing the bolts evenly.
Q5: What happens if I don’t bleed the air out of the cooling system?
Trapped air prevents efficient coolant circulation. This can lead to localized hot spots in the engine, causing the engine to overheat. Prolonged overheating can cause severe damage, including warped cylinder heads, blown head gaskets, and damaged engine components.
Q6: Can a faulty radiator cap cause overheating after a pump/thermostat job?
Yes, a faulty radiator cap can cause issues. The cap maintains pressure in the system, which raises the boiling point of the coolant. If the cap isn’t holding pressure, the coolant can boil at a lower temperature, leading to overheating. It’s a simple part to check or replace if you suspect it.
Conclusion
It’s completely understandable to feel frustrated when your car overheats after you’ve just invested time and effort into replacing essential cooling components like the thermostat and water pump. The good news is that in most cases, the solution involves something preventable and fixable, with air trapped in the cooling system being the most common culprit. By systematically checking for air pockets and employing proper bleeding techniques, inspecting your installation work, and verifying the function of all related cooling system parts—from the fan to the hoses—you can often resolve the issue yourself.
Remember to always prioritize safety, work on a cool engine, and use the correct parts and fluids for your specific vehicle. Don’t be afraid to consult your car’s manual or seek professional help if you’re unsure. With a little patience and this guide, you can get your car running at the right temperature, giving you peace of mind on the road.
Recent Posts
10 Best License Plate Frames for Popular Cars: Stylish & Durable Picks
Have you ever struggled with a loose or rusty license plate frame that just won’t stay put? It’s frustrating when your car’s look feels unfinished or when a noisy frame distracts you on every...
Best Tesla Model 3 & Model Y License Plate Frames No Drill Options
Have you ever struggled with installing a front license plate on your Tesla Model 3 or Model Y? Drilling into your sleek car’s bumper can feel wrong and risky.It’s frustrating to think about...