

Quick Summary:
A car that jerks when shifting from Park to Reverse often points to issues with the transmission fluid, motor mounts, or CV joints. Simple checks and fluid changes can fix many problems, but persistent jerking may require professional diagnosis. Addressing this promptly ensures smoother driving and prevents further damage.
It’s a feeling no driver enjoys: you shift your car into Reverse, and instead of a smooth transition, you get a noticeable jerk or clunk. This can be unsettling, making you wonder if something serious is wrong with your vehicle. Many drivers experience this at some point, and it’s a common point of concern. But don’t worry! Understanding why this happens is the first step to fixing it. Often, the causes are less intimidating than they might seem, and with a little guidance, you can get your car shifting smoothly again.
In this guide, we’ll break down the most common reasons your car jerks when shifting from park to reverse. We’ll explore what you can check yourself and when it’s time to seek professional help. Our goal is to give you the knowledge and confidence to tackle this issue, keeping your car reliable and your journeys stress-free.
Why Does My Car Jerk When Shifting From Park To Reverse?
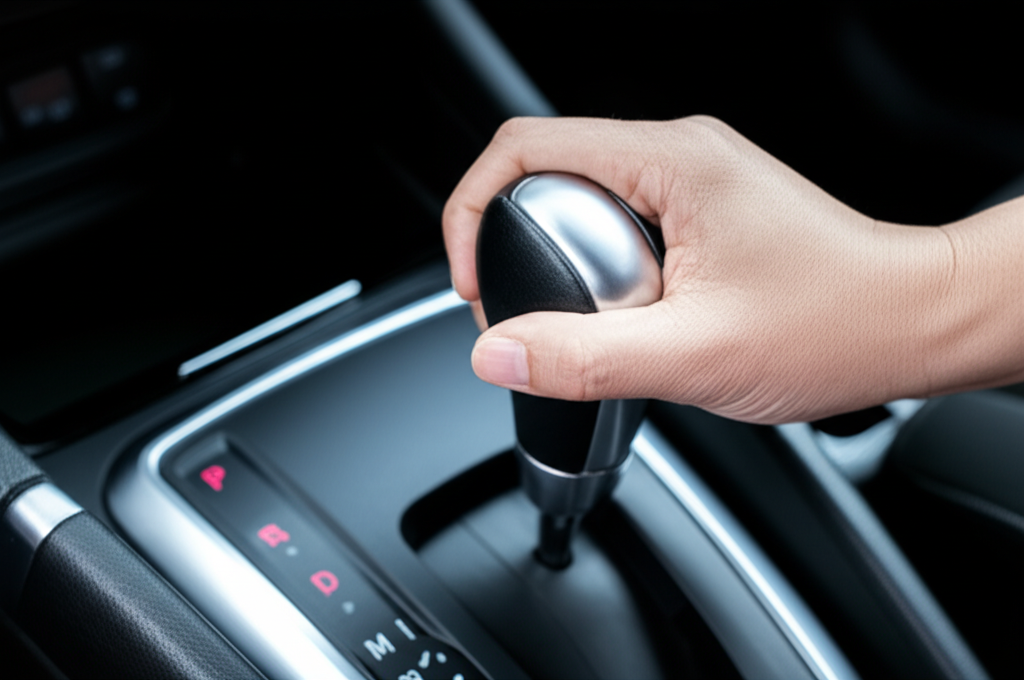
That jarring sensation when moving from Park to Reverse isn’t just annoying; it’s your car telling you something needs attention. The transmission is a complex system, and any hiccup in its operation can result in noticeable symptoms like a jerk or clunk. Let’s explore the most frequent culprits behind this common automotive complaint.
1. Low or Dirty Transmission Fluid
Think of transmission fluid as the lifeblood of your automatic transmission. It lubricates gears, cools components, and helps engage them smoothly. When the fluid level is low, or it’s dirty and broken down, its ability to perform these crucial tasks is compromised. This can lead to harsher shifts between gears, including the jump from Park to Reverse.
The Role of Transmission Fluid
- Lubrication: Prevents metal-on-metal friction within the transmission.
- Cooling: Dissipates heat generated by moving parts.
- Hydraulic Pressure: Essential for engaging and disengaging clutches and bands that control gear changes.
- Cleansliness: Carries away tiny metal particles and debris.
Over time, transmission fluid can degrade due to heat and contamination. It can become darker, smell burnt, and lose its effectiveness. Low fluid levels can occur due to leaks, and without enough fluid, the transmission’s hydraulic system can’t operate optimally, leading to slipping and jerky shifts.
Checking Your Transmission Fluid
Checking transmission fluid is similar to checking engine oil, but with a few key differences depending on your vehicle. Most cars have a dipstick specifically for transmission fluid. Always check your owner’s manual for precise instructions, as some vehicles have sealed transmissions or specific checking procedures.
- Warm Up the Engine: Drive your car for about 10-15 minutes to get the transmission fluid to its operating temperature.
- Park on a Level Surface: Ensure your car is on flat ground for an accurate reading.
- Engage the Parking Brake: Safety first!
- Locate the Transmission Dipstick: It’s usually a different color than the oil dipstick and may have a transmission symbol on it.
- Pull Out the Dipstick: Wipe it clean with a lint-free cloth.
- Re-insert the Dipstick: Push it all the way back in.
- Pull Out the Dipstick Again: Check the fluid level against the markings (usually “HOT” or “COLD” marks).
- Inspect the Fluid: Note its color and smell. Fresh fluid is typically red and has a slightly sweet smell. Dark brown or black fluid that smells burnt is a sign of trouble.
If the fluid is low, you can add the correct type specified in your owner’s manual. If it’s dirty or low, it might indicate a leak that needs to be addressed by a mechanic.
2. Worn or Damaged Motor Mounts
Motor mounts are the unsung heroes that secure your engine and transmission to the car’s frame. They aren’t just bolts; they’re designed with rubber or hydraulic cushioning to absorb vibrations and prevent the engine and transmission from moving excessively. When these mounts wear out, they can’t do their job effectively.
What Happens When Motor Mounts Fail
When the rubber in motor mounts deteriorates, cracks, or breaks, the engine and transmission can move more than they should. This extra movement is especially noticeable during gear changes. When you shift into Reverse, the engine and transmission might lurch or drop slightly, causing that jerk or clunk sensation. This can feel like the problem is within the transmission itself, but it’s actually the unsecured movement of the assembly.
Identifying Bad Motor Mounts
- Visible Damage: If you can safely look under your car (with it properly supported), you might see cracked or collapsed rubber on the mounts.
- Excessive Vibration: You might feel more vibration in the cabin, especially when idling or accelerating.
- Clunking or Thumping Sounds: Particularly when shifting gears, accelerating, or decelerating.
- Engine Sagging: In severe cases, you might notice the engine appearing to sag on one side.
Replacing motor mounts is a job often best left to a mechanic, as it involves supporting the engine and transmission’s weight safely. However, understanding their function helps pinpoint the source of the jerk.
3. Worn CV Joints or Axles
Constant Velocity (CV) joints are critical components of your car’s drivetrain, especially in front-wheel-drive and all-wheel-drive vehicles. They allow the drive shafts to transmit power from the transmission to the wheels while accommodating the steering and suspension movements. When these joints wear out, they can cause various symptoms.
How CV Joints Affect Shifting
Worn CV joints, particularly the inner ones that connect to the transmission, can cause a clunking or jerking sensation when you shift into gear, especially from Park to Reverse. This happens because the joint’s ability to smoothly transfer rotational force is compromised. The slop or play in a worn joint means that power isn’t applied to the wheels instantly or smoothly.
Signs of Worn CV Joints
- Clicking or Popping Sounds: Most often heard when turning, but can also occur during acceleration or shifting if the inner joint is worn.
- Grease Leaks: You might see grease splattered around the CV joint boots, indicating a torn boot that allows dirt and moisture in, accelerating wear.
- Jerking or Clunking: During acceleration or gear changes, as described.
- Vibrations: Sometimes felt through the floorboards.
If you suspect a CV joint issue, especially with torn boots, it’s important to have it inspected. A torn boot allows contaminants in, quickly destroying the joint. Replacing CV joints or axles is usually a mechanic’s job.
4. Problems with the Transmission Itself
While we’ve focused on simpler causes, it’s important to acknowledge that the transmission itself could be the source of the jerky shift. Issues within the transmission can be more complex and costly to repair.
Common Internal Transmission Problems
- Solenoid Issues: Solenoids are electronic valves that control fluid flow within the transmission. If one malfunctions, it can cause delayed or harsh shifts.
- Clutch Pack Wear: In automatic transmissions, clutch packs are responsible for engaging and providing different gears. Wear in these packs can lead to slipping and rough engagement.
- Torque Converter Problems: The torque converter connects the engine to the transmission in automatic vehicles. Issues with it can cause shuddering or jerking.
- Valve Body Issues: The valve body directs transmission fluid. Deposits or damage here can disrupt fluid flow and cause shifting problems.
Diagnosing internal transmission problems often requires specialized tools and expertise. If simpler solutions don’t resolve the jerk, or if you experience other transmission-related symptoms like slipping in all gears or warning lights, it’s time for a professional transmission shop.
5. Vacuum Leaks or Engine Control Issues
In older vehicles, vacuum-operated systems played a significant role in transmission control. A vacuum leak could disrupt the signals to the transmission, affecting shift quality. While modern vehicles rely more on electronic controls, issues with the Engine Control Unit (ECU) or sensors can still impact how the transmission behaves.
How Vacuum Leaks Affect Transmissions (Older Cars)
A vacuum modulator, connected via a vacuum line, often regulated line pressure in older automatic transmissions. If this line leaks, the pressure changes, leading to firm or soft shifts that can feel jerky. Small hoses can crack or become disconnected over time, especially in areas exposed to heat.
Electronic Control and Sensors
In newer cars, the ECU monitors various sensors (speed sensors, throttle position sensor, etc.) to determine optimal shift timing and pressure. If a sensor is faulty or there’s a wiring issue, the ECU might send incorrect commands to the transmission’s solenoids, resulting in rough shifts. Check Engine lights are often illuminated in these cases.
If you suspect a vacuum leak, a mechanic can often test for it using a smoke machine. For electronic issues, diagnostic scanning tools are essential.
Troubleshooting Steps: A Beginner’s Guide
Before heading to the mechanic, there are a few things you can check yourself to help diagnose the problem. These are beginner-friendly steps that can save you time and money.
Step 1: Check Transmission Fluid Level and Condition
As we discussed, this is the most common and easiest fix. Follow the steps previously outlined in the “Checking Your Transmission Fluid” section. If the fluid is low, add the correct type. If it’s dark or smells burnt, assume it needs a flush and potentially replacement, and consider a mechanic.
Step 2: Listen for Other Sounds
Pay attention to any other noises your car makes. Are there clunks when turning? Clicking noises? Rattles? These can help pinpoint whether the issue is related to the drivetrain (CV joints, axles) or something else.
Step 3: Inspect for Obvious Leaks
Park your car in a dry, level spot and leave it overnight. Check the ground for any fluid spots. Transmission fluid is often reddish-brown, but it can vary. Any new fluid spots under your car warrant investigation.
Step 4: Notice When the Jerk Occurs
- Only from Park to Reverse? This might point more strongly to transmission mounts or internal transmission issues.
- From all gears to Reverse? Could be a broader transmission issue or a fluid problem.
- When the car is cold or hot? Some issues are more pronounced when the fluid is cold or after extended driving.
Step 5: Simple Visual Inspection (If Comfortable)
If you’re comfortable and have a safe way to support your vehicle (e.g., jack stands), you can perform a basic visual inspection. Look for obviously damaged rubber components like motor mounts or CV joint boots. Be extremely cautious when working under a vehicle; always use secure jack stands.
When to Call a Professional Mechanic
While basic checks are great for DIYers, certain issues require the expertise and specialized tools of a professional mechanic.
- Persistent Jerking: If checking and topping up transmission fluid doesn’t solve the problem, or if the fluid is burnt.
- Suspected Motor Mount Failure: Replacing motor mounts is a critical safety job.
- Any Sign of CV Joint Damage: Torn boots or significant play require professional attention.
- Transmission Warning Lights: Any dashboard lights related to the engine or transmission should be addressed immediately.
- Internal Transmission Noises or Leaks: Grinding, humming, or significant fluid loss are serious signs.
- Complex Electronic Issues: Diagnosing sensor or ECU problems requires specialized equipment.
A good mechanic can properly diagnose the issue using diagnostic tools and their extensive knowledge. They can perform tests like a transmission fluid flush, diagnostic scans, and physical inspections of drivetrain components.
Essential Maintenance to Prevent Jerking
Regular maintenance is the best defense against transmission problems. Staying on top of your car’s needs can prevent jerky shifts and more serious issues down the road.
Regular Transmission Fluid Checks and Changes
Don’t neglect your transmission fluid. Follow your vehicle manufacturer’s recommended schedule for transmission fluid checks and changes. This typically involves changing the fluid and filter every 30,000 to 60,000 miles, but always consult your owner’s manual. AutoZone’s Service Net offers resources on transmission maintenance.
Inspect Drivetrain Components
While having your car serviced for oil changes or tire rotations, ask your mechanic to visually inspect your CV joints and motor mounts. Early detection of wear or damage can prevent costly repairs.
Maintain Engine Coolant Levels
An overheating engine can put extra stress on transmission components. Ensure your coolant is at the correct level and the cooling system is functioning properly.
Cost of Repairs: What to Expect
The cost to fix a jerky shift can vary widely depending on the cause.
| Problem | Estimated Repair Cost (Parts & Labor) | Notes |
|---|---|---|
| Low or Dirty Transmission Fluid | $100 – $300 | Fluid change/flush. Cost depends on fluid type and quantity. |
| Worn Motor Mounts | $300 – $700 | Can vary significantly based on vehicle and number of mounts needed. |
| Worn CV Axle/Joint | $200 – $600 per axle | Includes replacement of the entire axle assembly. |
| Internal Transmission Repair/Rebuild | $1,500 – $5,000+ | This is a major repair. Price depends on the extent of damage and transmission type. A rebuild is usually more than a specific part replacement. |
| Vacuum Leak Repair | $75 – $250 | Often a simple hose replacement. |
Note: These are estimated costs and can vary greatly based on your geographic location, the specific make and model of your vehicle, and whether you use a dealership or independent mechanic. Always get multiple quotes for significant repairs.
Frequently Asked Questions (FAQ)
Q1: Is it safe to drive my car if it jerks when shifting from Park to Reverse?
It’s generally not recommended to drive your car for extended periods if it’s experiencing a significant jerk when shifting into Reverse. While it might not cause immediate catastrophic failure, it can put undue stress on other transmission components, potentially leading to more severe and costly damage over time. It’s best to get it diagnosed and fixed promptly.
Q2: How often should I change my transmission fluid?
The recommended interval for transmission fluid changes varies by vehicle manufacturer. Most recommend a change every 30,000 to 60,000 miles. Always consult your car’s owner’s manual for the most accurate information for your specific model. Some manufacturers also specify time intervals, such as every 2-3 years, regardless of mileage.
Q3: Can a simple transmission fluid change fix a jerky shift?
Yes, in many cases, a transmission fluid change can resolve or significantly improve a jerky shift, especially if the fluid is low, dirty, or degraded. It’s often the first and most cost-effective solution to try. However, if the problem is due to worn mechanical parts like mounts or internal transmission components, a fluid change alone won’t fix it.
Q4: My car feels sluggish after shifting into Reverse. Is this related?
Yes, sluggishness after shifting, or delayed engagement, can be a symptom of the same issues that cause a jerk. Low or dirty transmission fluid, worn solenoids, or a failing torque converter can all lead to a lack of immediate power transfer or a soft engagement, resulting in both jerking and sluggishness.
Q5: How do I know if I have a transmission leak?
Transmission fluid leaks typically appear as red or reddish-brown fluid puddles under your car, often near the middle or rear of the vehicle (for automatic transmissions). If you notice a burnt smell coming from under your car, especially after driving, it could indicate that transmission fluid is leaking onto hot exhaust components.
Q6: Should I use a transmission flush or just a fluid change?
This is a topic with varying opinions. A standard fluid change only replaces about 30-50% of the fluid in the transmission. A transmission flush uses a machine to replace nearly all the old fluid with new. For cars with well-maintained fluid
Recent Posts
Durable Jeep Wrangler American Flag License Plate Frame for Patriotic Drivers
Have you ever felt frustrated by a plain, worn-out license plate frame on your Jeep Wrangler? It’s a small detail, but it can really affect your vehicle’s look.Every time you see that dull...
Slim Design Audi Black License Plate Frame for Sleek Car Styling
Have you ever struggled with a bulky, noisy license plate frame that just doesn’t fit right? It can be so frustrating when your car’s style feels off or the frame rattles every time you...