
Yes, you can absolutely remove PPF (Paint Protection Film) from your car yourself, and it’s easier than you might think with the right approach. This guide will walk you through a simple, step-by-step process to safely peel away the film, protecting your car’s paint underneath.
PPF is a fantastic way to keep your car’s paint looking factory-fresh, shielding it from everyday hazards like stone chips, bug splatter, and minor scratches. But what happens when it’s time to take it off? Maybe you’re selling your car, or perhaps the film has yellowed over time, or you’re just ready for a change. Whatever your reason, knowing how to remove PPF without damaging your car’s paint is key. Many people worry that taking off PPF is a difficult, paint-ruining job, but with a bit of patience and the right tools, it’s a task most car owners can handle. This guide is here to show you exactly how it’s done, making the process smooth and stress-free.
Understanding PPF Removal: What You Need to Know
Before we dive into the “how-to,” let’s quickly cover a few important points. PPF is essentially a clear, urethane-based film that adheres to your car’s paintwork. It’s designed to be durable and protective, but also removable. The key to a successful removal is understanding how the adhesive works. Heat is your best friend here, as it softens the adhesive, allowing the film to stretch and peel away cleanly. Think of it like gently warming up a sticker to make it come off without leaving residue.
The age and quality of the PPF can affect the difficulty of removal. Older films, or those that weren’t installed by professionals, might be more brittle or leave behind more adhesive. Always remember that safety and patience are paramount. Rushing the process or using excessive force can lead to paint damage.
Tools and Supplies for Effortless PPF Removal
Gathering the right tools before you start will make the entire process much smoother. You don’t need a professional garage or expensive equipment. Here’s a list of what you’ll need:
- Heat Gun or Powerful Hair Dryer: This is crucial for softening the adhesive. A heat gun offers more consistent heat, but a good quality hair dryer works too. Be careful not to overheat the paint.
- Rubbing Alcohol (Isopropyl Alcohol): Typically a 70% solution is sufficient for cleaning up any residual adhesive.
- Microfiber Towels: You’ll need several clean, soft microfiber towels for cleaning and drying.
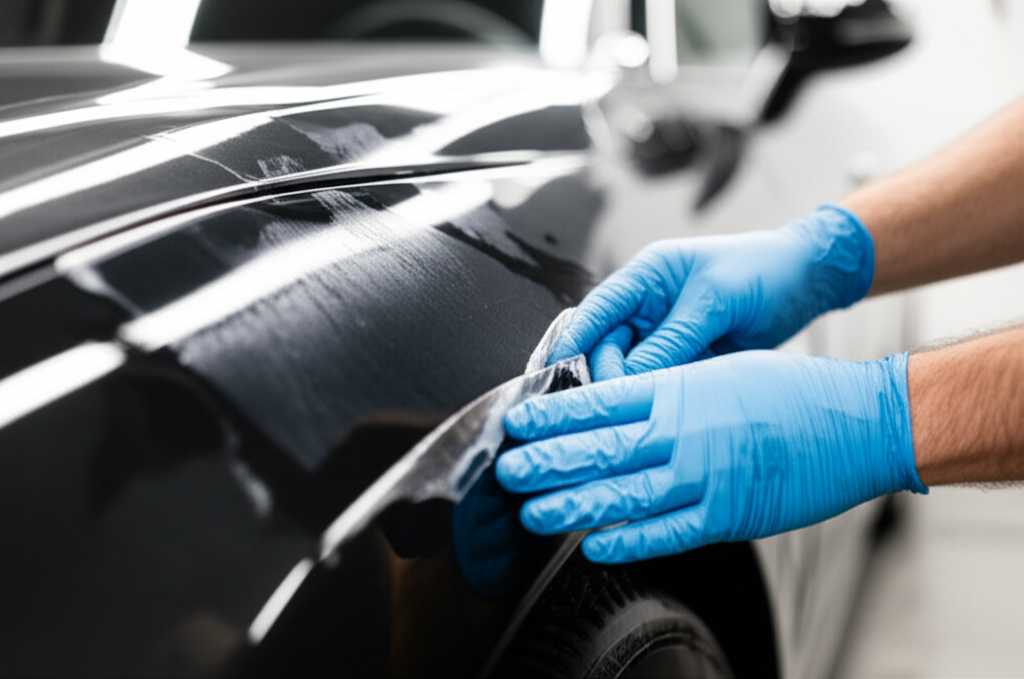
- Plastic Trim Removal Tools or Plastic Scrapers: These are essential for gently lifting edges without scratching your paint. Avoid metal scrapers at all costs!
- Detailing Gloves: To keep your hands clean and protect your skin.
- Clean Water and Bucket: For rinsing and general cleaning.
- Optional: PPF Adhesive Remover (e.g., 3M Adhesive Remover): For stubborn residue, though rubbing alcohol often does the trick.
Using quality tools, especially for heat application and scraping, will significantly reduce the risk of damaging your car’s finish. You can find plastic trim removal tools at most auto parts stores or online retailers dedicated to automotive detailing.
Step-by-Step Guide to Removing PPF
Now, let’s get to the core of it. Follow these steps carefully for a clean and safe PPF removal.
Step 1: Clean Your Car Thoroughly
Before you start peeling, wash your car thoroughly. Remove any dirt, dust, grime, or wax from the surface of the PPF. This prevents dirt from getting trapped under the film or creating scratches during removal. Use a pH-neutral car soap and plenty of clean water. Dry the car completely with a clean microfiber towel.
Step 2: Identify an Edge to Start
Find a corner or edge of the PPF. Often, edges near panel gaps or where the film might have been slightly lifted during installation are good starting points. If you can’t find an obvious edge, you might need to gently use a plastic trim tool to lift a small section of the film near a panel gap.
Step 3: Apply Heat to Soften the Adhesive
This is the most critical step. Take your heat gun or hair dryer and set it to a medium heat setting (around 150-180°F or 65-82°C is a good range). Hold it about 6-8 inches away from the PPF. Move the heat gun constantly in a sweeping motion across the surface. The goal is to warm the film and the adhesive underneath, making it more pliable.
You’ll notice the film becoming more flexible and losing some of its tension as it heats up. Don’t concentrate the heat on one spot for too long, as this can potentially damage the paint. A consistent, gentle warming is best.
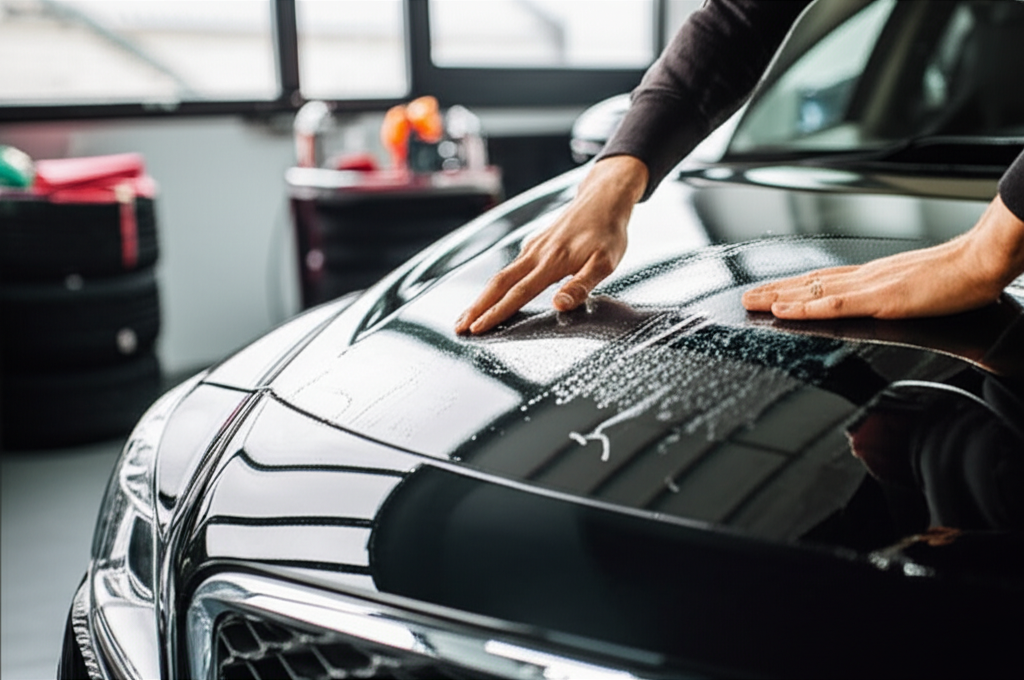
Step 4: Gently Peel the PPF
Once the film is warm, use your plastic scraper or trim tool to gently lift the edge you’ve identified. Start peeling the film back at a shallow angle, ideally between 45 and 90 degrees, pulling in the opposite direction of the edge you’re lifting.
As you pull, continue to apply heat a few inches ahead of where you’re peeling. This ensures the adhesive stays soft as you work. The film should stretch and peel away relatively smoothly. If you encounter resistance, apply more heat to that area. Work in small sections, peeling and heating as you go.
Important Tip for Smooth Peeling:
Maintain a steady, consistent pulling motion. Avoid jerky movements. The pulling force should be along the plane of the film, not directly away from the car’s surface. This minimizes stress on the paint.
Step 5: Address Stubborn Areas and Residue
Sometimes, the film might tear, or you might find areas where adhesive residue is left behind. If the film tears, simply re-apply heat to the remaining piece and continue peeling.
For adhesive residue, soak a microfiber towel with rubbing alcohol. Gently rub the residue. It should start to break down and ball up, allowing you to wipe it away. You can also use a dedicated PPF adhesive remover for particularly stubborn spots. Always test any cleaner on an inconspicuous area first.
You can learn more about safe cleaning practices from resources like the Environmental Protection Agency’s guidance on cleaning vehicles, which emphasizes using environmentally responsible methods.
Step 6: Clean and Polish the Paint
Once all the PPF and any residue are removed, give the area a final clean with rubbing alcohol to remove any remaining traces of adhesive or cleaning solution. Then, wash the area again with car soap and water. You might notice that the areas protected by the PPF look brighter and cleaner than the surrounding un-filmed paint, especially if the PPF was aged. A clay bar treatment followed by a polish and wax or sealant will restore the full shine and protection of your car’s paint.
Pros and Cons of DIY PPF Removal
While DIY removal can save you money, it’s not without its considerations. Here’s a breakdown:
| Pros | Cons |
|---|---|
| Cost Savings: Avoids professional labor charges. | Risk of Paint Damage: Improper heat application or aggressive peeling can scratch or lift the paint. |
| Convenience: Can be done on your own schedule. | Time-Consuming: Can take significantly longer than professional removal, especially if it’s your first time. |
| Learning Experience: Builds confidence in DIY car care. | Residue Issues: May encounter stubborn adhesive that requires specialized cleaners or extra elbow grease. |
| Immediate Gratification: See the results of your work right away. | Requires Patience: Rushing can lead to mistakes and damage. |
Understanding these trade-offs helps you decide if this is a task you’re comfortable tackling yourself.
When to Call a Professional
While this guide aims to empower you, there are situations where professional PPF removal is the wiser choice:
- High-Value or Classic Cars: If your car is particularly rare, valuable, or a beloved classic, the risk of damage might outweigh the cost savings of DIY.
- Poorly Installed PPF: If the original installation was subpar, the film might be brittle, improperly adhered, or have many seams, making removal exceptionally difficult.
- Lack of Confidence or Time: If you’re not confident in your ability or don’t have the time to dedicate to the task, a professional detailer can do it efficiently and safely.
- Extensive Damage or Delamination: If the PPF is already significantly damaged, peeling, or delaminating, it can be a sign of underlying issues that a professional might identify and handle better.
Professional installers often have specialized tools and experience that can make the process faster and safer. Finding a reputable detailer is key. Resources like the Specialty Equipment Market Association (SEMA) offer insights into the professional detailing industry and services.
Maintaining Your Paint After PPF Removal
Once the old PPF is off and your paint is cleaned, it’s a great time to think about future protection. Your car’s paint might be particularly susceptible to damage right after removal, especially if it was exposed to the elements without the film. Consider applying a high-quality sealant or ceramic coating to protect your freshly exposed paintwork.
Regular washing and drying using the two-bucket method can help prevent scratches and swirl marks. For more on proper car washing techniques, you can refer to guides from organizations like the EPA’s WaterSense tips for car washing, which also promote water conservation.
If you plan to reapply PPF or another form of paint protection, ensure the surface is immaculate. Any imperfections or remaining residue will show through or hinder adhesion, so take your time with the cleaning and prep stages.
Frequently Asked PPF Removal Questions
Here are some common questions beginner DIYers have about removing PPF:
Q1: Can I use a heat gun on all car paints?
A1: Yes, but with caution. Always keep the heat gun moving and maintain a safe distance (6-8 inches). Avoid prolonged direct heat on any single spot, as it can damage the paint’s clear coat or even the underlying paint. A lower setting and more movement is safer.
Q2: What’s the best way to remove sticky residue left by PPF?
A2: For most residue, rubbing alcohol (isopropyl alcohol) on a microfiber towel works well. Gently rub the residue until it balls up and can be wiped away. For tougher bits, a dedicated adhesive remover like 3M Adhesive Remover can be used, but always test it on a small, inconspicuous area first.
Q3: Will removing PPF damage my original paint?
A3: When done correctly with appropriate heat and tools, removing PPF should not damage your original paint. However, aggressive pulling, using sharp objects, or overheating can cause scratches, discoloration, or even lift the paint. Patience is key.
Q4: How long does it typically take to remove PPF?
A4: For a beginner working on a full car, it can take anywhere from 4 to 8 hours, or even longer. Smaller sections like fenders or bumpers might take 1-2 hours. Professionals can often do a full car in 2-3 hours due to their experience and specialized tools.
Q5: Can I reapply PPF after removing the old film?
A5: Absolutely! Once the surface is thoroughly cleaned and prepped, you can install new PPF. Many people choose to reapply after removing aged or damaged film to maintain their car’s protection and appearance.
Q6: Is it safe to use a razor blade to help lift edges?
A6: We strongly advise against using razor blades or any metal scrapers. They can easily scratch or chip your car’s paint. Stick to plastic trim removal tools or plastic scrapers designed for automotive use.
Conclusion
Removing PPF from your car is a manageable DIY project that can save you money and give you a great sense of accomplishment. By carefully preparing your workspace, using the right tools, and applying heat gently and consistently, you can successfully peel away old film without harming your car’s beautiful paint. Remember to work in small sections, be patient, and tackle any leftover residue with appropriate cleaners. After removal, a good cleaning, polishing, and perhaps even a new coat of protection will leave your car looking its best. If at any point you feel unsure or the task seems too daunting, don’t hesitate to seek help from a professional detailer.
Recent Posts
10 Best License Plate Frames for Popular Cars: Stylish & Durable Picks
Have you ever struggled with a loose or rusty license plate frame that just won’t stay put? It’s frustrating when your car’s look feels unfinished or when a noisy frame distracts you on every...
Best Tesla Model 3 & Model Y License Plate Frames No Drill Options
Have you ever struggled with installing a front license plate on your Tesla Model 3 or Model Y? Drilling into your sleek car’s bumper can feel wrong and risky.It’s frustrating to think about...