
Quick Summary:
Loading a kayak onto a roof rack requires careful planning and technique. Position the kayak correctly, use your body weight smartly, and secure it with straps to prevent shifting. Always practice these steps to ensure a safe and secure transport for your kayak and vehicle.
The Best Way to Safely Put Your Kayak on a Roof Rack
It’s exciting to get out on the water, but struggling to load your kayak onto your car can put a damper on your adventure before it even begins. Many folks find this task a bit daunting, worrying about dropping their kayak, scratching their car, or straining themselves. But don’t worry! Loading a kayak isn’t as hard as it looks, especially when you know the right techniques. We’re going to walk through the simplest and safest ways to get your kayak from the ground to your roof rack, step-by-step. With a little practice, you’ll be a pro in no time, feeling confident and ready for your next paddle!
Why Proper Kayak Loading Matters
Getting your kayak onto your vehicle’s roof rack might seem like a simple lift, but doing it correctly is crucial for several reasons. First and foremost is safety. A improperly loaded kayak can fall off during transit, creating a serious hazard for other drivers on the road. This isn’t just dangerous; it can lead to accidents and costly damage to your vehicle and kayak. Beyond immediate safety, proper loading also protects your gear. Incorrect placement can stress your kayak’s hull, leading to dents, cracks, or warping over time. It also prevents damage to your car’s roof, paint, and rack system. Learning the best methods ensures your kayak arrives at your destination in one piece and your car stays in great shape, allowing for many more enjoyable trips.
Essential Gear Checklist
Before you even think about lifting, make sure you have the right tools to make the job easier and safer. Having the right gear can significantly reduce the effort required and minimize the risk of injury or damage.
- Roof Rack System: This is your foundation. Ensure it’s appropriate for your vehicle and kayak weight. Most systems consist of crossbars mounted to the vehicle’s roof.
- Kayak Loading Assistance (Optional but Recommended):
- Kayak Roller/Loader: These attach to the rear of your roof rack and allow you to pivot the kayak up and onto the rack.
- Loading Straps or Padded Mats: These provide a smooth surface for sliding the kayak onto the rack.
- Loading Paddle/Stick: A long pole can help nudge the kayak into position.
- Strap System: You’ll need sturdy, cam-buckle straps or tie-downs to secure the kayak. Avoid bungee cords for primary securing as they can stretch and loosen.
- Bow and Stern Lines: These are essential for preventing the kayak from shifting forward or backward, especially at higher speeds or during sudden stops.
- Work Gloves: Protect your hands from splinters and provide a better grip.
- A Friend (Highly Recommended): Having a second person makes the lift significantly easier and safer, especially for heavier or longer kayaks.
Preparing for the Lift
Getting ready is half the battle. A little preparation goes a long way in ensuring a smooth and safe loading process.
1. Park Strategically
Find a level, clear area to park your vehicle. If possible, position your car so the rear of the kayak faces the direction you’ll be heading. This can make it easier to slide the kayak onto the rack without obstruction. Avoid parking on inclines, as this can make the kayak unstable and harder to control during the loading process.
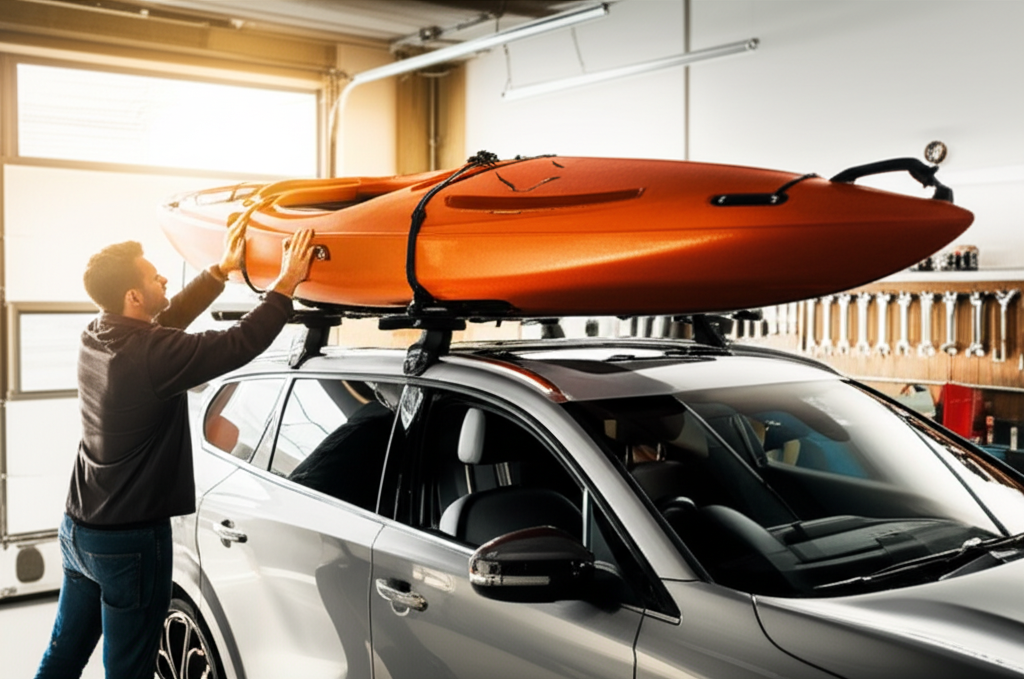
2. Position the Kayak
Lay the kayak on its side on the ground, parallel to your vehicle. If you have two people, one person can handle each end. For solo loading, you might need to position it slightly angled towards your vehicle’s rear.
3. Inspect Your Roof Rack
Ensure your roof rack crossbars are properly installed and secure. Check that any kayak cradles, saddles, or pads are in place and oriented correctly. If you’re using a loading assist device, attach it according to its instructions.
Step-by-Step: The Safest Ways to Load Your Kayak
There are a few proven methods to load a kayak onto your roof rack. The “best” method often depends on your kayak’s weight, your physical strength, the type of rack you have, and whether you have a helper. We’ll cover the most popular and effective techniques.
Method 1: The Two-Person Lift (The Easiest and Safest)
This is by far the most recommended method if you have a second person available. It distributes the weight and makes the process much more manageable.
- Team Up: Both individuals should stand on the same side of the kayak, one at the bow and one at the stern.
- Grip Firmly: Both people should get a good, solid grip on the kayak. Grab it from the strong points like reinforced handles or the cockpit coaming. Avoid gripping the hull directly if it’s thin or easily dented.
- Coordinate the Lift: On a count of three, lift the kayak together. Try to lift with your legs, not your back. Keep the kayak as level as possible.
- Move to the Vehicle: Walk the kayak over to your vehicle.
- Raise to Rack Height: Lift the kayak high enough to clear your roof rack. The person nearer the stern will typically lift higher to pivot the bow onto the rack first.
- Slide into Position: Gently slide the kayak onto the roof rack. Ensure it’s centered and balanced. The hull should rest on the rack’s support system (e.g., cradles, pads).
- Secure Preliminary: Once it’s on the rack, you can rest it gently while you prepare to strap it down.
Method 2: The Pivot/Roll (Great for Solo Loaders)
This method uses leverage to help with the heavy lifting. It’s ideal for solo paddlers, especially with longer or heavier kayaks.
- Engage Loading Assist: If you have a kayak roller or slide bar attached to the rear crossbar of your roof rack, position this according to its instructions.
- Position Kayak: Place the kayak on the ground with its stern (back end) closest to your vehicle. Angle the kayak so the stern is slightly higher than the bow.
- Engage the Roller: Carefully lift the bow of the kayak and rest it on the roller or padded edge of your crossbar.
- Use Body Weight: With the bow resting, walk towards the stern of the kayak. Use your body weight and leverage to lift the stern and pivot the kayak upwards. The roller or padded edge at the rear will help it slide smoothly onto the rack.
- Guide and Center: As the kayak pivots and slides onto the rack, guide it to ensure it’s centered and stable.
- Adjust and Secure: Once the kayak is fully on the rack, adjust its position for balance and then proceed to strap it down.
Method 3: The Step-Assist (Good for Taller Vehicles)
If your vehicle is taller, or you have trouble lifting the kayak high enough, a small step stool or even your vehicle’s tire can provide the extra height needed.
- Position Step: Place a sturdy step stool, a small crate, or use the tire of your vehicle as a platform near the rear of your car.
- Lift One End Gradually: Lift one end of the kayak (usually the bow) and rest it on the step or tire.
- Pivot and Slide: With one end supported, walk to the other end and lift it onto the roof rack. You’ll use a similar pivoting motion as the “Pivot/Roll” method.
- Center and Balance: Guide the kayak into its final, centered position on the rack.
Securing Your Kayak: The Crucial Steps
Loading is only half the job. Properly securing your kayak is paramount for safe transport. This involves using straps and lines correctly.
1. The Strapping Technique (Using Cam Straps)
Cam straps are preferred over ratchet straps for kayaks because they provide a secure hold without the risk of overtightening and damaging your kayak’s hull. You’ll need at least two straps, one for each crossbar.
- Position the Straps: Place your kayak hull-down or on its side on the roof rack. Position one cam strap over the kayak and under the crossbar on one side, then bring it back over the kayak’s hull. Repeat this for the second strap at the other crossbar. You want the straps to cross over the boat’s cockpit or strongest point.
- Thread the Strap: Take the loose end of the strap and thread it through the cam buckle.
- Tighten Securely: Pull the loose end of the strap firmly to tighten. The cam buckle will lock the webbing in place. You want the strap to be snug – it shouldn’t move when you push on the kayak, but don’t overtighten to the point of deforming the hull.
- Stow Excess Strap: Tuck away any excess strap material so it doesn’t flap in the wind or get caught on anything.
For more detailed guidance on strap usage, consider checking out resources from organizations like the California Division of Boating and Waterways, which provides excellent safety practices for boat transport that translate well to kayak loading.
2. Add Bow and Stern Lines
These lines are non-negotiable for safety. They prevent the kayak from shifting forwards or backwards, which can happen during braking or acceleration.
- Attach to Kayak: Use the bow and stern mounting points on your kayak (often small loops or handles). If your kayak doesn’t have these, you may need to improvise by wrapping a strap around a strong part of the hull near the bow and stern, ensuring it doesn’t damage the boat.
- Attach to Vehicle: You need a secure anchor point on your vehicle’s frame. Some cars have built-in tie-down loops under the bumper. If not, you can use a tow hook or create a temporary anchor by running the line under the hood and securing it to a solid metal part of the engine bay frame, then closing the hood over the line. Be sure the line isn’t pinched in a way that could damage the hood or hood seal.
- Tension the Lines: Pull the bow and stern lines taut. They should take up any slack and prevent movement. These lines don’t need to be as tight as the roof rack straps; their purpose is to stop fore-and-aft motion.
The National Highway Traffic Safety Administration (NHTSA) provides extensive information on vehicle safety, including cargo securing. While they focus on larger vehicles, the principles of securing loads apply: “The cargo must be properly blocked, braced, tied, or secured in or on the vehicle to prevent it from shifting, falling off, or being loaded in such a manner as to cause interference with the driver’s control of the vehicle.” Always aim for this level of security.
Kayak Loading Methods at a Glance
Here’s a quick comparison of the methods discussed to help you choose the best one for your situation.
| Method | Best For | Pros | Cons | Requires Helper? |
|---|---|---|---|---|
| Two-Person Lift | All kayak types, especially heavier/longer ones. | Easiest, safest, minimizes risk of damage. | Requires another person. | Yes |
| Pivot/Roll | Solo paddlers, kayaks with a relatively flat hull. | Manages heavier kayaks alone, uses leverage. | Requires a loading roller/assist, potential for hull abrasion without padding. | No |
| Step-Assist | Taller vehicles, individuals needing extra height. | Provides extra leverage/height, can be done solo. | Requires a stable step stool/platform, kayak still needs to be lifted. | Can be done solo |
Tips for Solo Loading Without Special Gear
If you don’t have a helper or specialized loading gear, here are some tips for solo loading:
- Use a Towel or Mat: Lay a thick towel, moving blanket, or dedicated kayak loading mat over the rear of your vehicle’s roof rack crossbar. This creates a slick surface to help the kayak slide.
- Lift One End High: Lift the bow of the kayak as high as you can, resting it on the crossbar or mat.
- Walk and Pivot: Slowly walk towards the stern, using your body to pivot the kayak up and over the crossbar.
- Slide Carefully: Once the kayak is mostly over the crossbar, it will rest on the rack. Slide it forward until it’s centered.
- It Takes Practice: Be patient with yourself. The first few times might be awkward, but you’ll get the hang of it.
When to Consider Kayak Carriers
While direct roof rack loading is common, specialized kayak carriers offer even more convenience and protection. These are often worth the investment if you transport your kayak frequently.
- Kayak Saddles/Molds: These cradles the kayak hull, conforming to its shape and distributing weight evenly. They are excellent for preventing hull deformation.
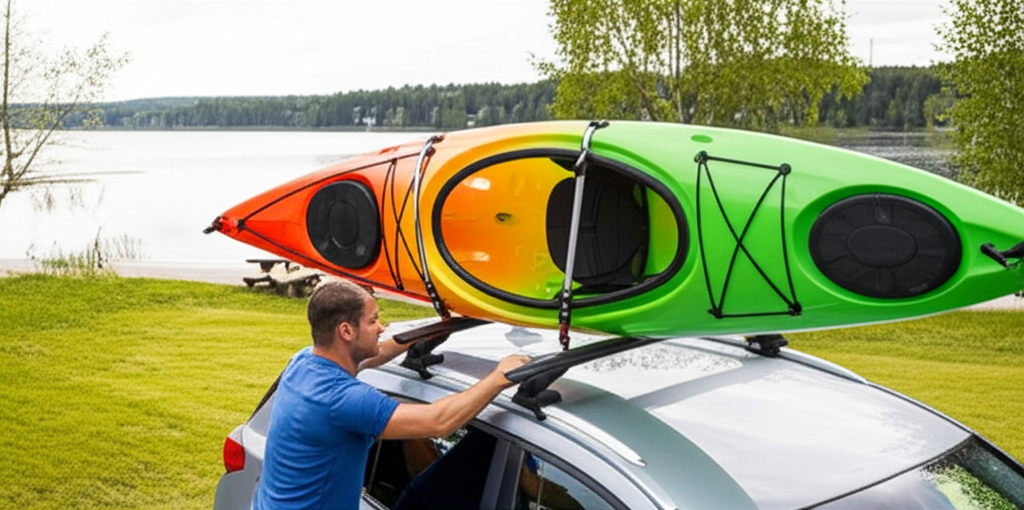
- Kayak J-Cradles: These mount vertically and hold the kayak on its side. They often save space, allowing you to carry multiple kayaks or other gear on the same rack.
- Kayak Racks with Integrated Rollers: Some high-end systems include rollers that extend to make loading significantly easier, almost allowing the kayak to roll onto the rack.
According to resources like REI, which sells outdoor gear and offers extensive advice, choosing the right rack system depends on your vehicle, kayak type, and lifestyle. For kayak transport, they emphasize systems that securely grip the kayak without causing damage. You can explore various options on their Kayak Roof Racks guide.
Frequently Asked Questions (FAQ)
Here are some common questions beginner kayakers have about loading their boats.
Q1: How do I know if my roof rack is strong enough for my kayak?
A: Most factory-installed roof racks have a weight capacity listed in your vehicle’s owner’s manual. Aftermarket racks often have higher capacities. Check the specifications for both your rack system and your kayak’s weight. Always err on the side of caution; if your kayak is near the rack’s limit, consider a more robust rack or a different loading method (like a trailer).
Q2: Can I use bungee cords to tie down my kayak?
A: No, bungee cords should never be used for primary kayak securing. They stretch and can loosen, leading to the kayak coming off the rack while driving. Always use sturdy cam straps or ratchet straps (used with caution to avoid hull damage) for the main ties.
Q3: What if my kayak is too heavy for me to lift?
A: This is where a helper is essential, or you should invest in loading assistance accessories like rollers or a kayak loader. Never risk injury by attempting to lift a kayak that is too heavy for you. Some lighter recreational kayaks might be manageable solo with clever use of leverage, but heavier touring or fishing kayaks often require two people or specialized gear.
Q4: How tight should the straps be?
A: Straps should be snug enough that the kayak does not move when you push on it, but not so tight that they visibly deform or indent the kayak’s hull. For plastic kayaks, overtightening can cause permanent damage. You should feel resistance and no looseness.
Q5: What happens if I don’t use bow and stern lines?
A: Without bow and stern lines, the kayak can slide forward during braking or backward during acceleration. This can cause dangerous situations, damage your car’s body (especially the front or rear), or even lead to the kayak coming completely off the rack. They are a non-negotiable safety feature.
Q6: Is it okay to lay my kayak on its side on the roof rack?
A: Yes, many kayaks can be transported on their side, especially if you use J-cradles or other specialized carriers. If placing it directly on crossbars, ensure the hull is protected with padding and the boat is securely strapped. Some kayaks are designed to be transported hull-down or on their side for optimal weight distribution and aerodynamics.
Recent Posts
Jumper Cables With Bag: Heavy Duty Booster Cables for Easy Storage
There’s nothing more frustrating than turning the key in your car and hearing silence. A dead battery can ruin your day in an instant.You might feel stuck, stressed, and unsure what to do next....
Strong Ram 1500 Heavy Duty License Plate Frame for Ultimate Durability
There’s nothing more frustrating than struggling with a flimsy license plate frame that bends, rusts, or just doesn’t fit right on your Ram 1500. You want something strong and reliable that...