
Quick Summary: Properly securing items to your roof rack with tie-downs is crucial for safety. Always use strong, appropriately rated straps, check for damage, and learn the right tensioning and knot techniques to prevent shifting loads. Safe tie-downs keep you and others on the road secure.
Heading out on an adventure or need to haul gear? Your roof rack is a fantastic tool, but only if you know how to use it safely. Many of us have seen items bouncing down the highway – a scary sight that thankfully can be avoided. Learning how to properly use roof rack tie downs might seem like a small detail, but it’s a big part of driving safely with extra cargo. Don’t worry, it’s not complicated! We’ll walk through everything you need to know, step-by-step, so you can travel with confidence, knowing your gear is secure. Let’s make sure your journey is as smooth and safe as possible.
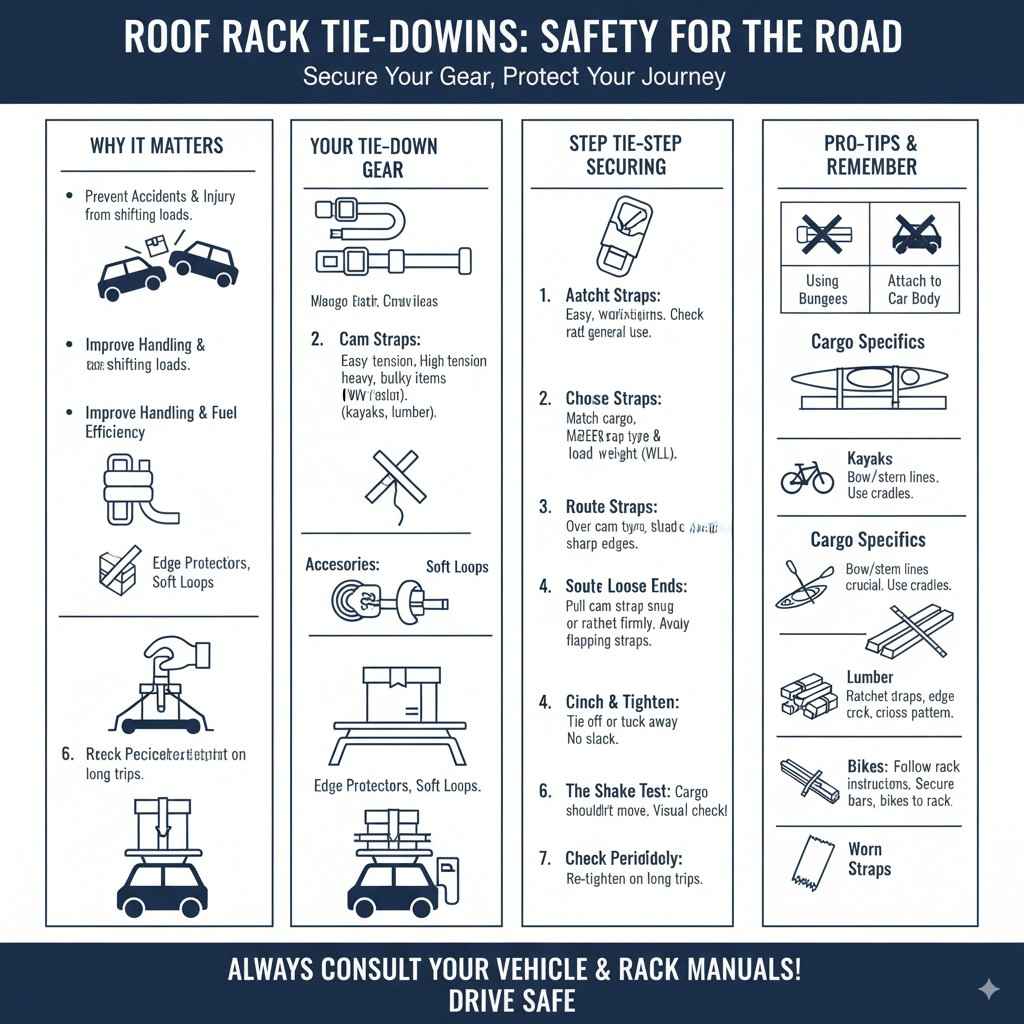
Why Proper Roof Rack Tie Downs Matter
Using your roof rack tie downs correctly isn’t just about keeping your items from falling off. It’s about ensuring the safety of yourself, your passengers, and everyone else on the road. A load that shifts or falls can cause accidents, leading to damage, injuries, or worse. Properly secured cargo also improves your vehicle’s handling. An unbalanced or loose load can affect steering, braking, and your car’s overall stability, especially at higher speeds or during sudden maneuvers. Think of it like this: your car is an extension of you, and its cargo is part of that. Keeping it stable and secure is part of responsible driving.
Beyond safety, correct tie-down methods help protect your gear and your vehicle. When items aren’t secured properly, they can rub against the roof rack or each other, causing scratches, dents, or tears. Your expensive kayak, tent, or luggage deserves to arrive in the same condition it left. Furthermore, a well-tied-down load means better fuel efficiency. Loose items create drag, making your engine work harder and consuming more gas. So, taking a few extra minutes to secure your load can save you money and hassle in the long run.
Understanding Your Roof Rack and Tie-Down Gear
Before you can tie anything down, it’s important to know the different parts of your roof rack system and the types of tie-down equipment available. Your roof rack itself usually consists of crossbars that span the width of your roof, and possibly side rails or a basket. The tie-downs are what connect your cargo to these crossbars.
Types of Roof Rack Tie Downs
There are several popular options for securing cargo. Each has its strengths and is suited for different types of loads. Knowing which one to use depends on what you’re carrying.
- Cam Straps: These are very common and easy to use. They consist of a strap with a metal cam buckle. You thread the strap through the buckle, loop it around your cargo, and pull the free end to tighten. The cam locks the strap in place. They’re great for general-purpose use and won’t overtighten, which is good for preventing damage to softer items.
- Ratchet Straps: These offer superior tension. They have a ratchet mechanism that allows you to tighten the strap very securely with a back-and-forth clicking motion. Ratchet straps are ideal for heavy or bulky items like kayaks, canoes, lumber, or construction materials where you need a very firm hold. Be careful not to overtighten, as this can damage delicate items or even your roof rack.
- Bungee Cords: While convenient for some light-duty tasks or temporarily holding down very light items, bungee cords are generally NOT recommended for securing cargo on a roof rack during travel. They stretch and can lose tension, especially as they age or are exposed to the elements. A loose bungee could easily let cargo shift or fall.
- Rope: Good quality rope, such as nylon or polyester, can be effective. However, it requires more skill to tie secure knots that won’t loosen under stress. It’s often used in conjunction with specific roof rack systems or for securing large, irregularly shaped items.
Essential Tie-Down Accessories
Sometimes, you’ll need a little extra help to secure your cargo effectively.
- Tie-Down Anchors: While most roof racks have built-in tie-down points, some systems might require additional anchors, especially if you’re carrying items that don’t easily wrap around crossbars.
- Edge Protectors: For items with sharp edges, like lumber or metal, edge protectors can prevent straps from fraying or cutting into the cargo, and vice-versa.
- Soft Loop Straps: These are useful for items with narrow points, like motorcycle handlebars or canoe gunwales. They loop around the item and then attach to a cam buckle or ratchet, providing a secure attachment point without stressing the item itself.
Step-by-Step Guide: How to Use Roof Rack Tie Downs Safely
Securing your cargo properly is a skill that improves with practice. Follow these steps to ensure your gear stays put.
Step 1: Assess Your Cargo and Roof Rack
Before you even touch a strap, take a moment to look at what you’re carrying and how it will sit on your roof rack.
- Weight Distribution: Try to place heavier items closer to the vehicle’s center, if possible. This helps maintain balance.
- Item Shape and Stability: Does it have a flat bottom? Is it aerodynamic? Will it sit securely on the crossbars, or does it need to be wedged or stabilized?
- Roof Rack Condition: Are the crossbars and feet secure? Do they move or feel loose? If your roof rack isn’t stable, nothing you tie to it will be either.
Step 2: Choose the Right Tie-Down Straps
Select straps that are appropriate for the weight and type of cargo. For most general items, sturdy cam straps are fine. For heavier items like a kayak or lumber, ratchet straps are usually better. Ensure your straps have a working load limit (WLL) that is significantly higher than the weight of the item you are securing. A good rule of thumb is to use straps with a WLL of at least half the weight of your cargo, but higher is always safer.
Step 3: Position the Cargo
Carefully place your item(s) onto the roof rack. Center the load as much as possible to prevent it from affecting your vehicle’s handling. If you are carrying multiple items, arrange them so they won’t shift against each other.
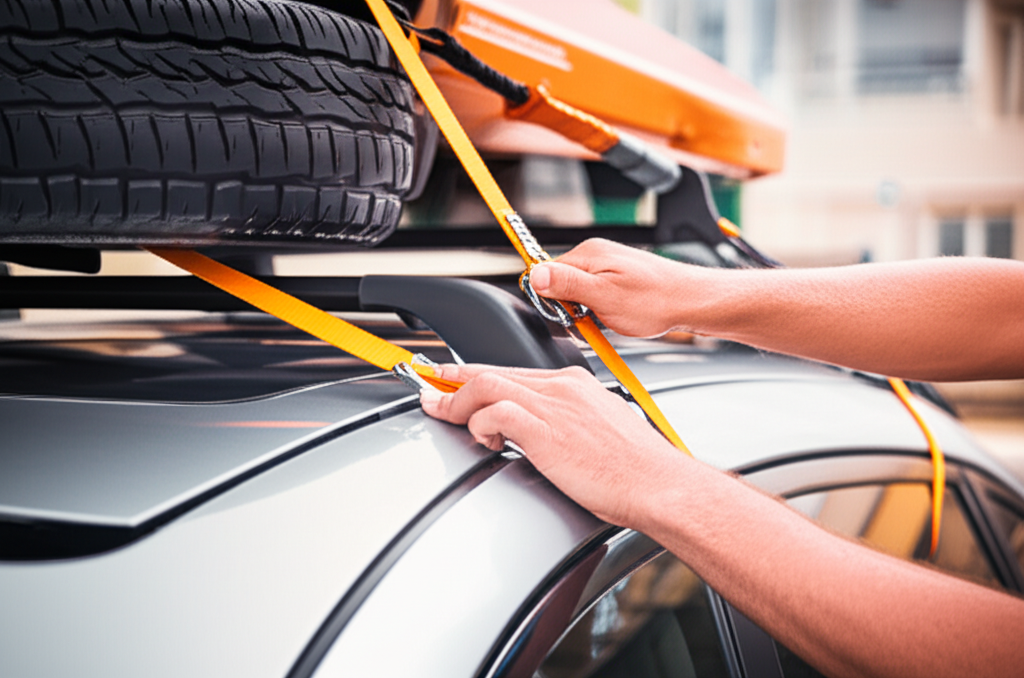
Step 4: Route the Tie-Down Straps
This is a critical step. You need to create a secure anchor point for your cargo.
- Over and Under: The most common method is to run the strap over the top of your cargo, then under the crossbar on one side, and then back over the cargo. Then, repeat the process on the other side of the vehicle with the same strap or another strap.
- Securing to Crossbars: Ensure the straps are routed around the roof rack’s crossbars and not just over the vehicle’s body panels. Attaching to the crossbars provides the strongest anchor.
- Avoid Sharp Edges: If your cargo has sharp edges that could cut the straps, use edge protectors or wrap the strap around a softer part of the item if possible.
Step 5: Cinch and Tighten
How you tighten depends on your strap type:
Using Cam Straps:
- Find the cam buckle.
- Thread the strap through the slot in the buckle.
- Pull the strap through until it’s snug around the cargo and crossbar.
- Pull the free end of the strap firmly. The cam will catch and hold the strap in place.
- Give the cargo a good tug in all directions to ensure it doesn’t move.
Using Ratchet Straps:
- Connect one end of the strap to an anchor point on your roof rack.
- Route the strap over your cargo and to the other side, connecting the other end to its corresponding anchor point.
- Push the ratchet mechanism until it’s engaged.
- Begin pumping the ratchet handle up and down. You will hear it clicking as it tightens the strap.
- Continue pumping until the strap is taut and your cargo is held firmly. Do not overtighten to the point of creasing or damaging your cargo or roof rack.
- Ensure the ratchet mechanism is locked in its tightened position.
Step 6: Secure Loose Ends
Once your straps are tightened, make sure any loose ends are tucked away neatly. You don’t want flapping straps that can get caught in things or become a hazard. Tie them off with a simple knot or tuck them securely under the tightened strap itself. Some straps have Velcro ties for this purpose.
Step 7: The Shake Test and Visual Check
This is non-negotiable for safety. Once everything is tied down, give your cargo a hard shake in every direction: front, back, left, and right. It should not move at all. Also, visually inspect all connection points and straps. Look for any signs of slippage, fraying, or damage. A quick once-over can prevent a major problem.
Step 8: Check Periodically During Your Trip
Straps can loosen over time due to vibrations, temperature changes, or the cargo settling. Make it a habit to pull over at rest stops or gas stations, especially on longer trips, to re-check the tension of your tie-downs and give the cargo another shake test. This simple check ensures continuous safety.
Tips for Securing Different Types of Cargo
Different items require slightly different approaches. Here’s a look at some common cargo types:
Kayaks and Canoes
These are often carried hull-down or sometimes on their side. The key is to keep them stable and prevent them from sliding or rolling.
- Hull-Down: Use at least two straps over the top of the kayak/canoe, one near the front and one near the back, securing them to opposite crossbars. Use strap protectors where the straps meet the hull to avoid scratches.
- On the Side: If carrying on the side, ensure it’s using specialized kayak cradles or blocks on the roof rack. Secure the kayak to the rack’s cradles and then use additional straps to prevent any side-to-side movement.
- Bow and Stern Lines: For added security, especially on longer trips or in windy conditions, connect ropes or straps from the bow and stern of your kayak/canoe to sturdy points on your vehicle’s bumper or frame (if equipped with appropriate tow hooks or anchor points). This prevents the kayak from sliding forward or backward. For guidance on finding secure anchor points on your vehicle, check your owner’s manual or resources like NHTSA’s towing and roadside safety information.

Lumber and Building Materials
When carrying lumber, long pipes, or similar materials, you’re often dealing with straight, potentially heavy loads.
- Use Ratchet Straps: Due to the weight, ratchet straps are highly recommended here.
- Cross-Woven: For long loads like lumber, consider using multiple straps in a criss-cross pattern over the bundle to distribute the tension evenly and prevent shifting.
- Secure Ends: Ensure the ends of long items are well within the dimensions of your vehicle or marked with flags if they extend significantly.
- Edge Protection: Always use edge protectors on the lumber where the straps make contact to prevent the straps from cutting into the wood and the wood from fraying the straps.
Bicycles
Roof-mounted bike racks offer a convenient way to transport bicycles. The rack itself usually has its own locking mechanisms, but you’ll still need to secure the rack to the roof bars.
- Rack Manufacturer Instructions: Always follow the specific instructions provided by the bicycle rack manufacturer.
- Secure Rack to Bars: Ensure the bicycle rack is firmly attached to your roof rack crossbars using the provided clamps or straps.
- Secure Bikes to Rack: Once bikes are loaded, use the rack’s built-in straps and frames to hold them securely. Double-check that the bike wheels and frames are locked in place and won’t wobble excessively.
Luggage and Cargo Boxes
These are generally simpler as the box or bag is designed to contain the items and offers a flat surface.
- Distribute Weight Inside: Place heavier items at the bottom and evenly distributed within the box.
- Secure Box to Rack: Most cargo boxes have internal clamping systems that attach the box to the crossbars. Ensure these are fully engaged and tightened.
- Additional Straps (Optional): For extra peace of mind, you can run cam straps over the top of the cargo box, threading them under the crossbars, to add another layer of security.
Common Mistakes to Avoid
Even with the best intentions, beginners can make a few common errors. Knowing these can help you avoid them:
| Common Mistake | Why It’s a Problem | How to Avoid It |
|---|---|---|
| Using Bungee Cords | They stretch, lose tension, and can break, leading to cargo shifts or falling items. | Always use rated cam straps or ratchet straps for roof rack cargo. |
| Overtightening Ratchet Straps | Can crush or damage cargo, or even stress and break your roof rack. | Tighten until snug and secure, but not to the point of deforming your cargo. Stop when there’s no more slack and the item is firm. |
| Not Checking Luggage Strap Condition | Worn, frayed, or sun-damaged straps can fail unexpectedly. | Regularly inspect your straps for cuts, frays, or signs of wear. If in doubt, replace them. |
| Attaching Straps to Vehicle Body | Door frames and body panels are not designed to bear the load of shifting cargo. | Always run straps around the roof rack’s crossbars. |
| Ignoring Loose Ends | Flapping straps can get caught on roadside objects, creating hazards or loosening the main strap. | Tie off or tuck away all loose strap ends securely. |
| Skipping the Shake Test | You can’t be sure your load is secure without physically testing it. | Always perform a vigorous shake test after tightening and before driving off. |
Legal and Safety Considerations
While specific laws vary by region, most jurisdictions have regulations regarding secure loads. Unsecured loads are a significant safety hazard, and drivers can be held liable for accidents caused by falling cargo. Many transportation authorities, like the Federal Highway Administration, offer guidelines on cargo securement to prevent public endangerment.
It’s always a good idea to be aware of your local laws regarding vehicle load limits and securement. Most importantly, prioritize safety. If you are unsure about securing a particular item, it’s better to err on the side of caution. This might mean using more straps, seeking advice from experienced cargo carriers, or reconsidering whether to transport the item via roof rack.
Frequently Asked Questions (FAQ)
Q1: How tight should roof rack tie downs be?
They should be tight enough that the cargo cannot move at all, but not so tight that they damage your cargo or roof rack. For ratchet straps, listen for the clicking and feel the tension; stop when it’s firm. For cam straps, pull firmly to engage the cam.
Q2: Can I use bungee cords to tie down my kayak?
It’s strongly advised against using bungee cords for securing items like kayaks to a roof rack. They lack the consistent tension and reliability needed to keep heavy, potentially shifting cargo safely in place during travel. Stick to cam straps or ratchet straps.
Q3: How often should I check my tie-downs when I’m driving?
You should check them at the first safe opportunity after driving for about 10-15 minutes, and then periodically at rest stops or gas stations, particularly on longer trips or over uneven terrain. Vibrations can cause straps to loosen.
Q4: My roof rack feels a bit wobbly. Can I still use tie-downs?
No. If your roof rack itself feels wobbly or insecure, do not load any cargo onto it or attempt to tie anything down. First, address the issue with your roof rack. Ensure all its components are tightly secured to your vehicle according to the manufacturer’s instructions. A stable rack is the foundation for safe cargo transport.
Q5: What is the difference between a cam strap and a ratchet strap?
Cam straps use a metal cam buckle to hold the strap in place with less effort
Recent Posts
Jumper Cables With Bag: Heavy Duty Booster Cables for Easy Storage
There’s nothing more frustrating than turning the key in your car and hearing silence. A dead battery can ruin your day in an instant.You might feel stuck, stressed, and unsure what to do next....
Strong Ram 1500 Heavy Duty License Plate Frame for Ultimate Durability
There’s nothing more frustrating than struggling with a flimsy license plate frame that bends, rusts, or just doesn’t fit right on your Ram 1500. You want something strong and reliable that...